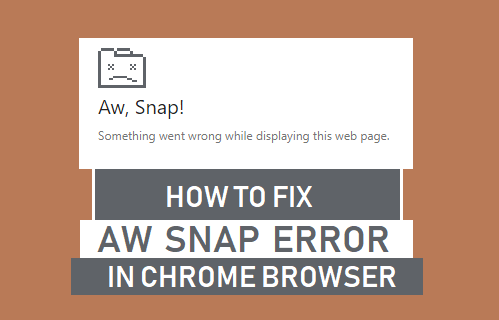
If Chrome browser is unable to to load webpages and displaying an alarming Aw, Snap! error message, you can find below the steps to fix this problem in Google Chrome browser.
Aw Snap Error in Chrome
The “Aw, Snap!” Error in Google Chrome browser is usually accompanied by an error message reading “Something went wrong while displaying this webpage” or “Google Chrome ran out of memory” and similar messages.
Since, this error in Chrome can be caused by a variety of issues, any of the following troubleshooting methods might help in fixing the problem on your computer.
1. Reload the Webpage
The first step is to make sure that your computer is connected to internet (Wi-Fi or Ethernet) and reload the webpage by clicking on the Reload icon.

Note: You can also Reload webpages on both Windows computer and Mac by pressing F5 Key or by using Ctrl+R shortcut.
2. Close Programs and Multiple Chrome Tabs
Close all open programs on your computer and close all open browser Tabs (except the one that is not loading) and try to Reload the webpage that you were trying to access.
3. Use Incognito Mode
Using Google Chrome in Incognito mode might help in opening the webpage.
1. Open Google Chrome browser > click on 3-dots menu icon and select New Incognito Window option.

2. In Incognito mode, paste the URL Address of the webpage that you are trying to open.
4. Clear Cache and Cookies
“Aw Snap” error in Chrome browser can be caused due to cached error pages and corrupted cookies. Hence, clear the browser Cache on your computer and try to access the webpage again.
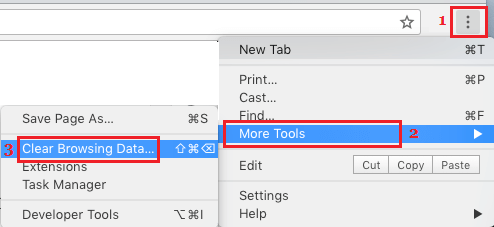
1. Open Google Chrome > click on 3-dots menu icon > hoover mouse over More Tools and select Clear Browsing Data option in the side-menu.
2. On the next screen, select All Time as the ‘Time Range’ > check Browsing History, Cookies and other site and Cached Images and Files and click on Clear Data button.
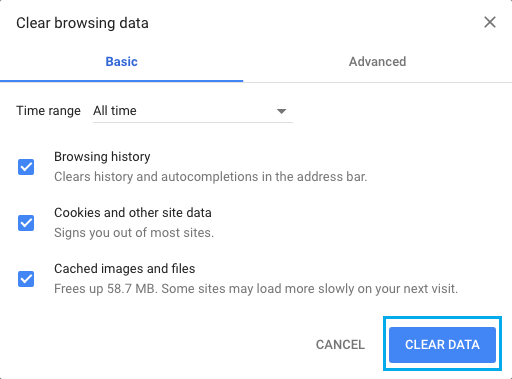
After Clearing Cookies, Cache and browsing history, try to access the same webpage again.
5. Restart the Computer
Browser errors like “Aw, Snap!” and others can be caused by minor software glitches and conflicting or stuck programs and processes on your computer. In most cases, this can be fixed by Restarting the computer.
Once the computer restarts, visit the webpage and see if you are able to access the webpage, without encountering any errors.
6. Disable Browser Extensions
While browser extensions can enhance its functionality, they can also lead to conflicts and cause problems while browsing.
1. Open Google Chrome > Click on 3-dots Chrome menu icon > hoover mouse over More tools and select Extensions.
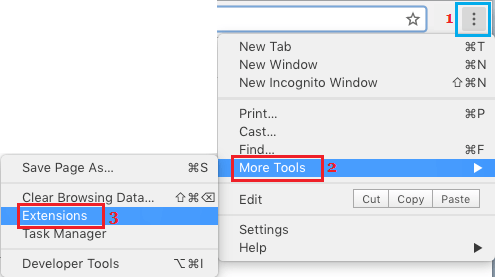
2. On the next screen, disable browser Extensions Installed on your computer by moving the toggle to OFF position.
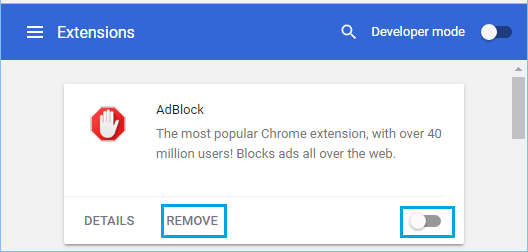
Note: If an extension is unnecessary, it is better to uninstall the extension by clicking on Remove.
After disabling Extensions, Restart Chrome browser and see if you are still dealing with Aw, Snap error.
If you are able to open the webpage without extensions, start enabling extensions one-by-one until you find the particular extension causing the problem on your computer.
7. Automatically Detect Settings
An effective solution for network connectivity problems is to enable the option to Automatically detect network settings on your computer.
1. Go to Settings > Network & Internet > select the Proxy tab in left-pane. In the right-pane, enable Automatically detect settings option.
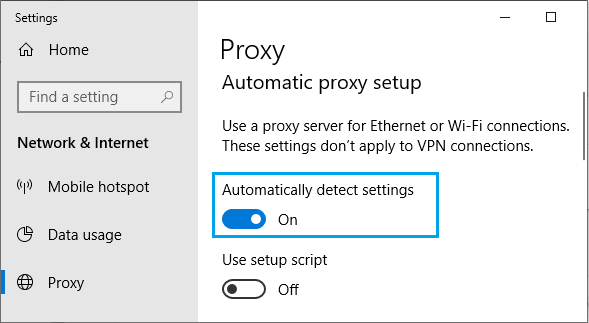
2. Restart the computer and see if you are still getting Aw Snap Error, when you try to open the Chrome Browser on your computer.
8. Disable Hardware Acceleration
The Hardware Acceleration feature in Chrome Browser can cause problems on certain computers.
1. Open Chrome browser > click on 3-dots Icon and select Settings in the drop-down menu.
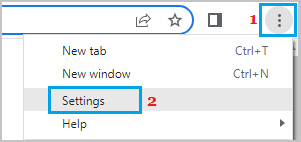
2. On the Settings screen, select System in the left-pane. In the right-pane, disable Use Hardware Acceleration When Available option.
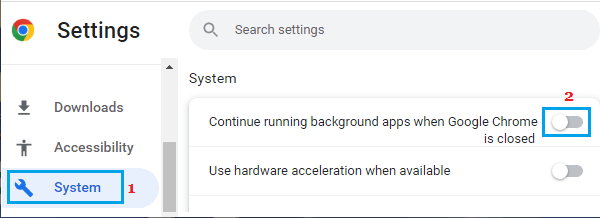
Restart Chrome browser and see if you are able to load the webpage.
9. Check Computer for Memory Problems
The Aw Snap error on your computer might be related to hardware issues. You can run a Memory Check, to verify the status of your computer.
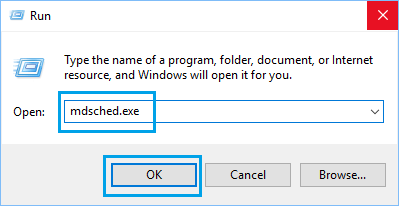
1. Right-click on the Start button and click on Run.
2. In the Run Command window, type mdsched.exe and click on OK.
3. On the pop-up, select Restart Now and Check for Problems option.
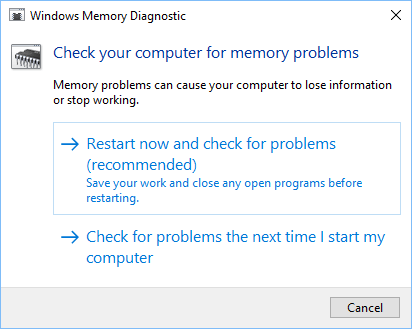
Follow the onscreen prompts to complete the process of checking memory problems on your computer.