If you have switched to a New Modem/Router or moved to a New Place, you also need to change the WiFi Network on your Chromecast Device.

Change WiFi Network on Chromecast
When you change or replace the Router/Modem in your Home/Office, a new WiFi Network is created and Chromecast won’t be able to automatically connect to this New WiFi Network.
This happens, is designed to store only one WiFi Network at a time. In this case, the only way to change WiFi Network on Chromecast is to Reset Chromecast and set it up all over again.
You can find below the steps to Reset Chromecast manually by using the Reset button and remotely by using Google Home App.
1. Manually Reset Chromecast and Connect to New WiFi Network
If Google Home App is not installed on your iPhone/Android Phone, you can change the WiFi Network on Chromecast by manually Resetting the Chromecast Device.
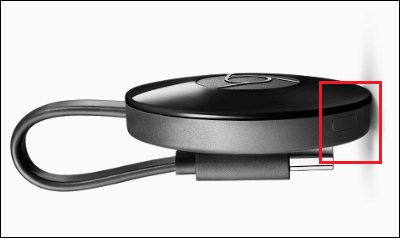
This can be done by pressing and holding the Reset button located on the Chromecast Device, until the LED light on the Chromecast Device stops Flashing.
1. Make sure the Chromecast Device is plugged into the TV and it is powered ON (Light ON).
2. Press and Hold Down the Reset Button on Chromecast Device (Next USB port or Back of Device), until it stops Flashing.

3. Release the Reset Button when the light stops flashing and stays Solid (without flashing).
4. Patiently wait for Chromecast to Reboot and complete the Factory Reset process.
Note: It will take about 2 to 3 minutes to complete the process and you will be able to see the progress on the screen of your TV.
Once the Reset process is completed, you need to Setup Chromecast and connect it to the New WiFi Network by using steps provided in this guide: How to Setup Chromecast Using Google Home App.
2. Change WiFi Network Using Google Home App
Download & Install Google Home App from App Store (in case of iPhone) and from Google Play Store (Android Phone) and follow the steps below to Change WiFi Network on Chromecast.
1. Switch ON the TV to which your Chromecast device is connected.
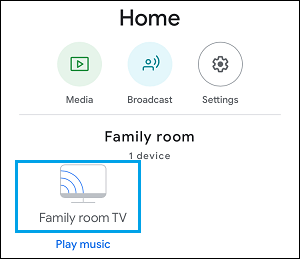
2. Open Google Home App and tap on the Device to which Chromecast is attached.

3. On the next screen, tap on the Settings icon, located at top-right corner.
![]()
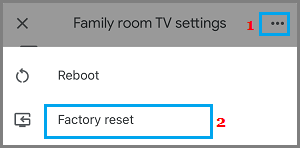
4. On Device Settings screen, tap on 3-dots icon and select Factory Reset option in the menu that appears.

5. On the confirmation pop-up, tap on Factory Reset button to confirm.
6. Patiently wait for the Reset process to be completed (you will be able to see the progress on the TV screen).
After the Reset process is completed, you will have to Setup Chromecast using Google Home App and connect it back to your New Home WiFi Network.