If you have been locked out of iPhone due to forgotten passcode, you can find below two different methods to reset iPhone Passcode without losing data.
Reset iPhone Password Without Losing Data
When users forget Password, the general tendency is to guess the forgotten password, which often results in iPhone getting temporarily disabled after 4 to 5 incorrect login attempts.
Depending on its security settings, iPhone gets permanently disabled after a certain number of login attempts and may even erase all its data, in order to protect the privacy of the user.
If iPhone gets permanently disabled, the only way to gain access is to remove the forgotten password, which can only be achieved by erasing all the data from your device.
The good news is that the Reset Process provides the option to Recover Data, if a backup of your device is available on iCloud or stored on your Mac or Windows computer.
1. Reset iPhone Password Using iCloud
The easiest way to Reset iPhone Password is by going to your iCloud Account, which provides the option to Reset iPhone and Restore Data from a Backup.
As you must have guessed, Data Recovery is possible only if a Backup of your device is available on iCloud and this method can be used only if Apple’s Find iPhone service is enabled on your device.
1. Using Mac/PC or another phone, visit iCloud.com and Sign-in to your iCloud Account.
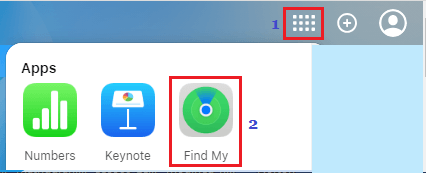
2. Once you are in iCloud, click on Apps Icon located at top-right corner and select Find My Icon in Apps menu.
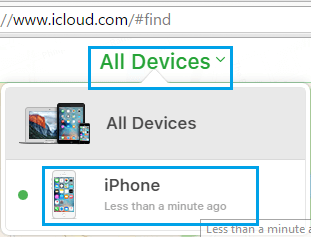
3. When prompted, enter your Apple ID Password to Sign-in to “Find My iPhone” service. On the next screen, click on All Devices and select your iPhone in the drop-down.
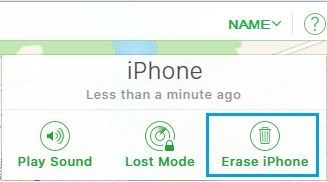
4. On the next screen, select Erase iPhone option to Erase all the data from your device.
5. When prompted, enter your Apple ID password and wait for the Reset Process to be completed. Once the Reset Process is completed, you will find your device restarting with “Hello” screen.
6. Follow the setup instructions, until you reach Apps & Data Screen, providing you with different options to Restore iPhone.
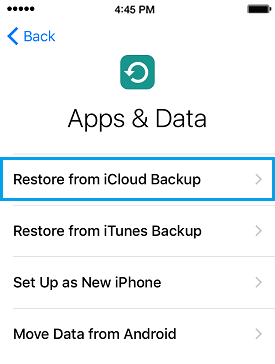
You can select Restore from iCloud Backup, if you had enabled Automated iCloud Backups on your device and a backup of your device is available on iCloud.
If you had not enabled iCloud Backups, you can only select Setup as New iPhone option, which erases all the data from your device.
2. Reset iPhone Password Using Recovery Mode
Another way to Reset iPhone Password is by using Recovery Mode, which provides the option to Recover Data from a backup of your device stored on a Mac or PC.
The Recovery Mode process can be performed both on MacBooks and Windows 10/11 computers that have the latest version of iTunes installed on them.
1. Connect iPhone to Computer and open the Finder on your Mac. If you are using Windows PC, open iTunes on your computer.
2. Next, follow the steps below to enter Recovery Mode as applicable for the model of your iPhone.
iPhone 8 and later: Press and release Volume UP button > Press and release Volume Down button > Next, Press and hold the Side button (Power Button), until you see the Recovery Mode screen.
iPhone 7/7 Plus: Press and hold the Side and Volume Down buttons at the same time. Keep holding them, until you see the Recovery Mode screen.
iPhone 6 or earlier: Press and hold Home and Side (Power) buttons at the same time. Keep holding them, until you see the Recovery Mode Screen (iTunes Logo and Cable)
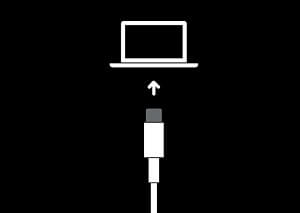
Note: Do not release the button as you see iPhone starting with Apple Logo. Continue holding down the button, until you see Recovery Mode Screen.
3. Once your device enters recovery mode, you will see a pop-up allowing you to Update or Restore iPhone.
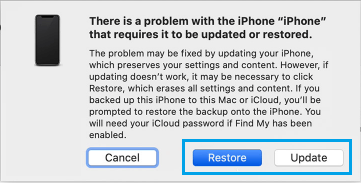
Since, you are trying to Erase the Password, select the Restore option and patiently wait for Restore Process to be completed.
Note: If your device exits recovery mode or takes longer than 15 minutes, allow the download to finish and repeat step 2.
4. After the Restore process is completed, you will find iPhone starting with ‘Hello’ screen. Follow the on-screen instructions, until you reach ‘Apps & Data’ Screen.
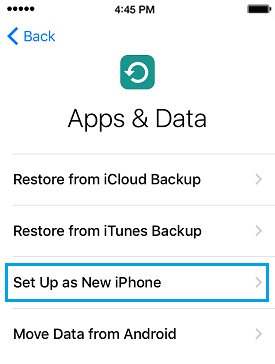
If you have Backup of iPhone stored on the computer, you can select Restore from iTunes Backup. If not, you can only select Set up as New iPhone, which erases all the data from your device.
Follow the remaining on-screen instructions to complete the setup process, join WiFi Network and setup a New Lock Screen Passcode on your iPhone.