Apple has opened up Siri to third party developers in its iOS 10 update and WhatsApp has become one of the first Apps to take advantage of this opportunity, allowing iPhone users to send WhatsApp Messages and place WhatsApp calls using Siri.
In order to use Siri with WhatsApp, you will need to have iOS 10 running on your iPhone and download the latest version of WhatsApp on your iPhone (2.16.10 or later).
Send WhatsApp Messages Using Siri
In order to make Siri work with WhatsApp, you will first need to provide Siri with access to your WhatsApp Account by following the steps below.
1. From the Home screen of your iPhone, tap on Settings.
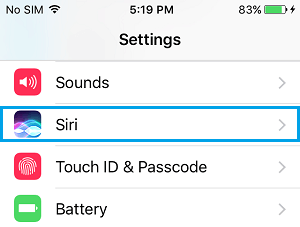
2. On the Settings screen, scroll down and tap on Siri.
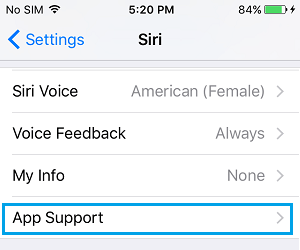
3. On the next screen, scroll down to bottom and tap on App Support.
4. On the App Support screen, move the slider for WhatsApp to ON position (See image below).
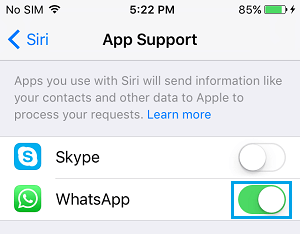
After enabling Siri with access to your WhatsApp account, follow the steps below to send a WhatsApp Message using Siri.
1. First, bring up Siri on your iPhone by long pressing the Home button.
2. Next, ask Siri to send a WhatsApp Message. You can say “Send WhatsApp Message to [Contact Name]” or say “Siri text [Contact Name] on WhatsApp”.
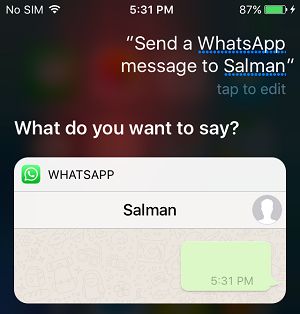
3. Siri will ask you “What do you want to say?” (See image above).
4. Speak your desired Message to Siri and take a look at the preview of your WhatsApp Message that Siri brings up for your review (See image below).
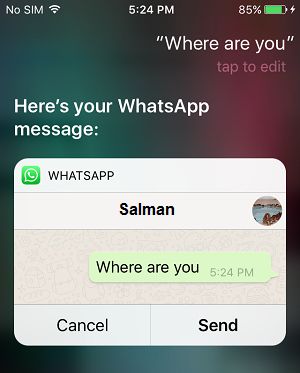
5. If the message looks good, you can ask Siri to send the Message by saying “Send” or tap on the Message to make your corrections (See image above).
6. Next, Siri will provide a confirmation that it is going to send your WhatsApp Message.

Your WhatsApp Message will be sent to your Contact, the same way as it is sent when you manually type a Message.
Place WhatsApp Calls Using Siri
In order to make use of Siri to place WhatsApp calls, you will first need to enable WhatsApp with access to the Microphone on your iPhone, by following the steps below.
1. From the Home Screen of your iPhone, tap on Settings.
2. On the Settings Screen, tap on WhatsApp.
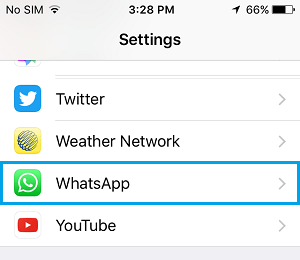
3. On the next screen, enable WhatsApp with access to Microphone by toggling the slider for Microphone to ON position (See image below).
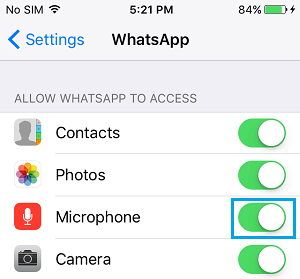
After allowing WhatsApp to access the Microphone on your iPhone, follow the steps below to place a WhatsApp Call using Siri.
1. Bring up Siri on your iPhone by long pressing the Home button.
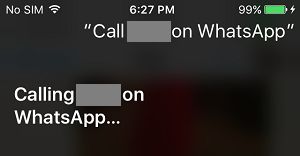
2. Next, ask Siri to place a WhatsApp call by saying “Call [Contact Name] on WhatsApp”
3. Siri will immediately start calling your WhatsApp Contact (See image below).
Siri Can’t Send WhatsApp Messages
Currently, there appears to be a glitch that prevents Siri from working with WhatsApp. Apparently, this only happens when you update to the newest version of WhatsApp before upgrading your iPhone to iOS 10.
If this is the case, you will find Siri saying “Sorry, you’ll need to continue in the App”, whenever you try to send a WhatsApp Message. Even if you open WhatsApp, Siri will be unable to send the Message.
Luckily, the fix to this issue is not difficult. All that you need to do is to delete WhatsApp from your iPhone and install it back again from the App Store.
It is recommended that you make a backup of your WhatsApp Messages and pictures to iCloud before deleting WhatsApp from your iPhone.