While you can always download Ringtones from iTunes and other sources, why not explore the possibility of using your favorite songs as Custom Ringtones on iPhone? You will find below the steps to Set Any Song as Ringtone on iPhone.
Set Song as Ringtone On iPhone
The procedure to convert Any Song as Ringtone or Text Tone on iPhone basically involves the following major steps.
- Download Song to Files App on iPhone.
- Download and Install GarageBand App on iPhone.
- Import Song from Files App to GarageBand.
- Select 30 Second Clip from the Song.
- Export the Song Clip to Ringtones
While the process to Set Song as Ringtone on iPhone may appear a bit laborious or difficult, it actually becomes easy, once you get used to the steps as provided below.
Step 1. Download Song to Files App
The first step is to download the song that you want to use as Ringtone to the Files App on iPhone. You can download the song from Apple Music or any other source where your favorite song is available.
Step 2. Download & Install GarageBand
The GarageBand App should already be available on your iPhone. If it is not, you can download this free music creation software from the App Store.
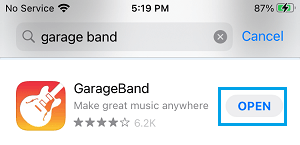
Open the App Store on your iPhone > Search for and download GarageBand on your iPhone. Once the download is complete, tap on Open to Install GarageBand on your iPhone.
Step 3. Import Song from Files App to GarageBand
The third step is to import your favorite or desired Song to GarageBand for editing.
1. Open GarageBand > switch to Tracks tab and select Any Instrument that you like (say Smart Piano).
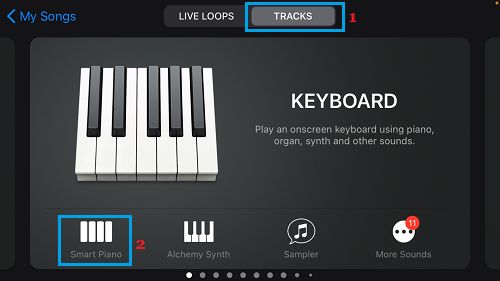
Note: It does not really matter which instrument you select, the remaining steps will be the same for all instruments.
2. On the next screen, select the Project Icon located in top-left corner icon groups.
![]()
3. Next, select the Loop Icon that appears in top-right corner.
![]()
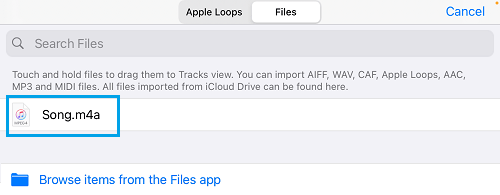
4. On the next screen, switch to Files tab and select Browse Items from the Files App link.

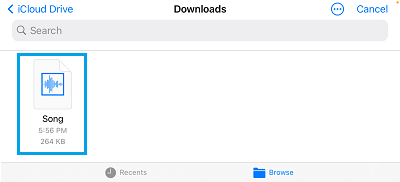
5. In Files App, select the Browse option and navigate to the Imported Song that you want to use as Ringtone.
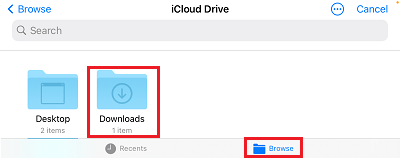
Once you locate the song, tap on the Song and it will be imported to GarageBand.
6. On the next screen, drag the Imported File (Down & Left) and drop it after the first track.
As you can see in image below, the imported Song clip has been dropped below the first track.

Note: The First Track is always reserved for the instrument in Audio Editing interface.
Step 4. Select 30 Second Clip from the Imported Song
Custom Ringtones on iPhone can only be 30 seconds long. Hence, the next step is to extract a 30 second clip from the downloaded song using GarageBand.
1. Press and Hold on the Imported Track and drag the handle to your desired starting point in the song.

2. Double-tap on the track and select the Split option. This will place a tiny scissor icon at your selected starting point of the song.
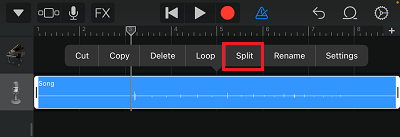
3. Drag the tiny Scissor icon downwards to split the song at pre-selected starting point.

4. Similarly, repeat steps 1, 2 and 3 to select an end-point of the song and split the song at the end-point.

5.Select the Starting Unwanted Part of the song and tap on the Delete option in the menu that appears.
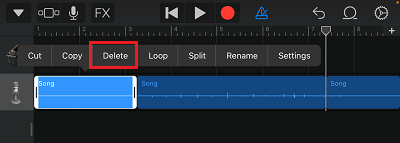
6. Similarly, select the Ending Unwanted Part of the song and tap on the Delete option.
This leaves only the remaining 30 second clip of the song that you can use as Ringtone. You can listen to this clip by tapping on the play button located in the top-menu bar.
Step 5. Export Song Clip to Ringtones
The last step is to export the 30 second Song Clip from GarageBand to the Ringtones Folder on your iPhone.
1. Tap on the Down Arrow icon located at top-left corner and select My Songs in the drop-down.

2. On the next screen, Long-press on the Clip and select the Share option in contextual menu.

Note: You may have to scroll down in the contextual menu to see the Share option.
3. On the Share Song screen, select the Ringtone tab.
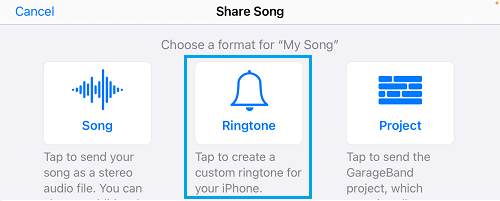
4. On the next screen, type a Name for the Ringtone and tap on the Export option located at top-right corner.

5. Once the export process is successfully completed, tap on Use Sound As… option.
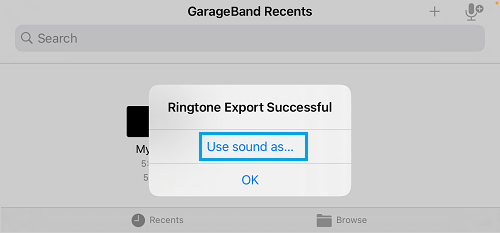
6. On the next screen, select the Standard Ringtone option and this will set the Song Clip as Custom Ringtone on iPhone.
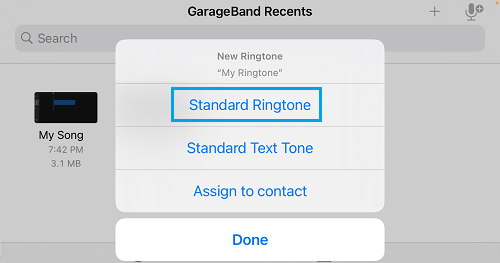
As you can see in above image, you can also use the Song as Custom Text Tone, Assign the Song to Contact or tap on Done to Add the Custom Ringtone to the list of other Ringtones on your iPhone.