When you set a Default Printer on your Windows 11 computer, all the Print Jobs that are issued from your device will be automatically sent to your selected Printer.
This can be useful if there are multiple printers (as in an office) and you want to make sure that you are always printing to a nearby printer.
If you are using the same Laptop at Home & Office, you can set your Home Printer as default and prevent the possibility of your personal documents being sent to an Office printer.
While setting a Default Printer ensures that all print jobs by default are sent to the same printer, it does not prevent you from printing to other printers on the network.
For example, even if Home Printer is set as the default on your computer, you will still be able to print to any printer at your Office by selecting the Office Printer in the Print dialogue box.
Set Default Printer in Windows 11
If you mostly print to a particular printer in your home or office, you can set that printer as the default printer on your Windows 11 computer.
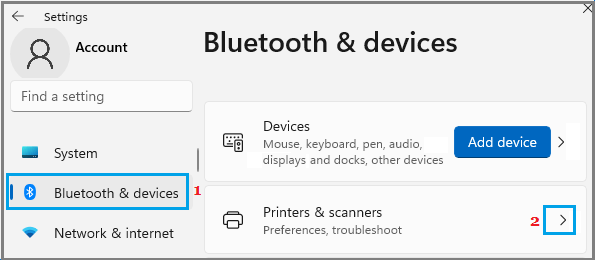
1. Go to Settings > select Bluetooth & Devices in the left-pane and click on Printers & Scanners in the right-pane.

2. On Printers & Scanners screen, scroll down to “Printer Preferences” section and disable Let Windows manage my default printer option.

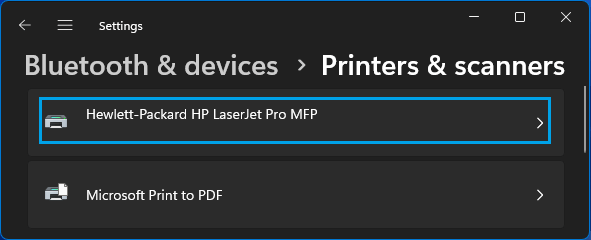
3. On the same screen, scroll up and click on the Printer that you want to set as the default Printer.

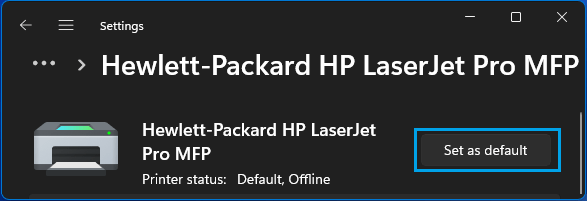
4. On the Printer’s page,

After this, you should always find your computer printing to your selected default printer.
2. Automatically Switch Default Printer Based on Location
Windows 11 comes with “Let Windows manage my default printer” option, which automatically switches the default printer, based on the location of your computer.
This ensures that when you go Home from Office, the default printer on your computer automatically switches from Office to Home Printer.
1. Go to Settings > select Bluetooth & Devices in the left-pane and click on Printers & Scanners in the right-pane.

2. On Printers & Scanners screen, scroll down to “Printer Preferences” section and enable Let Windows manage my default printer option.

This will automatically switch the default printer on your computer, based on the most recently used printer in that particular location.
While this method works well for most users, it can be problematic for those who keep switching to different printers at office.
In which case, the most recently used printer at office will end up becoming the default printer at your office.