Here is how you can Create Albums in Google Photos and organize all your Photos by placing them in appropriately Named Albums, within the Photos App in Google Photos.
Create Albums in Google Photos
By default, all photos that you take on your Phone are made available in the Photos tab in Google Photos, which results in a ton of unorganized Photos accumulating in the Photos tab.
Hence, Google Photos provides the option to Create Albums and place similar Photos in appropriately named Albums in the Photos App.
For example, if you go on a Holiday along with your family and friends, you can create a Folder named as “Holidays” and place all Holiday Photos in that particular Album.
1. Create New Album in Google Photos
1. Open Google Photos App and tap on Albums tab located in bottom menu.

2. On the Albums screen, scroll down and tap on New Album option.
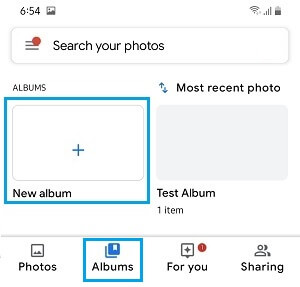
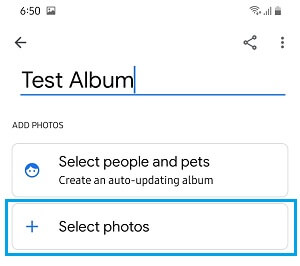
3. On the next screen, Add a Title for your New Album and tap on Select Photos option.
4. On the next screen, select the Photos that you want to Add to the Album and tap on Add.
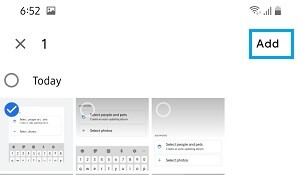
Note: You will need to Add at-least one Photo in order to Create an Album in Google Photos
2. Add Photos to Album in Google Photos
Once an Album is created, you can Add Photos to Album at any time by following the steps below.
1. Open Google Photos App > tap on Albums tab located in bottom menu.

2. On the Albums screen, select the Album to which you want to Add Photos.
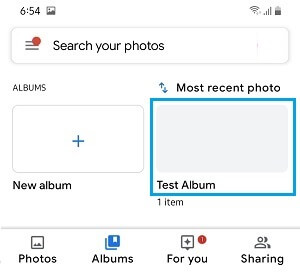
3. Once you are in the Album, tap on +Add Photos icon located in the top menu.
![]()
4. On the next screen, select Photos that you want to Add to the Album and tap on Add.

3. Remove Photos from Album in Google Photos
You can Remove Photos from any Album in Google Photos by following the steps below.
1. Open Google Photos App > tap on Albums tab in bottom menu.

2. On the next screen, select the Album from which you want to Remove Photos.

3. On the next screen, tap and hold on the Photo that you want to remove, until it is selected. Select other Photos that you want to remove by tapping on them.
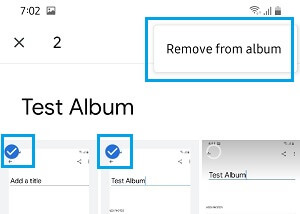
4. After Photos are selected, tap on 3-dot icon located at the top-right corner of the screen and tap on Remove from Album option that appears.
4. Share Albums in Google Photos
Google Photos App makes it really easy to share Albums with your friends and family.
1. Open the Google Photos App > tap on the Albums tab in the bottom menu.

2. On the next screen, select the Album that you want to Share with your family and friends.

3. Once you are in the selected Album, tap on 3-dot icon menu icon located at the top-right corner of your screen.
![]()
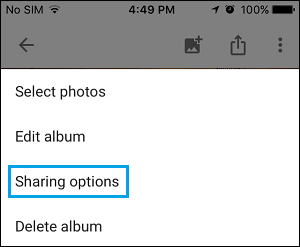
4. From the menu that appears, select Sharing options.
5. On the next screen, move the toggle next to Share Album to ON position.
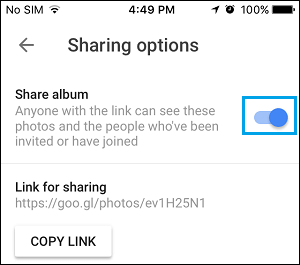
6. Once the Share Album option is turned on, you will see the Link for Sharing that you can be used for Sharing the Album with others.
In order to Share the Photo Album with your family and friends, simply copy the “Link for Sharing” as created by Google and send it to them.
5. Delete Albums in Google Photos
At any time, you can delete any Albums in Google Photos by following the steps below.
1. Open Google Photos > tap on Albums tab located in bottom menu.

2. On the next screen, select the Album that you want to Delete.

3. On the next screen, tap on 3-dot icon located at top-right corner of your screen.
![]()
4. From the menu that appears, select Delete Album option.
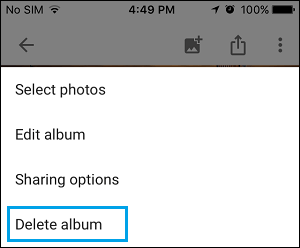
5. On the confirmation pop-up, tap on Delete to permanently delete the Album from Google Photos.