Duplicate photos take up storage space and make it difficult to organize and manage photos. You can find below the steps to Find and Delete Duplicate Photos in Windows 10.

Find and Delete Duplicate Photos in Windows 10
The simplest way to find and delete duplicate Photos in Windows 10 is to open the Folder containing Duplicate Photos using File Explorer and Sort Photos by Names.
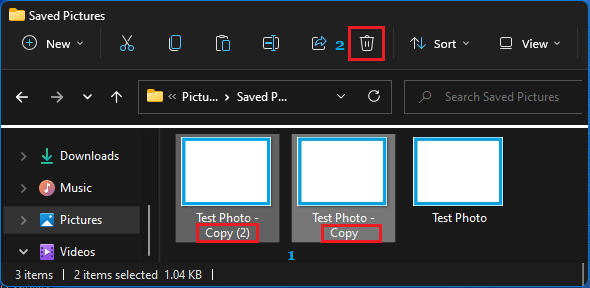
Once Photos are sorted by Names, you can identify Duplicate Photos by looking for the word “Copy” in the Name of the Photos.
If you are using the built-in Photos App, you won’t be able to see duplicate Photos as they are hidden by the Photos App, in order to provide a better user experience.
However, the Photos App can also be set to Show Duplicate Photos, which allows you to identify Photos by looking at the word “Duplicate” in their File Names.
1. Delete Duplicate Photos Using File Explorer
Although, Windows File Explorer is basically designed to view and open files, it can also be configured to find and locate duplicate photos.
1. Open File Explorer and select Pictures Folder in the sidebar (or open any other Folder in which Photos are located).

Important: Do not search and delete Photos in System folders like Program Files, Windows and PerfLogs
2. In Pictures Folder, switch to View tab in top-menu bar, click on Sort by tab and select Name in the drop-down menu.

3. After Sorting Photos by Name, select Photos that have the word “Copy” in their File Name and click on the Trash Can Icon to delete the selected Duplicate Photos from your computer.

Note: You can also right-click on any selected Photo and select the Delete option.
2. Delete Duplicate Photos Using Microsoft Photos App
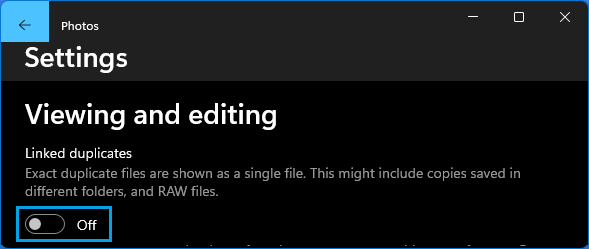
In order to find duplicates in Microsoft Photos, you need to turn OFF “Linked duplicates” option in Photos App, which is enabled by default in the Photos App.
1. Open the Photos App on your computer > click on 3-dots Icon and select Settings in the drop-down menu.

2. On the Settings screen, scroll down and move Linked duplicates to OFF position.

3. Go back to the previous screen (by clicking on back arrow) and click on Collection tab in top-menu bar.

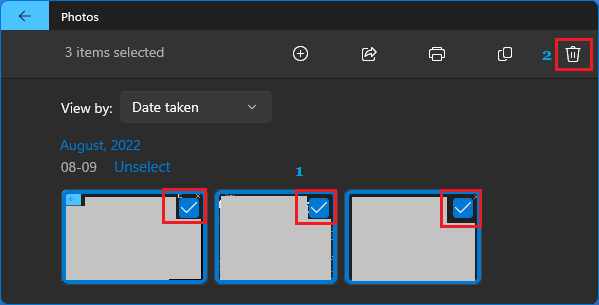
4. On Collections screen, select Duplicate Photos and click on the Trash icon located at top-right corner of the screen.

5. On the confirmation pop-up, select the Delete option to remove the selected duplicate photos.