While there is no option to Hide Specific Contacts or prevent Specific Contact Names from appearing on iPhone, you can still manage Hide Contacts on iPhone using workarounds as provided below.
1. Hide Contacts On iPhone Using Nickname
An easy way to hide any Contact on iPhone is to give the Contact a Nickname that only you can relate to and this will make iPhone display the Nick Name of your Contact, making it difficult for anyone else to guess who you are speaking or texting to.
1. Open Contacts App and select the Contact that you want to give a nickname to.
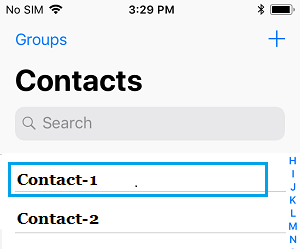
2. On Contacts page, tap on the Edit option.
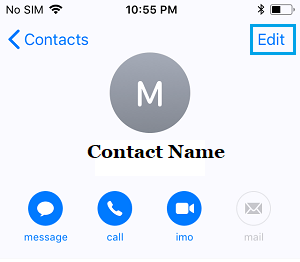
3. On the next screen, scroll down all the way to bottom and select Add Field option.
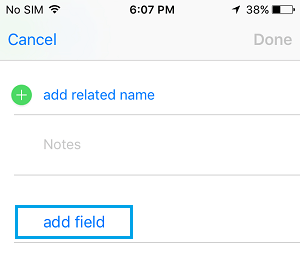
4. On Add Field screen, select the Nickname option and this new field will be added to Contact’s basic details.
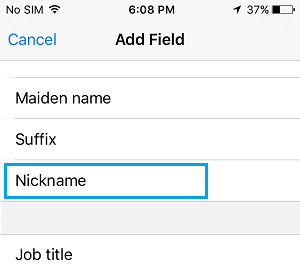
5. On the next screen, type a Nickname for your Contact in the newly added Nickname Field and tap on Done to save this new entry.
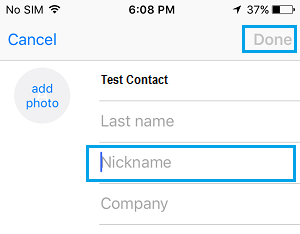
After this, iPhone will only display the Nickname for this particular Contact, when you are speaking to or sending text message to this particular Contact.
Anyone trying to snoop on you will only be able to see the Nickname of this Contact, which will make it difficult for anyone to guess who you are speaking to or interacting via text messages.
Hide iPhone Contacts from Spotlight Search
Even if you hide Contacts by using Nickname, you cannot rule out the possibility of the real Contact Name or Phone Number from coming up in Spotlight search.
1. Go to Settings > General > Spotlight Search.
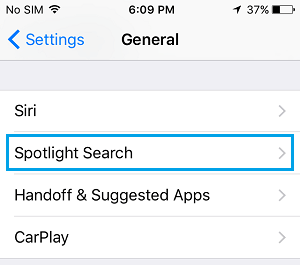
2. On Spotlight search screen, move the slider next to Contacts to OFF position. Similarly, move the toggle next to Phone to OFF position.
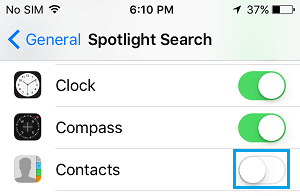
This will prevent both Contact names and Phone numbers from showing up in Spotlight search.
2. Hide Contacts by Moving them to Gmail
This method involves adding the Contact that you want to hide to your Gmail Account and then deleting the Contact from iPhone.
After deleting the Contact from iPhone, you can set iPhone Contacts App to hide Gmail Contacts.
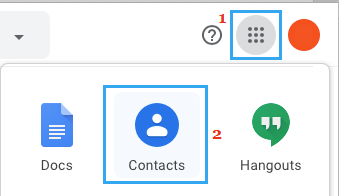
1. Login to your Gmail Account > click on Google Apps icon and select Contacts in the Apps menu.
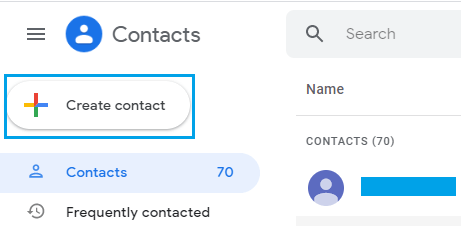
2. On the Contacts screen, click on Create Contact option.
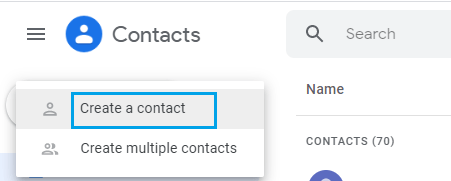
3. On the pop-up, click on Create a Contact option.
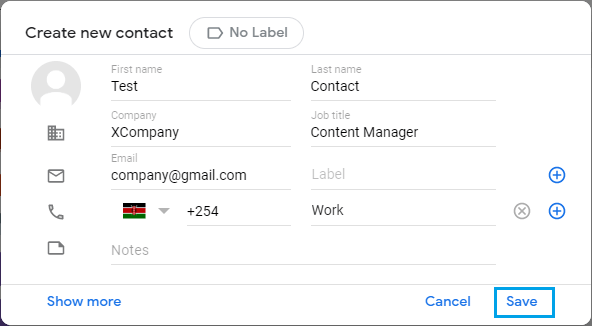
4. On the next screen, enter your Contact’s Name, Email, Phone Number and other details as required and click on the Save button.
After adding the Contact to Gmail, the next step is to remove the Contact from your iPhone.
5. On iPhone, open Contacts App and select the Contact that you want to remove.

6. On Contacts info screen, select the Edit option, located at top-right corner of your screen.

7. On the next screen, scroll down to bottom and select the Delete Contact option.
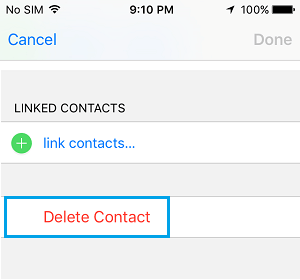
8. On the confirmation pop-up, tap on Delete Contact to Confirm.
9. After deleting the Contact, tap on the Groups option.

10. On the next screen, uncheck All Gmail Contacts.
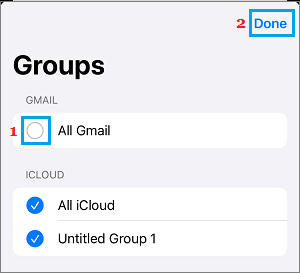
As you must have realized, the disadvantage of this method is that it hides all Gmail Contacts.
3. Hide Contacts by Creating New Contact Group
Another way to Hide Contacts on iPhone is by creating a New Contact Group in iCloud and moving all the Contacts that you do not want to Hide to this New Contact Group.
After this, you can set the Contacts App to display only the Contacts in this New Group and hide remaining iCloud Contacts.
1. On your iPhone, go to Settings > tap on your Apple ID Name > iCloud and move the slide next to Contacts to ON position.

2. On your Mac or PC go to www.icloud.com and sign-in to your iCloud Account. Once you are in your iCloud Account, Click on the Contacts tab.
![]()
3. On iCloud Contacts screen, click on the + icon located at the bottom left of your screen and then click on New Group option.
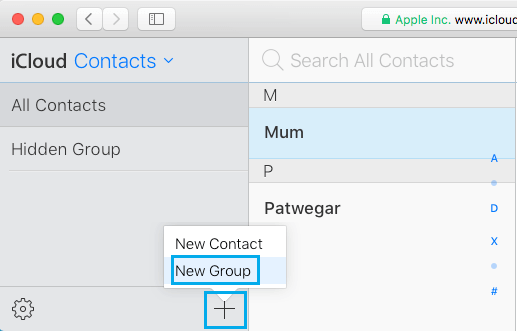
4. You will see a New Contact Group Created with the name Untitled Group 1 (See image below).
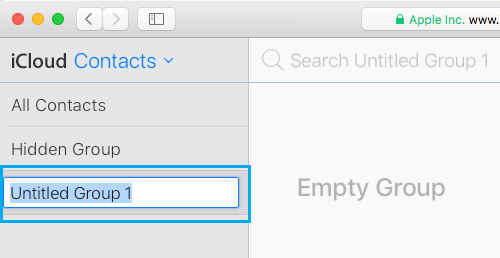
5. Type a Descriptive Name for the Contact Group and press the Enter Key to save this New Contact Group.
6. Next, click on All Contacts in the left-pane. In the right-pane, select Contacts that you want to add to New Contact Group.
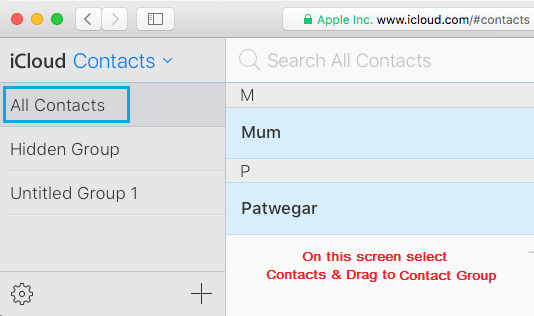
7. Once Contacts are selected, simply drag the selected Contacts to New Contact Group in the left pane (Group 1 in this case).
Tip: You can select multiple contacts by holding Command Key (on Mac) and Ctrl Key (in Windows).
8. Back on your iPhone, open Contacts App and tap on the Group Icon.

9. On the next screen, select only the New Contact Group that you just created.
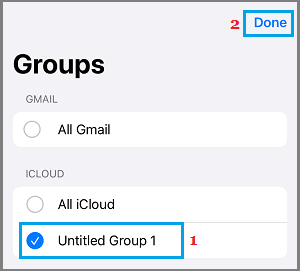
This will make iPhone to display only the Contacts that are available in the New Contact Group and hide others iCloud Contacts.