It is a good practice to periodically download a backup of iPhone to Mac, as it can help you recover almost all the data on your iPhone, if it is lost, stolen or suffers from physical damage.
While you can also restore iPhone from an iCloud Backup, you need to be aware that iCloud Backups include only the most essential data (as defined by Apple) and are not considered as a complete backup of iPhone.
Also, if you have a free iCloud Account, there is always the possibility of your iPhone being unable to back up its data to iCloud, if the size of the data on your iPhone is greater than 5 GB, which is the storage limit on a Free iCloud account.
1. Download iPhone Backup to Mac Using Finder
You can follow the steps below to download a complete Backup of your iPhone to Mac by using the Finder Utility as available in macOS.
1. Connect iPhone to Mac using a Lightning to USB cable.
2. Click on the Finder Icon > Select iPhone in the left-pane. In the right-pane, select Backup all the Data on iPhone to Mac and click on the Back Up Now button.
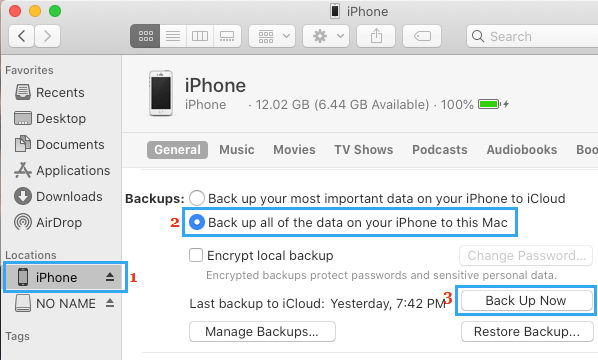
3. Patiently wait for the Backup process to be completed.
Note: The time required for the backup process depends on the amount of data available on your iPhone.
2. Download Encrypted iPhone Backup to Mac
You can also download an Encrypted Backup of iPhone to Mac by following the steps below.
1. Connect iPhone to Mac and open the Finder on your Mac.
2. Select your iPhone in the left-pane. In the right-pane, select Backup all Data on iPhone to Mac and check Encrypt local backup option.
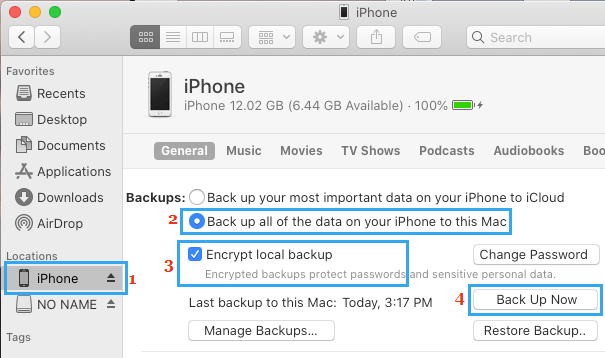
3. Click on Back Up Now button to download an Encrypted Backup of your iPhone to Mac.
Note: When you select Encrypt Local Backup option for the first time, you will be required to setup a password that will be required to open the Encrypted iPhone Backup File on your Mac.
Important: Make sure that you do not lose the Encrypted Backup password, as it will be required to access the encrypted backup of your device.
How to Check iPhone Backup on Mac
Before disconnecting iPhone from Mac, it is good practice to check and confirm that the Backup of your device is indeed available on your Mac.
You can do this by clicking on Manage Backups button, located under Backups section.
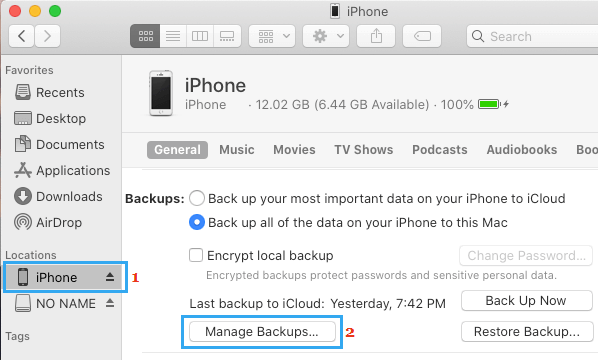
On the next screen, you will be able to see the list of iPhone Backup Files available on your Mac. Once a Backup of iPhone is available on Mac, you will be able to Restore iPhone (in case required) by using the Backup File.