The default size of the Mouse Pointer on a Windows computer should suit most users; as it has been designed for use on computers with standard size screens. Hence, if you are looking for a way to change the size and color of mouse pointer, it is likely that you are using a larger display, dual-monitors or a custom desktop background; which can make it difficult to track the small sized arrow.
Another reason for changing the size and color of mouse pointer is to customize the pointer to suit individual visual and work related requirements and make it more visible and easy to identify on the screen.
Related: How to Change Screen Brightness in Windows 11/10.
Change Mouse Pointer Size and Color in Windows 11
In general, changing the size and color of mouse pointer can help in improving visibility, reduce eye strain, speed up navigation and help in making the mouse pointer remain visible during intense gaming sessions, presentations and while Sharing the screen during an online meeting.
You can find below the steps to change the size and color of Mouse Pointer on a Windows 11/10 computer.
1. Change Mouse Pointer Size
If you feel that the size of the Mouse Pointer is small or large, you can easily increase or decrease the size of mouse pointer by going to the Accessibility Settings on your computer.
1. Press Windows + I Keys to open the Settings App on your computer.
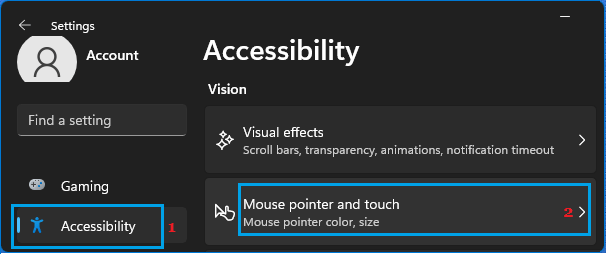
2. On the Settings screen, select Accessibility in the left-pane and click on Mouse pointer & touch in the right-pane.
3. On the next screen, you can use the Slider to increase or decrease the size of the Mouse Pointer to suit your visual or work related requirements.
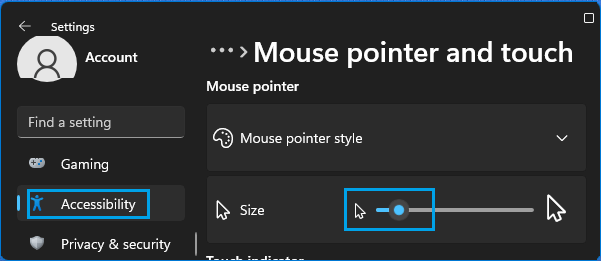
Note: You need to experiment with different mouse pointer sizes, until you find the right size.
2. Change Mouse Pointer Color
You can change the color of the cursor or mouse pointer to make it prominent and easy to spot on the screen of your computer.
1. Open the Settings App on your computer.
2. On the Settings screen, select Accessibility in the left-pane and click on Mouse Pointer & Touch in the right-pane.
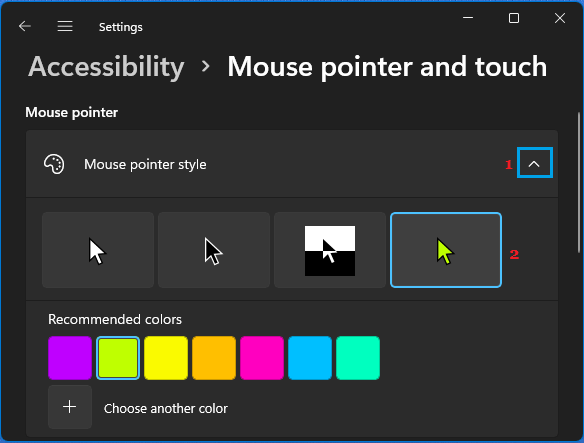
3. On the next screen, you can select your desired color for the Mouse Pointer from Recommended colors or make use of the Custom Color option.
3. Change Text Cursor Thickness
Another Pointer setting that you may want to customize is the thickness of the blinking cursor; which appears while you are typing in Microsoft Word and other apps.
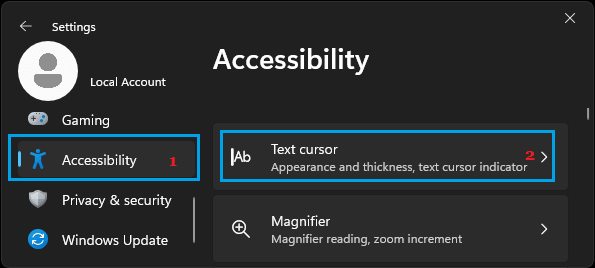
1. Go to Settings > Accessibility > scroll down in the right-pane and click on Text Cursor tab.
2. On the next screen, scroll down to Text Cursor Thickness section.
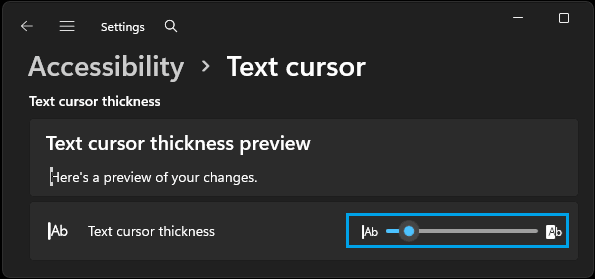
3. Use the Slider to change the Text Cursor Thickness to suit your requirements.
Note: You will be able to see a Preview of the Cursor thickness; as you move the slider.