You can change the ‘User Name’ that you use to login to the computer, both for Local User Account and also for Microsoft User Account on your Windows computer.
In the case of Local User Accounts, you can change the User Name of any Local User account on your computer by going to User Accounts section in Control Panel.
If you are using Microsoft Account, the easiest way to change the User Name of your Microsoft Account as it appears on the screen of your computer is by going to Microsoft’s website.
Change User Account Name in Windows 11/10
Make sure that you are logged-in to your Admin account and use any of the following methods to change the User Account Name for any User Account on your computer.
1. Change Local User Account Name
You can change the Name of your Local User Account by following the steps.
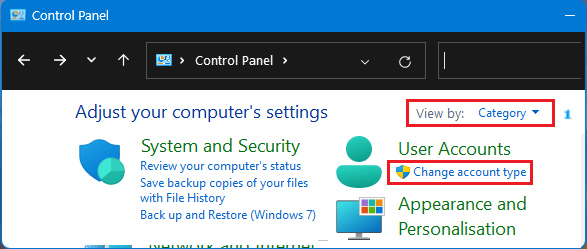
1. Open the control panel on your computer.
2. On the Control Panel screen, switch to “Category” view and click on Change account type link.
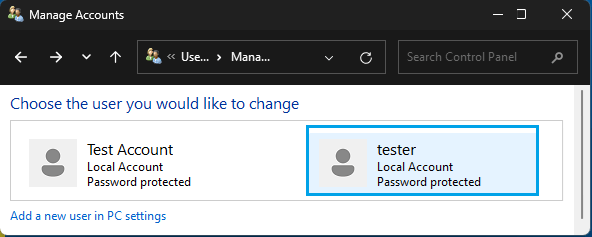
3. On the next screen, select the User Account that you want to Rename.
4. On the next screen, click on Change your account name link.

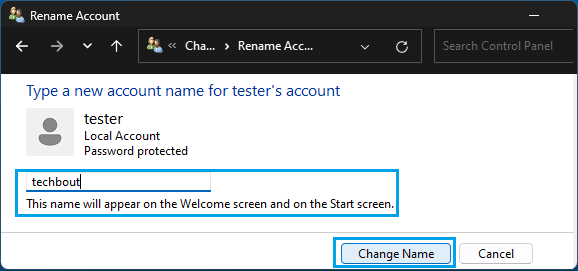
5. On Rename Account screen, type the New Name for the User Account and click on Change Name button.
You can check if the User Name has been changed by restarting the computer or wait till you login to the computer the next time.
2. Change Microsoft Account User Name
In the case of Microsoft Account, the User Name is pulled from your online profile and it can be easily changed by going to your Microsoft Account page.
1. Open the web browser on your computer and go to account.microsoft.com.
2. Login to your Microsoft Account by entering your Email Address and Password.
3. On the next screen, click on Your Info in the left-pane. In the right-pane, click on Edit Name link.
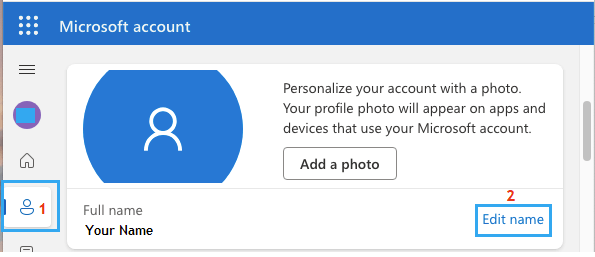
4. On the pop-up, type the New Name for the User Account and click on the Sr by using the following the steps.

5. Once you are done, click on the Save button to save the change in your Microsoft Account User Name.
The next time you login to the computer using Microsoft Account, you should be able to see your New Name. If you do not see the change, you may have to wait for a few hours for the changes to sync to your computer.
Also, you need to be aware that changes to your First and Last Name will also be reflected in your online ID and your Microsoft Email Account.