It is a good practice to periodically check and monitor the status of storage space on your Mac and make sure that there is enough storage space for proper functioning of apps and programs on your computer.
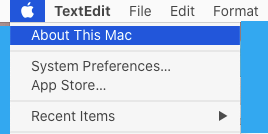
All that is required to check and manage the status of storage space on your Mac is to click on Apple Logo located in the top menu bar of your Mac and click on ‘About This Mac’ option in the drop-down menu.
Apart from this there are other ways to check the total amount of storage space occupied and the amount of free storage space available on your MacBook.
Check and Manage Storage on Mac
You can find below 3 different methods to check and manage the storage space on your MacBook.
1. Easy Way to Check Storage on Mac
As mentioned above, the easiest way to find the current status of storage space on Mac is to click on Apple Logo in top menu bar.
1. Click on the Apple Logo in top menu bar and select About This Mac option in the drop-down menu.
2. On the next screen, click on Storage and wait for your Mac to calculate the amount of storage space available on your device.
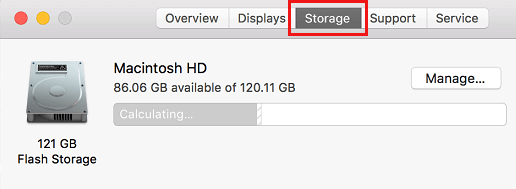
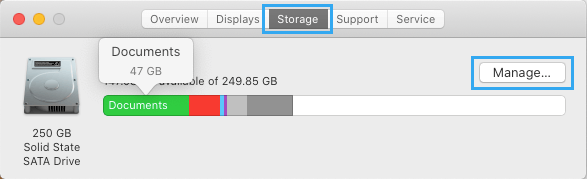
Within a few seconds, you will see a graphical representation of the amount of storage space used and remaining on your device.
3. To find more storage details, click on the Manage button.
4. On the next screen, click on Applications in the left-pane. In the right-pane, you will see the storage space occupied by each Application on your Mac.
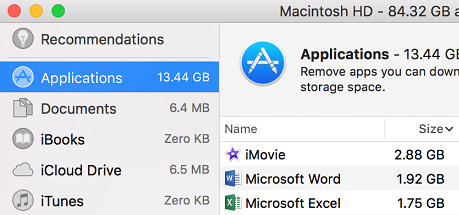
Similarly, you can click on Documents, Music and other tabs to see the amount of storage space taken up by Documents, Music and other items on your Mac.
2. Check Storage on Mac Using Finder
You can also check and manage the storage space on your Mac by using the Finder.
1. Open the Finder on your Mac.
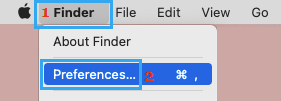
2. On the Finder screen, click on the Finder tab in the top-menu bar and select Preferences in the drop-down menu.
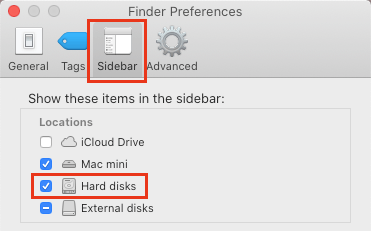
3. On Finder Preferences screen, switch to Sidebar tab and select Hard Disks option located under “Locations” section.
Once the option to show Hard Disk in Finder side-bar menu is enabled, you will be able to check the status of storage on Mac by opening the Finder.
1. Open the Finder on your Mac.
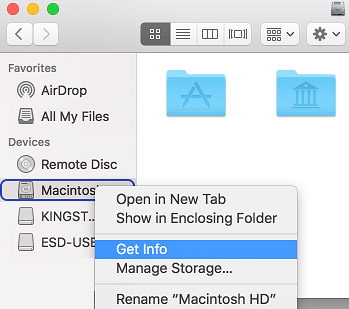
2. On the Finder screen, right-click on Macintosh… in side menu and select Get Info option in the right-click menu.
3. On the next screen, you will be able to see detailed storage information on your Mac.
3. Check Storage on Mac Using Disk Utility
Another way to check the status of storage on Mac is by using Disk Utility.
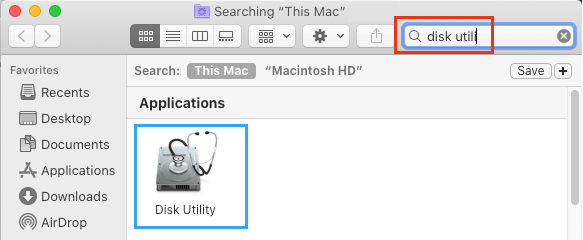
1. Press Command + Option + Spacebar keys to open the spotlight search on your Mac.
2. On the next screen, type Disk Utility in the search bar and double-click on Disk Utility in the search results.
3. On the Disk Utility screen, you will clearly see the status of storage occupied and available on your Mac.