If Deleted Files are Missing or Not showing in the Recycle Bin, you can find below the steps to prevent Recycle Bin Files from being Automatically Deleted in Windows 11/10.
Deleted Files Missing in Recycle Bin
When a file is deleted on a Windows 10/11 computer, it is moved to the recycle bin, where it remains waiting to be permanently deleted by the system.
If the Recycle bin becomes full or reaches its maximum capacity, the files in Recycle bin are deleted on First In First Out basis.
This setting is designed to allow users to restore deleted files, if they were deleted by mistake or accidentally deleted from the computer.
If Deleted Files are missing or not showing up in Recycle bin, it could be due to any of the following reasons.
- The Recycle bin was cleared after deleting the files.
- Deleted Files are set to bypass the Recycle Bin on your computer
- The file was deleted from an External storage device (USB Drive, External Hard Drive)
- The file was deleted using Command Prompt, PowerShell or Batch Script
- The size of the deleted file was larger than the available storage capacity of Recycle bin
- You had pressed the Shift Key while deleting the file
You won’t be able to recover deleted file/files, if any of the above reasons are true. Hence, we are providing below the measures to prevent deleted files from not showing in the Recycle Bin.
1. Change Recycle Bin Settings
As mentioned above, the problem could be due to deleted files being set to bypass the Recycle Bin.
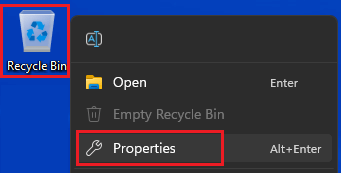
1. Right-click on the Recycle Bin icon located on Desktop and click on Properties.
2. On Properties screen, uncheck Don’t move files to the Recycle Bin option.
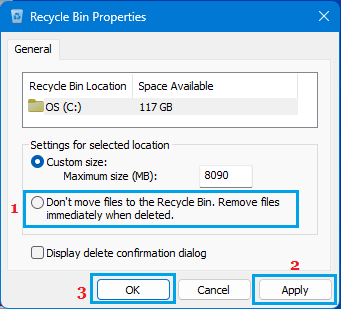
3. Click on Apply and OK to save this setting on your computer.
After this, any file that you delete on the computer should be available in the Recycle Bin.
2. Disable Storage Sense
A common reason for Deleted Files missing in Recycle Bin is due to the Recycle Bin being automatically cleared by Storage Sense.
You can prevent this from happening by disabling Storage Sense (if you are not using it) or by excluding Recycle Bin from Storage Sense activities on the computer (Next Step).
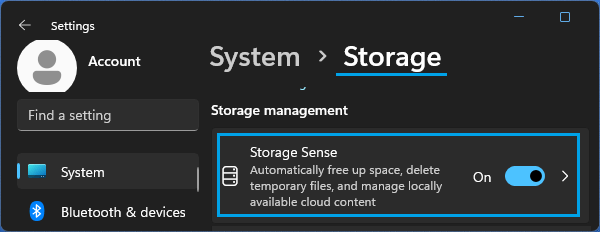
1. Go to Settings > System > Storage.
2. Disable Storage Sense by moving the slider to OFF position.

After this, deleted Files should remain stored in the Recycle bin until the Recycle Bin is manually cleared.
2. Prevent Storage Sense from Clearing Recycle Bin Files
By default, the Storage Sense feature in Windows 10/11 is designed to clear recycle bin files. You can prevent this from happening by changing Storage Sense settings.
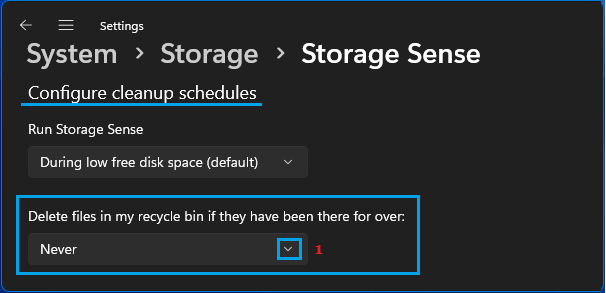
Windows 11: Go to Settings > System > Storage > scroll down and click on Storage Sense in the right-pane.
On the next screen, set Delete files in my recycle bin…. option to Never.
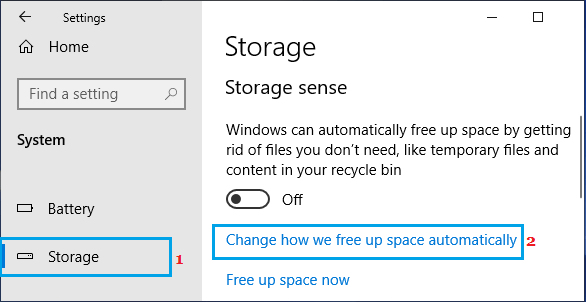
Windows 10: Go to Settings > System > Storage and click on Change how we free up space automatically option in the right-pane.
On the next screen, set Delete files in my recycle bin option to Never.
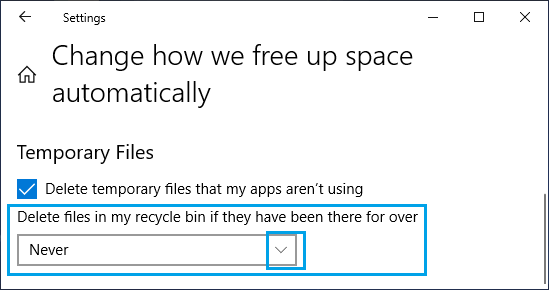
After this, deleted Files should always be available in the Recycle Bin, until the Recycle Bin is manually cleared.
3. Show Hidden Files in Recycle Bin
1. Open the File Explorer on your computer.
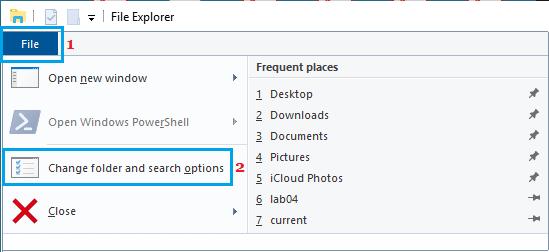
2. Click on the File Tab and select Change Folders and Search options in the menu that appears.
3. On Folder Options screen, switch to View tab > select Show hidden files, folders, drives option and uncheck Hide protected operating system files (Recommended) option.
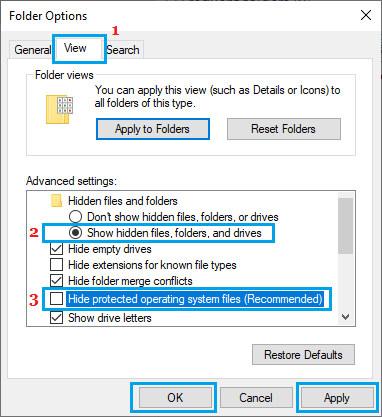
4. Click on Apply and OK to save this change and Restart the computer.
After the computer restarts, go to C:/ drive and you should be able to see a $Recycle.Bin Folder. Open this folder to see if the deleted files are there.
4. Reset Recycle Bin
If above methods did not work, the problem could be due to Recycle Bin on your system being corrupted. This can be fixed by resetting the recycle bin.
1. Type Command Prompt in the Search bar > right-click on Command Prompt in the search results and select Run as Administrator option.
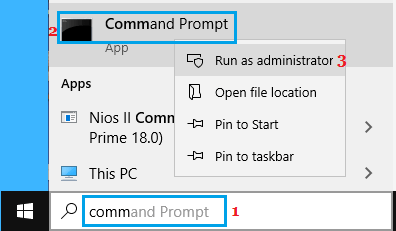
2. In the Command Prompt window, type rd /s /q C:$Recycle.bin and press the Enter key on the Keyboard of your computer.

3. Restart the computer and you should now find Recycle Bin working properly.
5. Increase the Size of Recycle Bin
In general, the size of Recycle bin is configured to be about 5% of the total disk storage capacity of the computer.
When the size of File that you are trying to delete is larger than the space available in Recycle Bin, you should see a warning message saying that the File will be deleted permanently from the system.
The File will be permanently deleted, only if you click on the Delete option in confirmation pop-up. You can prevent this from hapeening by increasing the size of Recycle bin.
1. Right-click on the Recycle Bin icon on the Desktop and click on Properties.

2. On Recycle Bin Properties screen, select the Location of Recycle Bin and enter the Size of Recycle Bin in “Custom Size” section.
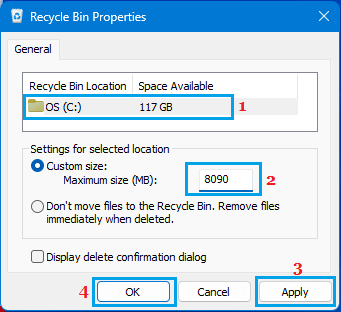
3. Click on Apply and OK to save this setting on your computer.