It is possible to Disable the Lock Screen in Windows and make your computer provide direct access to the Login Screen, without the need to click on the mouse or press a key on the keyboard.
You may want to do this, if you are going through a very busy day and want to avoid the hassle of pressing a key or clicking on the mouse to get past the Lock Screen.
Disable Lock Screen in Windows 11/10
If required, you can disable the Lock Screen on your Windows 11/10 computer using the following steps.
1. Right-Click on the Start button and click on Run.
2. On the Run Command window, type regedit and click on OK.

3. On the Registry Editor screen, navigate to HKEY_LOCAL_MACHINE\SOFTWARE\Policies\Microsoft\Windows and click on the Windows Folder to open it.
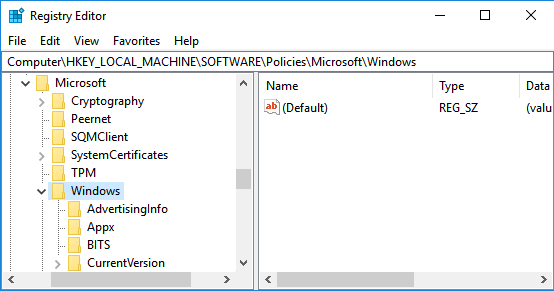
4. In Windows Folder, see if you can find a Folder named as Personalization.
If you cannot find the Personalization key, right-click on Windows Folder and select New > Key option.
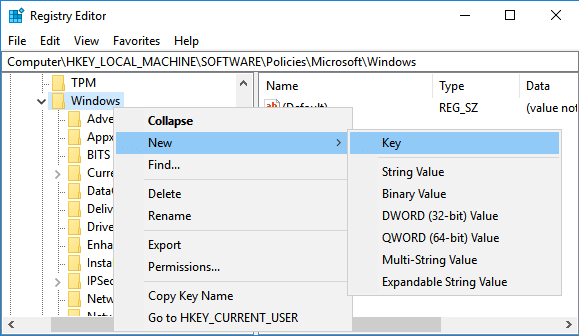
5. Once the New Key is created, Rename the New Key that you just created as Personalization.
6. Next, right-clicking on Personalization and select New > DWORD (32-bit) Value in the contextual menu.
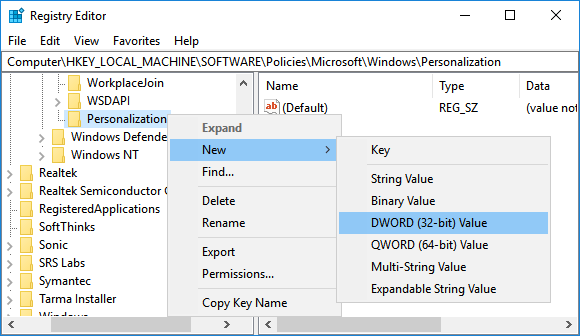
7. Name the New DWORD that you just created as NoLockScreen.
8. Next, double-click on NoLockScreen to launch the Edit DWORD windown > Enter “1” in the Value data field and click on OK button.
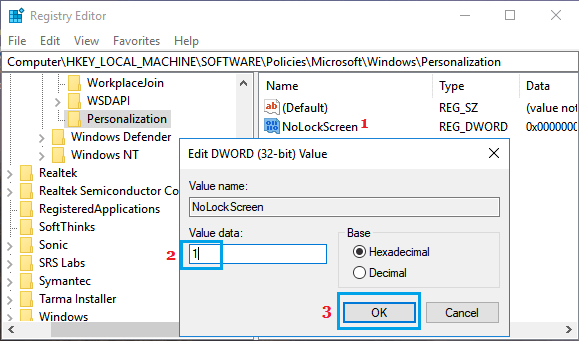
After this Restart the computer and you should find your computer skipping the Lock Screen and taking you straight to the Login screen.
At at any time, you can Re-enable the Lock screen on your computer by going to NoLockScreen key and changing the Value Data back to “0” from “1“.