The “Fast Startup” feature in Windows can be defined as a “Hybrid Startup” process; which can make the computer to boot up significantly faster; compared to both regular cold start and wake-up from hibernation mode.
This is achieved by saving system kernel and drivers to hibernation file (hiberfil.sys); located on the Local storage of the computer at the time of shutdown and reloading the saved kernel into memory during startup; totally bypassing the lengthy process of initializing the hardware and drivers; which are required in a traditional cold start.
Similarly, the Fast Startup can be faster than wake-up from Hibernation, because it logs off all users, closes all open applications and saves only the kernel to hard drive; while Hibernation saves the entire active session (apps, open windows, documents) to hard disk (hiberfil.sys), which takes up more storage space and processing time; compared to saving and loading up just the OS kernel.
Enable Fast Startup in Windows 11/10
If your computer is equipped with HDD drives, enabling the Fast Startup feature can provide the following advantages.
- Reduced Startup Time: Fast Startup can improve startup time by as much as 60% on computer running on traditional Hard Disk Drives (HDD).
- Good User Experience: Any user working on a computer that boots up early and provides almost immediate access to the system is likely to report good user experience.
- Power Consumption & Security: Fast startup feature uses the same amount of power as regular or full shutdown and is compatible with Bitlocker encryption.
Steps to Enable Fast Startup in Windows 11/10
You can check if the Fast Startup feature has been enabled on your computer and enable it (if it is not already enabled) by using the following steps.
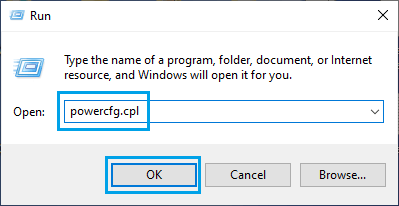
1. Press Windows + R keys to open the Run Command on your computer.
2. In the Run Command window, type powercfg.cpl and click on OK.
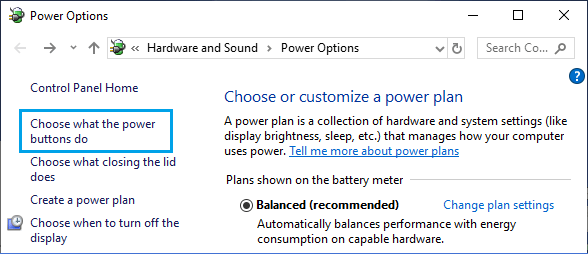
3. On “Power Options” screen, click on Choose What the Power Buttons Do link.
4. On the next screen, scroll down to “Shutdown Settings” and select Turn on fast startup option.
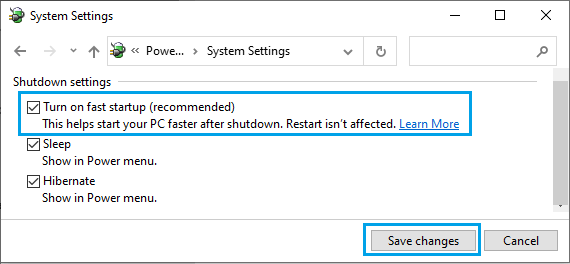
5. After the check box is selected, click on Save Changes to save and implement this change on your computer.
What to Do If “Turn ON Fast Startup” Option is Missing?
If “Turn on Fast Startup” option is missing on your computer, it is usually due to “Hibernate mode” not being enabled on your device. This can be easily fixed by running powercfg/hibernate on command.
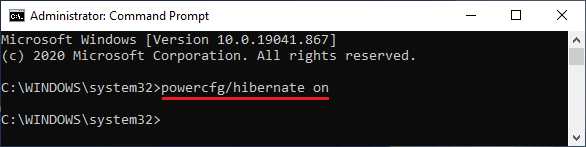
1. Type CMD in the Search bar > right-click on Command Prompt and select Run as Administrator option.

2. On the Command Prompt screen, type powercfg/hibernate on and press the Enter key.
3. After this Command is executed, you should be able to find “Turn on Fast Startup” option in Settings.