As you must be already aware, the simplest way to connect a Windows Laptop or Desktop computer to TV is by using a cable.
If the Laptop has a HDMI Port, it can be easily connected to TV using a basic HDMI cable. If the Laptop only has USB Ports and lacks a HDMI port, you can still connect the Laptop to TV using a USB-to-HDMI Adapter.
If you do not like using cables, you can wirelessly connect the Laptop screen to TV using Google’s Chromecast device and other methods as provided in this guide.
Connect Windows Laptop to TV
You can find below the steps to connect Laptop to TV using HDMI Cable and also different methods to wirelessly connect Laptop to TV
1. Connect Laptop to TV Using HDMI Cable
If the Laptop has a HDMI Port, it can be easily connected to TV using a basic HDMI cable. If the Laptop only has USB Ports and lacks a HDMI port, you can still connect the Laptop to TV using a USB-to-HDMI Adapter.
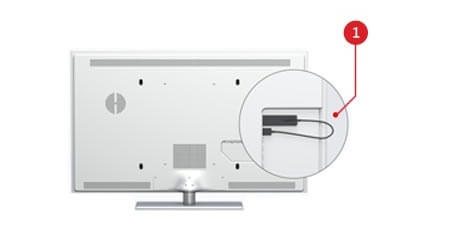
1. Plug one End of HDMI Cable to HDMI Port of the TV.
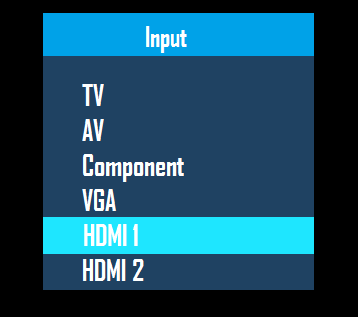
2. Using a TV Remote, change the Input Source on the TV to match HDMI Port to which HDMI Cable is attached.
3. Plug the other End of HDMI Cable to the HDMI Port on your Laptop.
Now, you should be able to see the screen of your Laptop projecting on the large screen of your Home Television.
2. Connect Laptop to Smart TV
If your computer supports Miracast, you should be able to wirelessly project Laptop screen to Smart TV.
1. On your Laptop, go to Settings > System > Display > on the next screen, click on Connect to a wireless display option.
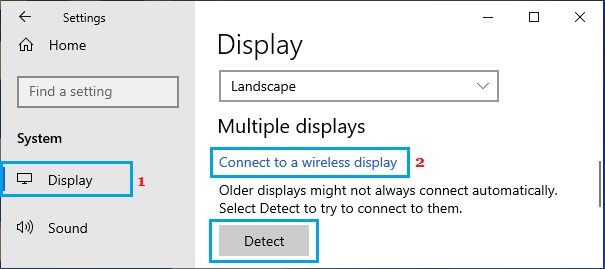
2. Select your Smart TV as it appears in the slide-up menu on your computer.
If the TV does not appear in the list, click on the Detect option and allow the computer to detect and bring up the Smart TV for selection.
If the Laptop still fails to detect the TV, it is likely that your computer is not equipped with Miracast technology.
In this case, you will have to use a Miracast Adapter or use devices like Google Chromecast, Amazon Fire TV Stick or ScreenBeam USB Transmitter from Actiontec.
3. Project Laptop to TV Using Chromecast
An easy way to project Laptop screen to TV is by using Google’s inexpensive Chromecast Device, which needs to be plugged to the HDMI port of the TV and setup using steps as provided in this guide: How to Use Chromecast on Windows 10/11 Computer.
Once the Chromecast Device is plugged to the TV and setup, you can project Laptop to TV using the following steps.
1. Open the Google Chrome browser on your computer.
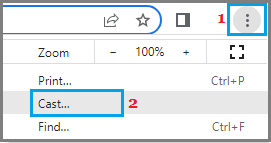
2. Click on 3-dots menu icon and select the Cast option in the drop-down menu.
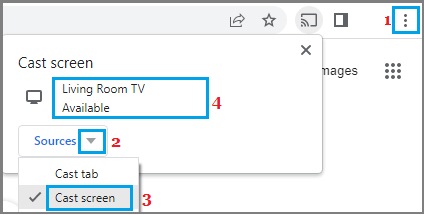
3. On the Casting menu that appears, click on the Sources (2) drop-down and select Cast Screen (3) option and then clicxk on the Location (4) of your Chromecast Device as it appears in “Cast Screen” section.
4. You should now find the screen of your Laptop projecting on the larger screen of your Home Television.
The Casting option is also available in Microsoft Edge. Open Microsoft Edge browser > click on 3-dots Icon > hoover mouse over More Tools and select Cast Media to Device option.

Now, you should find the screen of Laptop casting or projecting on the large screen of your Home Televsion.
4. Project Laptop to TV Using Miracast Adapter
You can find Miracast adapters from a variety of manufacturers. Your best bet would be Microsoft Wireless Display Adapter ($59) because it comes from Microsoft.
1. Plug HDMI End of Miracast Adapter into HDMI port of the TV and the USB End into USB Port of TV.
2. Using TV remote, select the HDMI Port to which the Miracast Adapter is attached – HDMI 1 or HDMI 2 or others, if your TV has more HDMI ports.
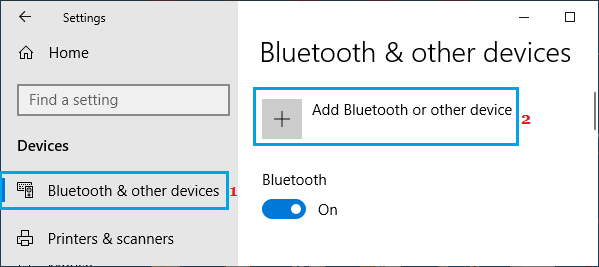
3. On your Laptop, go to Settings > Devices > select Bluetooth & Other devices in the left-pane. In the right-pane, click on Add Bluetooth or other device option.
4. On the next screen, select your Miracast Receiver from the list of connected devices (you will clearly see all devices connected to your computer).
You should now find the screen of your Laptop projecting on the larger screen of your Home TV.