The reason for USB Device not working on a Windows computer could be due to multiple reasons, ranging from outdated/corrupted device drivers to the USB Device itself being damaged, becoming faulty or corrupted.
Sometimes, the problem is simply due to the USB Device not being properly connected and this can be often resolved by re-connecting the USB Device.
USB Device Not Working in Windows 11/10
If you suspect that the USB Device might be damaged or connected, you can confirm your doubt by plugging the USB Device to another computer.
If the USB Device works on another computer, it confirms that it has not become faulty and there is problem on the computer that needs to be fixed
1. Power Flush the Computer
The problem could simply be due to a software glitch or stuck program or processes preventing the USB Device from working properly.
1. Shut Down the computer and unplug it from the power source.
2. After 60 seconds > Restart the computer and see if the USB Device is now working.
2. Uninstall Faulty Device Driver
As mentioned above, the problem could be due to the driver software for the USB device being outdated.
1. Right-click on the Start button and click on Device Manager.
2. On the next screen, open Universal Serial Bus Controllers entry, right-click on the Unknown Device and click on Uninstall Device option.
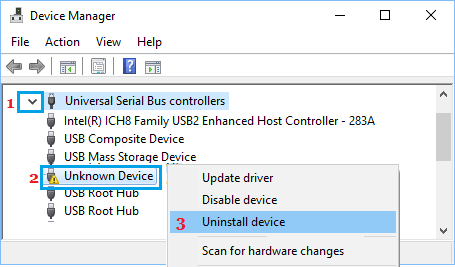
3. On the confirmation pop-up, click on OK to confirm.
Similarly, uninstall other Unknown Devices (if any) and Restart the computer.
3. Prevent Windows from Switching OFF USB Root Hub
The problem could be due to power supply to the USB Root HUB being switched off by the power settings on your computer.
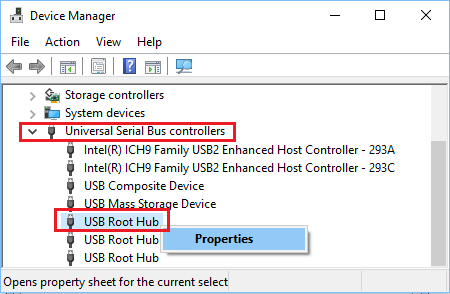
1. Open Device Manager > Right-click on USB Root Hub and click on Properties.
2. On the next screen, go to Power Management tab and uncheck Allow the computer to turn off this device to save power option and click on OK.
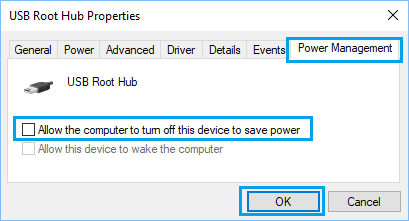
3. Repeat the above steps for other USB Root Hubs (If any) and Restart your computer.
4. Disable Fast Startup
The Fast Startup feature can sometimes end up not loading USB devices or loading them inconsistently (ON and OFF).
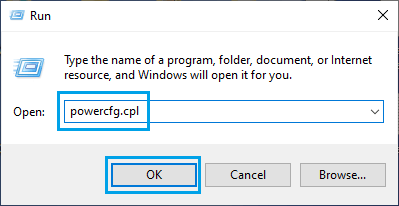
1. Open Run Command > Type powercfg.cpl and click on OK.
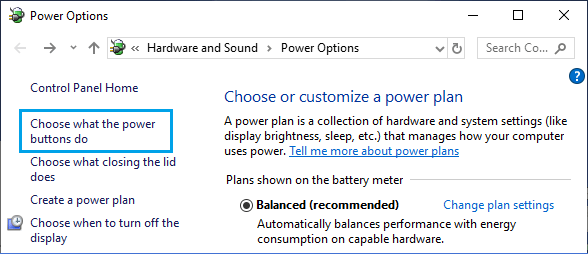
3. On Power Options screen, click on Choose What the Power Buttons Do link.
4. On System Settings screen, disable Turn on fast startup option, located under “Shutdown Settings” section.
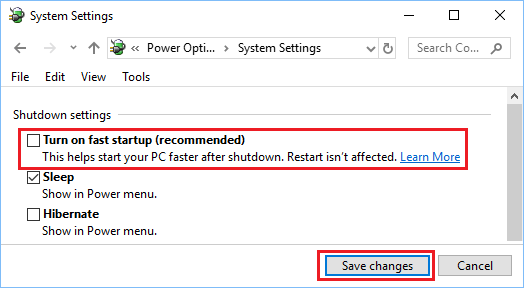
5. Click on Save Changes button to save this revised power setting on your computer.