You can Add your Email Accounts to the Mail App on Mac and manage all your Email Accounts from within the Mail App, without having to Login to individual Email Accounts.

Add Email Account to Mail App on Mac
When you add Email Accounts to the Mail App on Mac, you will be able to see all your Email Messages, received from different Email Accounts within the Mail App.
Similarly, you can send New Email Messages or Reply to received Email Messages, right from within the Mail App, without the need to Login to individual Email Accounts.
The Mail App on Map supports Email Accounts from all major service providers (Gmail, Outlook, Yahoo & others) and allows you to manage all your Email Accounts from within the Mail App.
1. Add New Email Account to Mac Using Mail App
An easy way to Add New Email Account to Mac is to open the Mail App on your Mac.
1. Open the Mail App on your Mac.
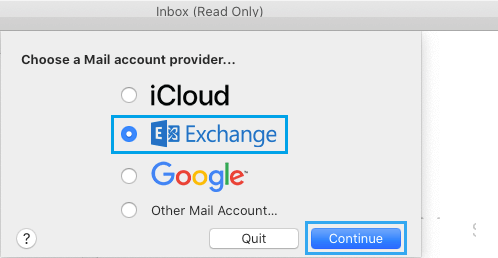
2. On the pop-up, select your Email Account Provider and click on Continue.
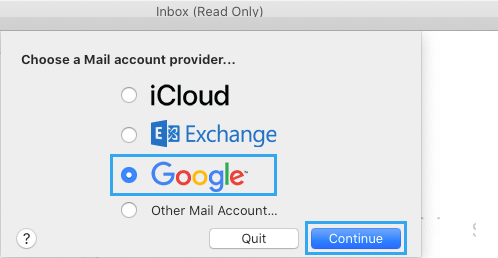
3. If you selected Gmail, click on Open Browser to allow Google to complete authentication in your web browser.
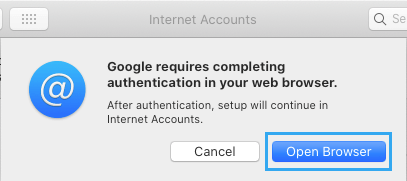
4. On the next two screen, sign-in to your Email Account by typing your Email Address and Password.
5. On the next screen, make sure the Mail App is selected and click on Done.
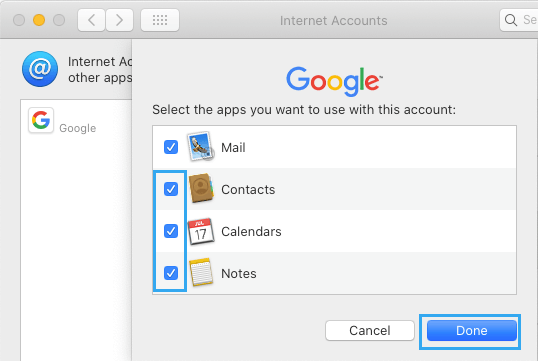
Note: If required, you can also select other Apps that you want to use with this Email Account and click on Done.
Within a few seconds, you will find all your Emails appearing on the screen of your Mac in the Mail App.
2. Add New Email Account to Mac Using System Preferences
Another way to Add New Email Account to Mac is to use System Preferences.
1. Click on the Apple Icon in top-menu bar > select System Preferences in the drop-down menu.
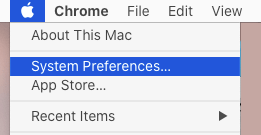
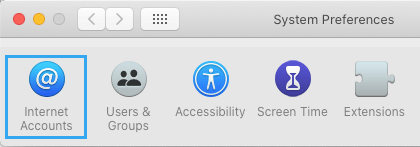
2. On System Preferences screen, click on Internet Accounts option.
3. On Internet Accounts screen, select your Email Account Provider.
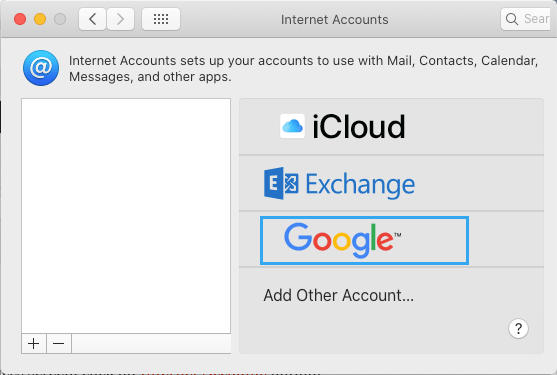
4. If you selected Gmail, click on Open Browser.

5. On the next two screens, enter Email Address and Password to Sign in to your Email Account.
6. On the confirmation screen, click on Allow to provide macOS with access to your Email Account.
7. On the next screen, make sure that Mail App is selected and click on Done.

Note: You can also Add Contacts, Calendar and Notes App to this Mail App on Mac.
3. Add Another Email Account to Mac
If you have already added an Email Account to Mac, you can follow the steps below to Add another Email Account to Mac.
1. Open the Mail App on your Mac.
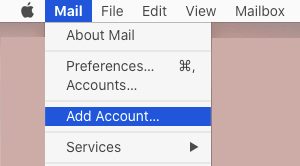
2. Click on the Mail tab in top-menu bar and select Add Account option in the drop-down menu.
3. On the pop-up, select your Email Account Provider and click on Continue.
4. On the next two screens, enter Email Address and Password to Sign in to your Email Account.
5. Click on Done to complete the process.
You can repeat the above steps to add all your Email Accounts to Mac and manage multiple Email Accounts from a single location.