If you have multiple Email Accounts, you can add them all to the Mail App on iPhone and access them from within the Mail App, without the need login to individual email accounts.
When Multiple Email Accounts are added to iPhone, it automatically creates Folders and names them after the service provider of your Email Account.
For example, the Mail App will create Folders named as Gmail and Outlook or Hotmail, when you add both your Gmail and Outlook or Hotmail account to iPhone.
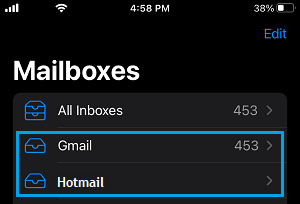
This ensures that all your Email Accounts are properly segregated and there is no mix up or confusion while sending and receiving Email Messages from your iPhone.
Add Multiple Email Accounts to iPhone
You can find below the steps to Add Multiple Email Accounts to iPhone, set Default Email Address and also the steps to switch between different Email Accounts.
1. Add Multiple Email Accounts to iPhone
If you have already added an Email Account to iPhone, the steps to add your second and multiple Email Account to iPhone are practically the same.
1. Open Settings > scroll down and tap on Apps.
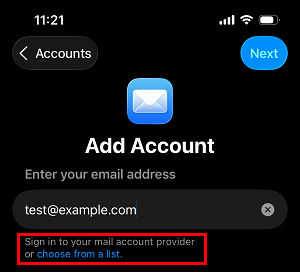
2. From the Apps screen, go to Mail > Mail Accounts > Add Account > tap on choose from a list link.
3. On the next screen, select your Email Service provider from the list.
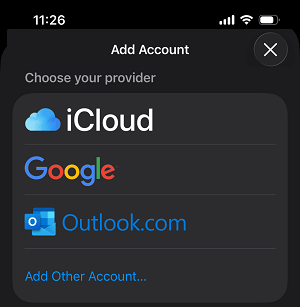
Note: If your Email provider is not listed, tap on Add Other Account and follow the steps to manually add Email Account to iPhone.
4. Enter your Email Address and Password to Sign-in to your Email Account and follow the next set of instructions to provide iPhone with access to your Email Account.
5. Make sure the Mail Slider is set to ON position and tap on Save.
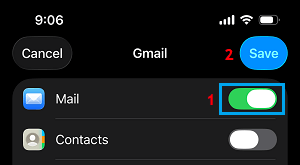
Note: If required, you can also provide iPhone with access to your Gmail Contacts and Calendars.
4. Repeat the above steps for other Email Accounts that you want to add to iPhone.
2. Set Default Email Address on iPhone
When you have multiple Email Accounts on iPhone, you can designate a particular email account as your Default Email Account for sending Emails from iPhone.
1. Go to Settings > Apps > Mail > scroll down to “Composing” section and tap on Default Account.

Note: The “Default Account” option appears only when there are two or more Email Accounts on iPhone.
2. On the next screen, select the Email Account that you want to set as your Default Account for sending Emails from iPhone.
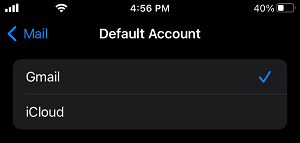
After this, your selected Email Address will always appear as the Default “From Address”, while sending Emails from your device.
3. Switch Between Different Email Accounts on iPhone
The Mail App makes it really easy to Switch between your personal, work and other Email Accounts.
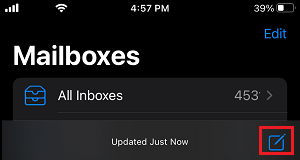
1. Open Mail App > tap on the Compose button located at bottom-right corner of the screen.
2. On New Message screen, tap on From: Email Address Field twice and you will see the option to select the Email Account to send this Email from.
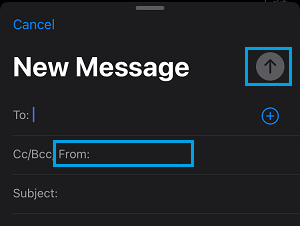
3. Select the Email Account from which you want to send the Email and it will appear in the “From” field.