If you are like most users, it is likely that your Apple ID is being used for iMessages. However, it is also possible add another or New Email Address to Messages App and use it for sending and receiving iMessages from iPhone.
This way, you can prevent your Apple ID from being widely exposed and use it only for logging into your device and making purchases on the App Store.
Add New Email Address to iMessage on iPhone
Before going ahead with the steps to Add New Email Address to iMessage, you need to be aware that you will be required to verify your New Email Address.
Hence, make sure that you have access to the New Email Address and you can login to it, in order to receive a six-digit verification code from Apple.
Add Email Address to iMessage on iPhone
If you do not like the idea of your Apple ID Email Address being used for iMessages, you can follow the steps below to Add a New Email Address to Messages App and use it to send and receiving iMessages from iPhone.
1. Open Settings > tap on your Apple ID.
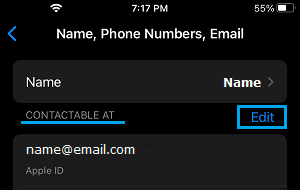
2. From Apple ID screen, go to Name, Phone Numbers, Email > tap on the Edit option.
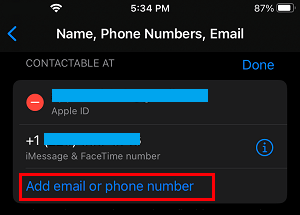
3. On the expanded Edit screen, select Add Email or Phone Number option.
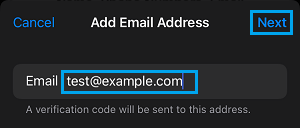
4. On the pop-up, select Add Email Address option > On the next screen, enter your New Email Address and tap on Next.
5. As mentioned above, Apple will now send a six-digit verification code to the New Email Address that you just added to iPhone.
6. Get the verification code by logging into your Email Account > Enter the verification code and wait for the verification process to be complete (few seconds).
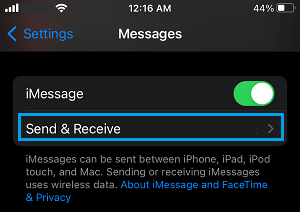
7. After the Email Address is verified, go to Settings > Messages > tap on Send & Receive.
8. On the next screen, you will see the New Email Address that you added to iPhone under “Contactable At” section.
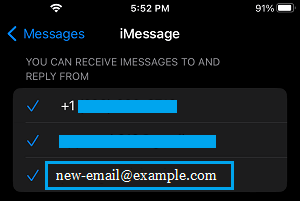
You can select the New Email by tapping on it and your iPhone will start using this New Email Address to send and receive iMessages from your iPhone.