A Network Printer allows multiple computers at your Home or Office to share a common printer. You will find below the steps to Add Wireless or Network Printer in Windows 10.
Add Network or Wireless Printer in Windows 10
In general, the procedure to Add Network or Wireless Printers in Windows 10 involves the following two steps.
- Setup Printer and connect to WiFi Network.
- Add Wireless or Network Printer to Computer
So, let us go ahead and take a look at the steps to Add Wireless or Network Printer.
1. Setup Wireless Printer and Connect to Network
Most Wireless Printers come with a LCD screen which allows you to go through the initial setup process and connect to WiFi Network.
1. Switch ON the Printer by pressing its Power button.
2. Access Setup Menu on the LCD Panel of the printer.
3. Choose Language, Country, Install Cartridges and Choose your WiFi Network.
4. Enter your WiFi Network Password.
If your printer does not have a LCD screen, you will have to connect the printer to the computer, in order to complete the setup process and connect to WiFi Network.
2. Add Wireless or Network Printer to Computer
Once the Printer is connected to WiFi Network, you should be able to connect to it from your computer by following these steps.
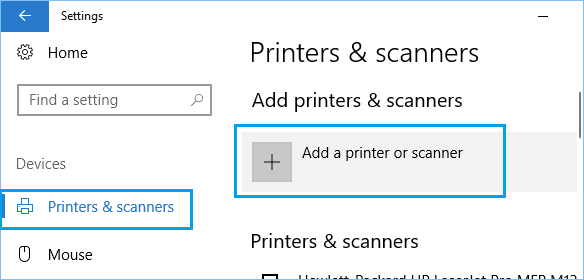
1. Open Settings > click on Devices Icon > On the next screen, select Printers & Scanners in the left pane. In the right-pane, click on Add a Printer or Scanner option.
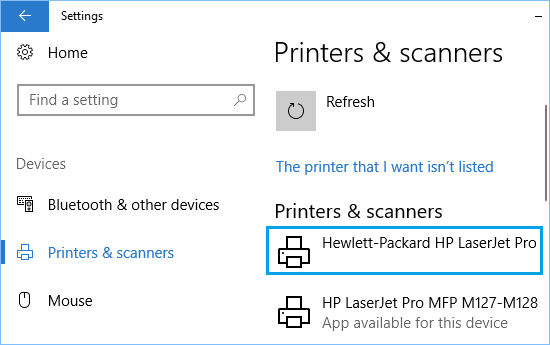
2. Wait for Windows to search for the Printer and click on your printer as it comes up in search results.
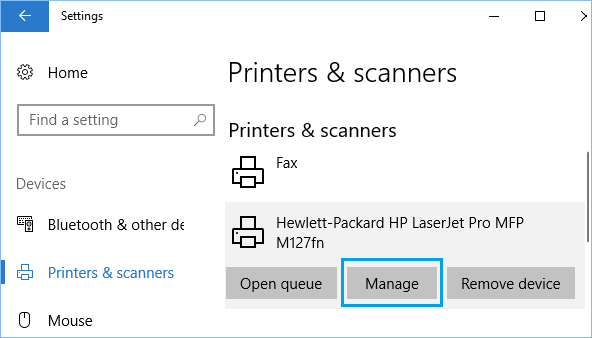
3. Next, click on the Manage option.
4. On the next screen, you will see the option to Print a Test Page and Run the Troubleshooter, in case you are having problems connecting to the printer.
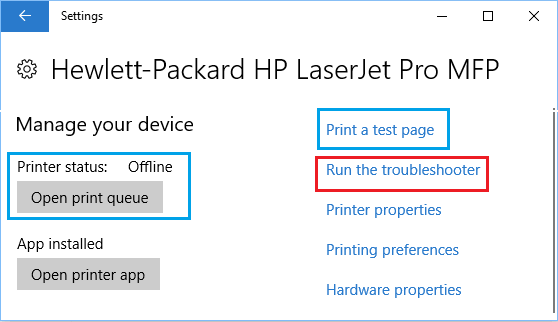
This is the simplest way to add a printer in Windows 10 and should work for most new models of printers. You can move to the next step, in case Windows 10 is unable to list your printer.
If the Printer that your want to Add is not Listed
Follow the steps below, in case Windows 10 is unable to list the printer that you wanted to add.
1. Go to Settings > Devices > Printers & Scanners in the left pane. In the right-pane, click on Add a Printer or Scanner option.

2. Allow Windows to start searching for Printers and click on The Printer that I want isn’t listed.
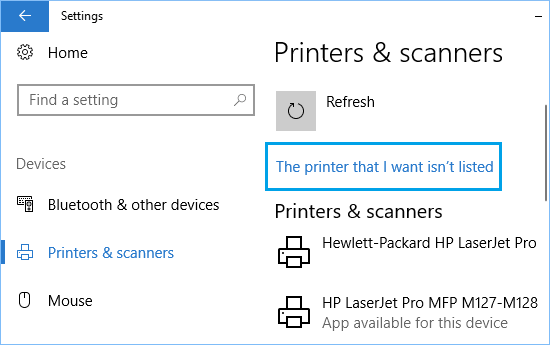
3. On the next screen, you will see various other options that you can try to find your printer.
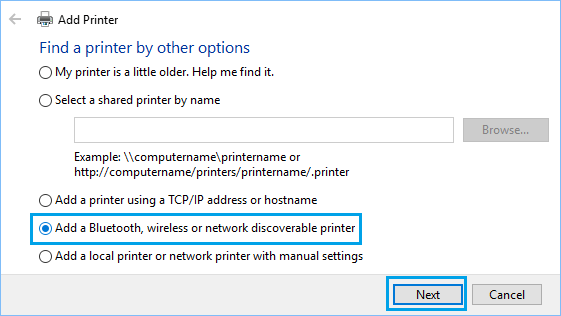
My Printer is a Little Older – Makes your computer to start a deeper scan, using different methods to detect different types of computers.
Select a Shared Printer by Name – This option is usually helpful in work environments, where you can go ahead and enter the full path to the printer as provided by your network administrator.
Add a Printer Using TCP/IP Address – This requires you to know the IP Address of your printer.
Add a Bluetooth, Wireless or Network Discoverable printer – Makes Windows 10 to perform another scan to find the printer.
Add a Local Printer or Network Printer with manual settings – This option is useful in case you have a printer that uses a serial or parallel port (LPT1, LPT2 …).
One of the above options, should help you find and Add the Printer to your computer.