If the Wake up Alarm function on iPhone is not working, you can find below the steps to troubleshoot and fix the problem of Alarm Not Working on iPhone.
iPhone Alarm Not Working
While it is really simple to Set an Alarm on iPhone, it is still possible even for experienced users to make a change in Alarm Settings and quit the Alarm App without saving the changes.
Another reason for Alarm Not Working on iPhone is due to users selecting Change Next Alarm only option, while trying to make changes to their Sleep Schedule.
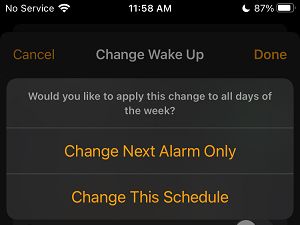
Selecting “Change This Schedule” ensures that Alarm works on all days of the week, while selecting “Change Next Alarm only” makes the Alarm work only for a day – Alarm won’t work on the next day.
With this understanding, let us go ahead and take a look at troubleshooting steps to fix the problem of Alarm not ringing on iPhone.
1. It is Not Due to Ringer Being Switched OFF
The Wake up Alarm on iPhone should ring, even if the physical Ringer switch located at the side of iPhone has been accidentally or intentionally moved to Mute or Silent position.
Since, Alarm is not working properly on your device, consider leaving your iPhone in Ring Mode for a day. This should rule out any possibility of iPhone Alarm function being impacted due to Ringer position.
2. Increase Alarm Volume
The problem might simply be due to the Ringtone and Alert Volume on your iPhone being set to a low level.
1. Go to Settings > Sounds and Haptics.
2. On the next screen, use the slider under “Ringer And Alerts” section to set the Ringtone and Alerts volume to a suitable level.
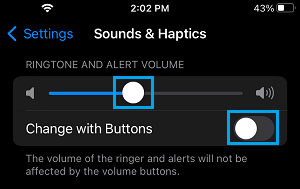
If required, you can disable Change with Buttons option to prevent the possibility of Ringer/Alerts Sound being set to low volume using the physical Volume up/down buttons.
3. Check Alarm Time
If you are travelling or just arrived in a New Country, the problem might be due to the Alarm Time not matching with your current location.
Also, it is not uncommon during stressful, demanding and busy periods to set an Alarm for 5-30 PM and expect it to goes OFF at 5-30AM.
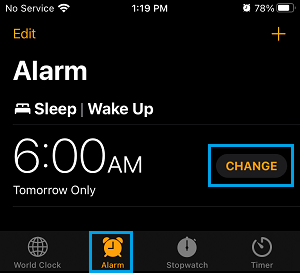
1. Open the Clock App on your iPhone.
2. Switch to Alarm tab and make sure the Alarm time is correct.
4. Disconnect Wired Headphones
The Alarm on iPhone should Ring at its scheduled time, even if your device is connected to wired or wireless headphones.
However, in ceratin cases both wired and wireless headphones can make iPhone get stuck in headphone mode, which may have an impact on the built-in speakers.
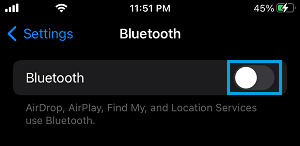
A simple solution to this issue, is to simply discoconnect the wired speakers by pulling them out and disconnect wireless speakers by switching OFF Bluetooth.
1. Go to Settings > Bluetooth.
2. Move the Slider next to Bluetooth to OFF position.
5. Did You Select A Proper Alarm Sound?
It is possible that the Alarm sound that you selected is simply unable to wake you up or causing a confusion in your mind.
This can happen, if the Alarm Sound on iPhone is set to Birdsong (see below) or any other natural sound and you somehow end up relating the Alarm to Birds chirping outside and other sounds from nature.
1. Open Clock App > switch to Alarm tab and tap on the Change option.

2. On the next screen, scroll down and tap on Sounds & Haptics option.
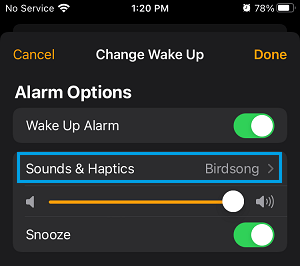
3. On the next screen, select you desired Alarm sound and tap on the Back button.
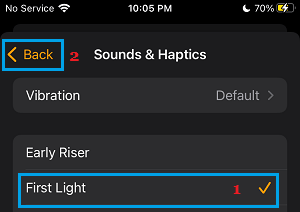
4. On Change Wake up screen, make sure that you tap on Done to save the changes made to the Clock App.
6. Delete Unecessary Alarms
Delete all Alarms from your iPhone and see if this helps in fixing the probkem.
1. Open Clock App > switch to Alarm tab and tap on the Edit option located at top-left corner.
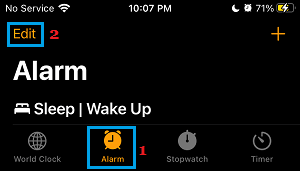
2. On the next screen, tap on the Red Minus button and then tap on the Delete option that becomes available.
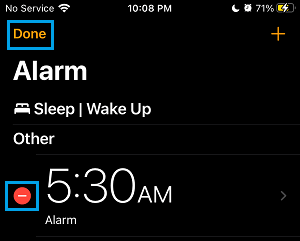
3. Make sure you tap on Done to save this change on your iPhone.
Repeat the above steps to delete other Alarms (if any) and Add a New Alarm that you want to use by tapping on the Plus Icon (top-left corner).
7. Install Updates
It is possible that the problem is due to a bug in the system for which Apple may have released a patch to fix the problem.
1. Go to Settings > General > Software Update.
2. On the next screen, tap on Download and Install (If an iOS update is available).
Patiently wait for the update to be downloaded to your device. Once the download is complete, install the update by tapping on Install Now option.
8. Reset All Settings
Note down the Password for your WiFi Network and follow the steps below to Reset All Settings on your device.
1. Go to Settings > General > Transfer or Reset iPhone > Reset.
2. On the pop-up, select Reset All Settings option.
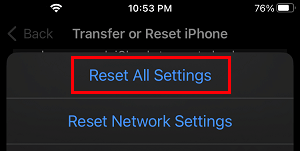
After iPhone Restarts, connect your device to Wi-Fi Network and make sure iPhone is set to Ring the Alarm at your desired time.