While the default setting in Windows is to use the DNS Servers of your Internet service provider, it also provides the option to change the DNS Server on your computer to any available public DNS service.
This can be useful, if you want to make use of advanced DNS features like Content filtering, Anti-phishing and Child protection controls as available in OpenDNS and other DNS service providers.
Also, if the DNS servers of your service provider appear to be constantly busy or overcrowded, switching to Google Public DNS, OpenDNS or Cloudflare might help in improving the browsing speed on your devices.
Change DNS Servers in Windows 11/10
You can find below 2 different methods to change the DNS Servers on a Windows computer. You can use any method that you find easy to use.
Related: How to Change Router DNS Server.
1. Change DNS Server Using Network Connections
You can follow the steps below to change the DNS Server on your Windows computer.
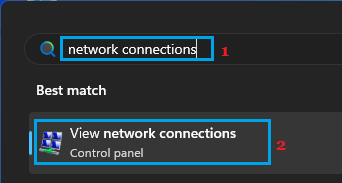
1. Type Network Connections in Windows Search bar and click on View Network Connections in the Search Results.
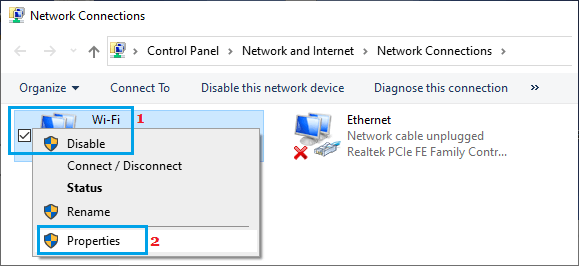
2. On Network connections screen, right-click on your active network (Wi-Fi or Ethernet) and click on Properties.
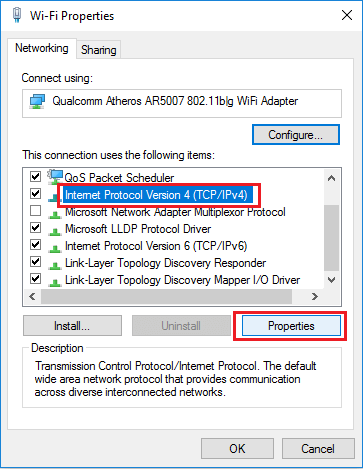
3. On Wi-Fi Properties screen, select Internet Protocol Version 4 (TCP/IPv4) entry and click on Properties.
4. On the next screen, select Use the following DNS Server addresses option and enter the DNS Server Address of your new DNS Service provider.
For example, if you want to use Google Public DNS Service, type 8.8.8.8 as your Preferred DNS Server and 8.8.4.4 as the Alternate DNS server.
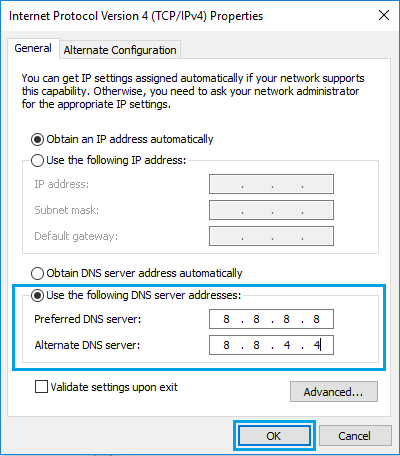
5. Click on OK to save the new DNS Server settings on your computer.
After this, make sure that you restart the computer in order to implement this change in DNS settings.
2. Change DNS Server Using Settings
If you prefer using the Settings menu, you can follow the steps below to change the DNS Server on your computer.
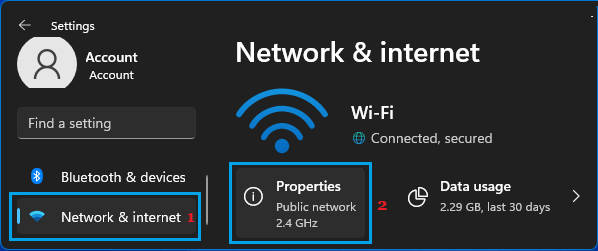
1. Go to Start Button > Settings Icon > Network & Internet (left-pane) > In the right-pane, click on the Properties tab located below the current active Network on your computer.
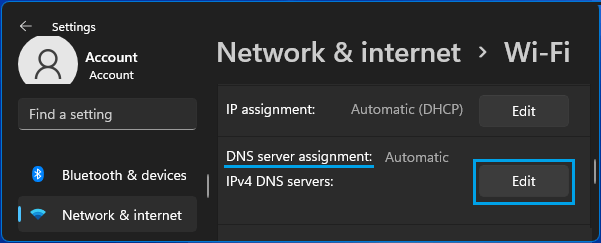
2. On Wi-Fi Properties screen, scroll down to DNS Server Assignment section and click on the Edit button.
3. On Edit Network DNS Settings pop-up, first select the Manual (1) option and enter the DNS Server Address of your New DNS Service Provider.
In this case, we are entering 8.8.8.8 as Preferred DNS and 8.8.4.4 as Alternate DNS Address, in order to use Google’s Public DNS Service.
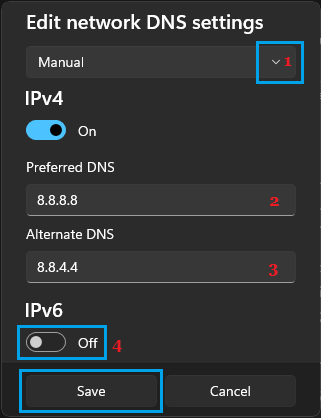
Note: If you want to use OpenDNS, type 208.67.222.222 as Preferred DNS and 208.67.220.220 as Alternate DNS.
Once you are done, make sure you click on the Save button to save the new DNS Server settings on your computer.