Sometimes you may find the need to take ownership of a File or Folder, in order to move, copy or edit that File or Folder on your computer. You can find below the steps to Change Ownership of File or Folder in Windows 10.
Change Ownership of File or Folder in Windows 10
By default, Windows 10 locks files and folders to the User that originally created them. Apart from the Admin, no one else is allowed to move, copy or edit Files or Folders created by other Users.
This issue can be easily fixed by changing or transferring the ownership of File or Folder to the User that you want to be able to edit that particular File or Folder.
Once the ownership of File/Folder is transferred to another User, the New User will be able to move, copy and edit that particular File/Folder.
Change Ownership of File or Folder in Windows 10
Follow the steps below to change ownership of File or Folder in Windows 10 from one user to another.
1. Open the File Explorer on your computer.
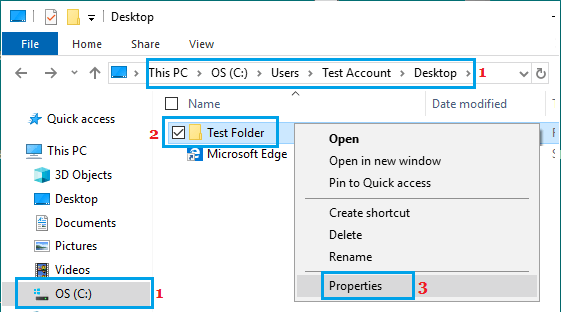
2. On the File Explorer screen, navigate to the location of the Folder > Right click on the File/Folder and click on Properties.
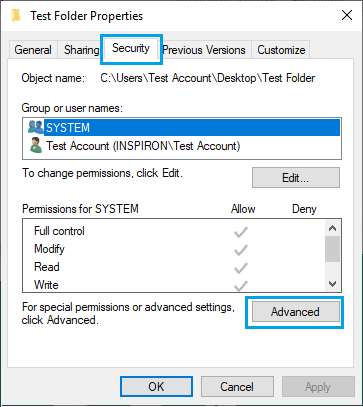
3. On File/Folder Properties screen, click on Security Tab and then click on the Advanced button.
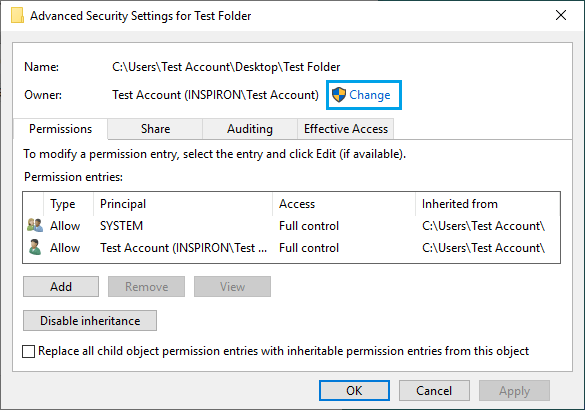
4. On Advanced Security Settings screen, click on the Change option located next to the Owner entry.
5. On Select User or Group window, click on the Advanced button.
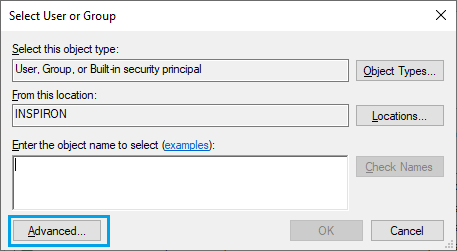
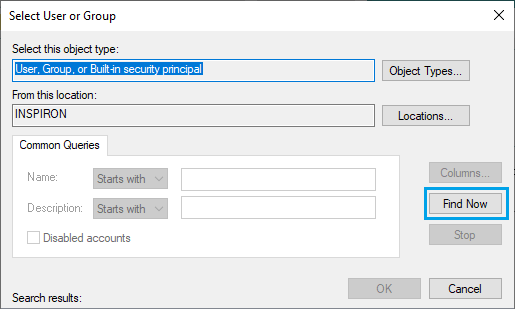
6. Next, click on Find Now button to bring up the list of all Users and Groups on your computer.
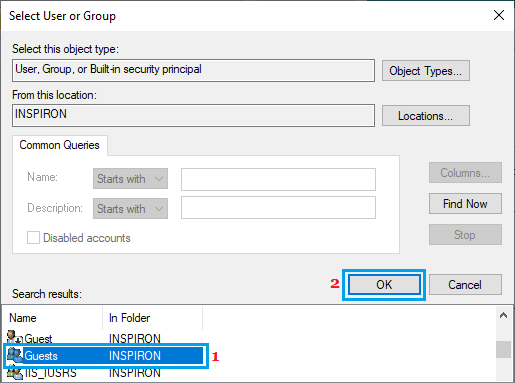
7. From the list of Users and Groups, select the User that you want to transfer the ownership of the File/Folder and click on the OK button.
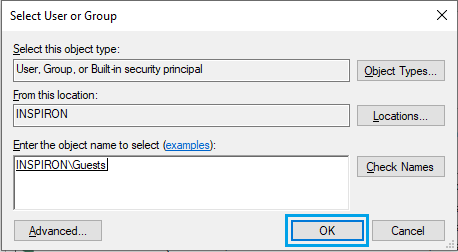
8. After the User is selected, click on the OK button.
9. On Advanced Security Settings screen, you will see the New Owner listed. The next, step is to transfer ownership of files and sub-folders within the folder.
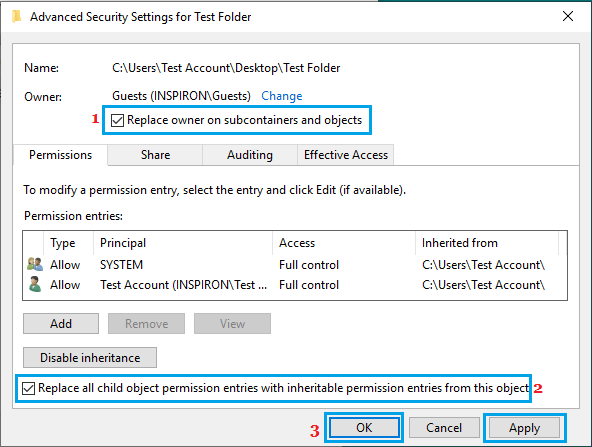
To do so, select Replace owner on subcontainers and objects and Replace all child permission entries with inheritable permission entries from the object options.
10. Click on Apply and OK to save the changes and exit the window.
After completing above steps, the ownership of the Folder including all Files and Sub-folders within the Folder will be transferred to the new owner.
In case required, you can go back to Advanced Security Settings and remove the old owner. This will ensure that only the newly assigned User has access to the Folder.