While the default setting on Mac is to save Screenshots to Desktop, you can change the Screenshot Save Location on your Mac to “Downloads” Folder or any other Location that suites your requirements.
For example, if you frequently take screenshots, you may find it better to save them to a dedicated Folder on your Mac, instead of allowing the Desktop to be cluttered with Screenshots.
Change Screenshot Save Location on Mac
All that is required to change the Screenshot Save Location on your Mac is to open the Screenshot Tool, click on the Options button and select from the following locations.
- Desktop: This is the default option that saves screenshots to the Desktop on your Mac.
- Documents: Saves the Screenshot to Documents Folder.
- Downloads: Saves the Screenshots to the Downloads Folder.
- Clipboard: Saves Screenshots to the clipboard, which allows you to paste Screenshots into other Apps.
- Mail: Automatically opens a New Email with the Screenshot attached.
- Preview: Opens the Screenshot in Preview App, allowing you to Edit the Screenshot, before saving it to your Mac.
- Messages: Automatically opens a New Message, allowing you to send the Screenshot right away to any of your Contacts.
- Other: Allows you to save Screenshots to New Folder or any other location on your Mac.
Once you select Downloads, Documents or any Location, your MacBook will remember the new setting and start saving Screenshots to your selected Location.
With this understanding, let us go ahead and take a look at the actual steps to change the Screenshot Save Location on your MacBook.
1. Steps to Change Screenshots Save Location On Mac
As mentioned above, the easiest way to change the default screenshot save location on your Mac is by using the Options menu as available within the Screenshot App.
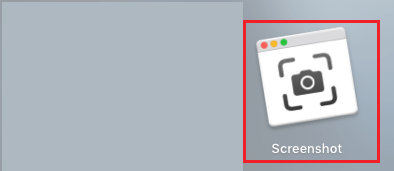
1. Open the Screenshot App on your Mac by pressing Command + Shift + 5 Keys.
You can also open the Screenshot App or Tool from the Launchpad: Click on the Launchpad icon > go to Others Folder > click on the Screenshot icon.
2. Once the Screenshot tool becomes available, click on Options and select Downloads, Documents or Other Location as your preferred New Location for Screenshots on your Mac.
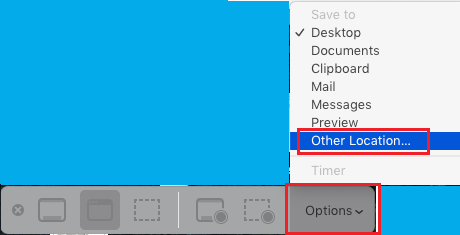
3. If you select Downloads, the Screenshots will be saved to the Downloads Folder on your computer. If you select Other Location, you will be prompted to select a specific Folder or Location, where you want to save the Screenshot.
2. Change Screenshot Save Location on Mac Using Terminal
Another way to change the screenshot save location on Mac is by using the Terminal.
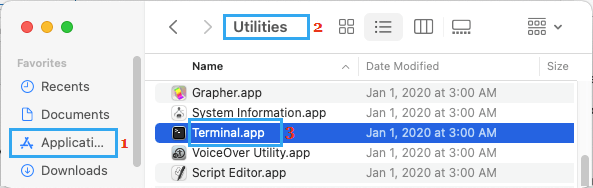
1. Open the Finder on your Mac > go to Applications > Utilities and click on Terminal.app.
Note: You can also press Command + Spacebar to open Spotlight Search > type Terminal in Spotlight Search and click on the Top Hit suggestion Terminal to open the Terminal Window.
2. On the Terminal screen, type defaults write com.apple.screencapture location /Users/Username/Downloads/ and press the Enter key.

3. Next, type killall SystemUIServer and press the Enter key.
This will change the screenshot save location to the Downloads Folder on your MacBook.
3. Save Screenshots to New Folder on Mac
You can create a New Folder > name the New Folder as “Screenshots” and save the screenshots to this New Folder Folder on your computer.
1. Open the Finder on your Mac.
2. From the Finder screen, navigate to Applications > Utilities and click on the Terminal.app.
3. On the Terminal windows, type defaults write com.apple.screencapture location /Users/Username/desktop/Screenshots/ and press the Enter Key.

4. Next, type killall SystemUIServer and press the Enter key.
This will change the default screenshot location on Mac to the New Screenshots Folder that you just created on your Mac.