Unlike Windows operating system, the “BIOS/UEFI” firmware does not receive frequent updates and most users do not find any pressing reason to check the version of BIOS/UEFI installed on their computers.
However, it is always a good idea to check the version of BIOS/UEFI installed on the computer, if you are thinking in terms of upgrading the computer with additional or faster RAM, new CPU, newer NVMe storage and other motherboard components.
You may also find the need to check the version of BIOS/UEFI installed on the computer, if it is frequently crashing and you suspect that the problem might be related to the BIOS/UEFI not being updated.
Check BIOS/UEFI Version in Windows 11/10
You can check and confirm the version of BIOS/UEFI firmware installed on a Windows 11/10 computer by using any of the following methods.
- Command Prompt: Using “wmic bios get biosversion” command.
- Run Command: Typing msinfo32 in the Run Command box.
- System Information App: Typing “System Information” in the Search bar.
- DirectX Diagnostic Tool: Typing dxdiag in the Run Command box.
If an update is required, you can update the computer to the latest version of BIOS/UEFI by using steps as provided in this guide: How to Update BIOS/UEFI in Windows 11/10.
1. Check BIOS Version Using Command Prompt
1. Type CMD in the Search bar > right-click on Command Prompt in search results and select Run as Administrator option.

2. On the Command Prompt Window, type wmic bios get biosversion and press the enter key on the keyboard of your compute.
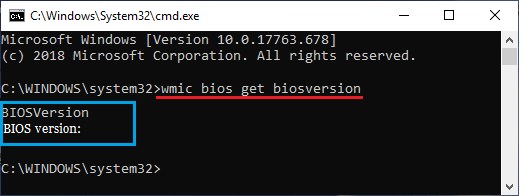
3. Once the Command is executed, the BIOS Version will be listed on the Command Prompt window.
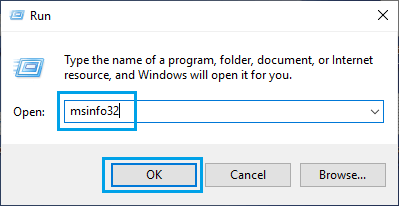
2. Check BIOS Version Using Run Command
Follow the steps below to find BIOS Version using the Run Command.
1. Right-click on the Start button and click on RUN.
2. In the Run Command window, type msinfo32 and click on OK.
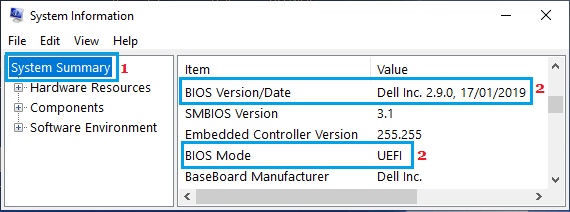
3. On System Information screen, you will be able to check BIOS version installed on your computer.
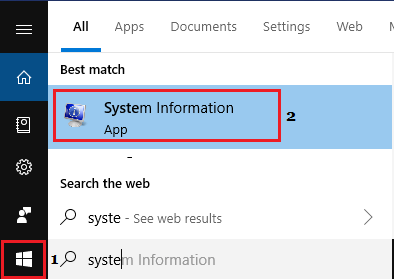
3. Check BIOS Version Using System Information App
Instead of using RUN Command, you can directly open System Information and check BIOS Version installed on your computer.
1. Type “System Information” in the search bar and double click on System Information App.
2. On “System Information” screen, scroll down to BIOS entry and you will be able to check the version of BIOS installed on the computer.
4. Check BIOS Version Using DirectX Diagnostic Tool
Another way to check the version of BIOS/UEFI firmware installed on a Windows computer is by opening the DirectX Diagnostic Tool window using Run Command.
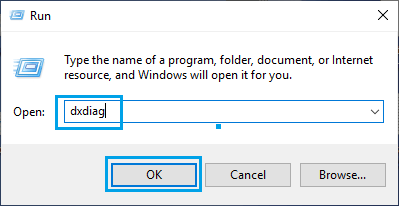
1. Open the Run Command on your computer.
2. Type dxdiag in the Run Command window and click on OK.
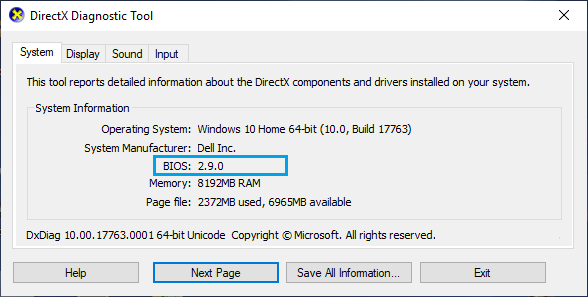
3. On the “DirectX Diagnostic Tool” screen, you will be able to see the BIOS version under “System information section.
After finding BIOS Version, you can go to the manufacturers website (DELL, HP, etc.) to check the latest version of BIOS as available for download.
Important: Update BIOS only if the computer is going through hardware related problems.