If the processor on a Windows computer is equipped with cache memory, it can store re-usable information in its own cache, instead of having to store it in the RAM (Random Access Memory).
Since, re-usable data is available within the cache, the processor does not have to spend time accessing this information from the main memory (RAM) of the computer.
In simple terms, a computer equipped with processor cache memory can potentially run faster, compared to a similar computer that can store re-usable information in its Random Access Memory.
However, when it comes to cost, processor cache memory is expensive, which explains the reason for lack of processor cache memory in low-end and budget computers.
Types of Processor Cache Memory
These are the most commonly used types of Processor Cache Memory used on computers.
- L1 cache: This is the primary cache embedded in the processor chip. This type of Cache is fast, but it offers very limited storage capacity.
- L2 cache: This secondary cache can either be embedded on the processor chip or made available on its own separate chip with a high-speed bus connecting it to the CPU.
- L3 cache: This type of processor cache is designed to serve as a backup for L1 and L2 caches. While L3 Cache is slower compared to L1 and L2 Caches, it is faster than RAM and offers significant boost to the performance of L1, L2 Cache.
Since, L1 type Cache offers limited storage space, most high-end and mid-level computers come equipped with L2 and L3 types or processor cache memory.
Check Processor Cache Memory in Windows 11/10
You can check whether or not your computer is equipped with processor cache memory and the type and amount of processor cache memory installed on the computer by using any of the following methods.
1. Check Processor Cache Memory Using Task Manager
An easy way to check the type and amount of processor cache memory available on your computer is by opening the Task Manager.
1. Right-click on Start button and click on Task Manager.
2. On Task Manager screen, switch to Performance tab > select CPU and you should be able to see L1, L2 and L3 Cache sizes listed under “Virtualization” section.

As you can see in the image above, the CPU in this case has very small L1, L2 and L3 Cache size.
2. Check Processor Cache Memory Using Command Prompt
If you like using Command prompt, you can find the type and size of processor cache memory on your computer by using WMIC command.
1. Type CMD in the Search bar > right-click on Command Prompt in search results and select Run as Administrator option.

2. On the Command Prompt screen, type wmic cpu get L2CacheSize, L3CacheSize and press the Enter key on the keyboard of your computer.
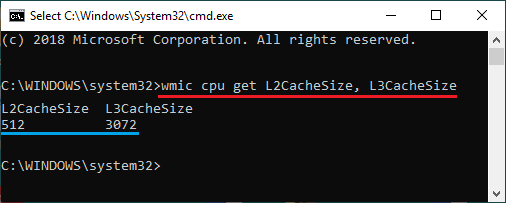
3. Once the command is executed, you will find L2, L3 Cache size information displayed on the screen.
3. Check Processor Cache Memory Using Settings
You can find the make and model of the processor installed on your computer by using Settings and use this information to check whether or not this type of processor is equipped with a cache.
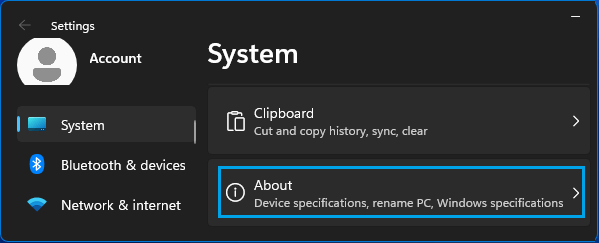
1. Go to Settings > System > scroll down in the right-pane and click on About.
2. On the next screen, you will find information about the make and model of the processor installed on your computer.
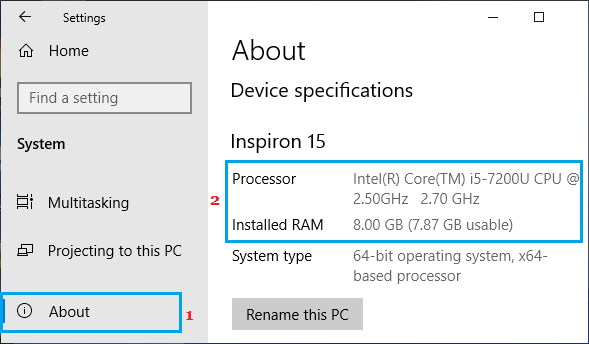
Once you know the make and model of the processor (Intel Core i5-7200 in this case), you can use Google to get detailed specifications of this processor.