While the problem of a computer that turns on with Black or No Display does point to possibility of the screen or the display device being faulty, it can also occur due to other reasons.
For example, it is not uncommon to find cases of this problem being caused due to USB devices plugged to the computer becoming incompatible with Windows operating system.
If you are lucky, the problem might simply be due to a stuck app or processes interfering with proper functioning of the display device.
Computer Turns On with Black or No Display
If you can hear your Windows 11/10 computer turning ON but there is no display on the screen, you should be able to fix the problem using the following troubleshooting steps.
1. Inspect Connections & Monitor
If you are using an external monitor, start by checking all the cables that are connected to the display on your computer and make sure that all connections are right and there are no loose connections.
After this, make sure that the Monitor is switched ON and you can see the power light on the monitor.
2. Power Flush the Monitor
As mentioned above, the problem could simply be due to a stuck app or process.
1. Shut Down the computer and make sure you also unplug the Monitor from its Power Supply Source.
2. Wait for 60 seconds > plug the Monitor back to its Power Supply source and restart the computer by pressing the Power button.
3. Disconnect All Connected Devices
Sometimes, the problem is due to a USB plugged device becoming incompatible with Windows operating system.
1. Power OFF the computer by using its Power button or by using the Shut Down option.
2. Once the computer is completely switched OFF, remove all the USB Connected devices from the computer (Except Keyboard and Mouse).
3. Start the computer by pressing the Power button and see if the display is now working. If the Display is working, it confirms that the problem is due to one of the USB connected devices.
You can identify the incompatible device by connecting USB devices one-by-one to the computer, until you find the device that causes the display to switch OFF.
Once, the device is found, see if you can update its driver. If not, you will have to stop using this device.
4. Reset BIOS to Default Settings
If you are using a Desktop computer, you can Reset its BIOS to default Settings by using the following steps.
1. Power OFF the computer by using the Shut Down option or the Power Button.
2. Once, the computer is powered OFF, disconnect the computer from its power supply source.
3. Wait for 60 seconds > open the casing and remove the CMOS battery from the motherboard.
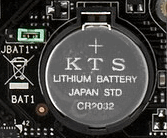
4. After removing the battery, wait for 60 seconds and put the CMOS battery back into the Motherboard.
5. Close the casing > connect the computer to its power supply source and switch ON the computer.
Note: Sensitive computer parts can suffer damage due to static shock. Hence, make sure that you do not touch any part with your bare hands (Wear gloves).