The default setting in Google Chrome browser is to frequently check for updates and automatically install them on the computer. However, it is possible to disable Automatic Chrome updates on a Windows computer using different methods as provided in this guide.
After disabling Automatic updates, you can manually check for updates by opening the Chrome settings menu and clicking on Help or About tab.
If an update is available, Google Chrome will automatically download the update and promptly install the update, in order to ensure the security and proper functioning of the Chrome browser installed on your computer.
Disable Automatic Chrome Updates
While automatic updates are good and designed to keep the browser safe, users have reported the following reasons for disabling automatic updates in Google Chrome.
1. Automatic updates happen in the background, without any prior notice or user permission.
2. Unscheduled Auto-updates can slow down the computer, just when you are trying to get something important done on the computer or trying to meet a stiff deadline.
3. Microsoft Edge browser provides the option to disable auto-updates by opting for a metered connection. This option is lacking in Google’s Chrome browser.
4. Latest update may remove certain functionalities in the browser that you like using.
5. Prevent the Chrome browser from using up resources on the computer by frequently checking for updates in the background.
If you agree with above or have your own reasons, you can use any of the following methods to prevent Google Chrome browser from automatically updating on your computer.
1. Disable Automatic Chrome Updates Using System Configuration
Perhaps, the easiest way to disable Automatic Chrome updates is by going to the System Configuration screen on your Windows 11/10 computer.
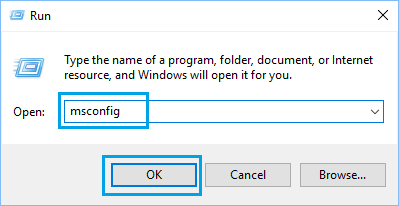
1. Right-click on the Start button and click on Run.
2. In the Run Command window, type msconfig and click on OK.
3. On System Configuration screen, switch to the Services tab and uncheck both GoogleUpdater services.
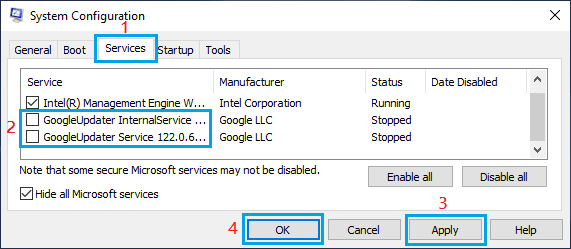
4. Click on Apply and OK to save this change on your computer.
Make sure that you restart the computer to implement this change.
2. Disable Automatic Chrome Update Using Service Manager
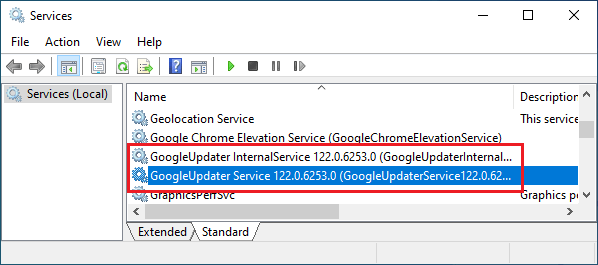
1. Open Run Command > type services.msc and click on OK.

2. On the Services screen, double click on GoogleUpdater Service.
3. On the pop-up, change the Startup type to Disabled.
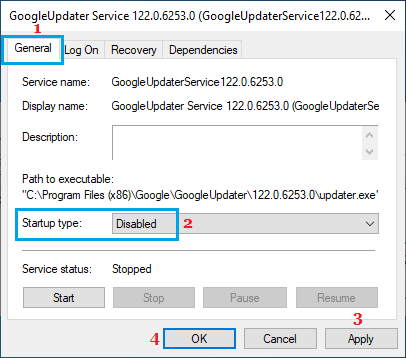
4. Click on Apply and OK to save this change.
Similarly, double-click on GoogleUpdater InternalService or similar and change the Startup type to Disabled and restart the computer to implement this change.
3. Rename Google Chrome Update Folder
Another way to prevent Google Chrome from updating is to rename the Chrome Update Folder.
1. Open the File Explorer on your computer.
2. Navigate to C:\Program Files(x86) and locate Google Folder.
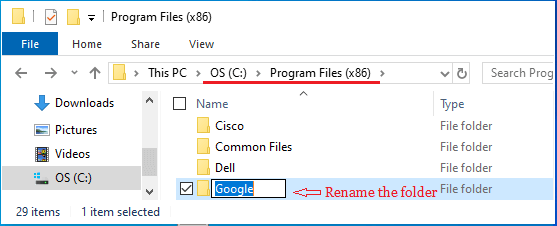
3. Right-click on Google Folder and Rename the Folder to 123Google or something else that you can easily undo.
4. Rename Google Update Application
If you are unable to rename the update folder, you can rename GoogleUpdate application file and this will prevent the Chrome browser from automatically updating.
1. Open the File Explorer on your computer.
2. Navigate to C:\Program Files(x86)\Google and locate GoogleUpdate Folder.
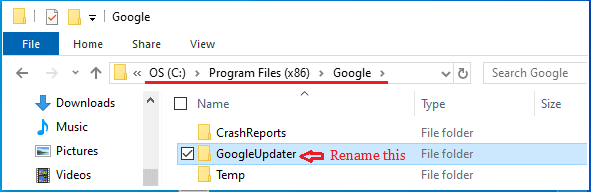
3. Right-click on GoogleUpdater application folder and Rename the Folder to 123GoogleUpdater or something else that you can easily change later on.
Why Not Disable Automatic Chrome Updates?
While you can disable Automatic Chrome Updates by using any of the above methods, it important to make sure that you re-enable Chrome Auto-updates back on your computer.
Preventing the Chrome browser from installing updates for a long time can make your computer vulnerable to viruses and other security issues.
Apart from this, you may miss out on new features and improvements made by Google to its browser. Hence, it is important that you either re-enable Auto-updates or remember to manually check for updates.