If you are looking for a way to disable the On-screen keyboard on your computer, it likely that the On-screen keyboard is bothering you by starting up automatically or popping up unexpectedly.
This can happen, if you had accidentally or intentionally enabled the On-Screen Keyboard and it was also set up to become available at the Login Screen and stay switched ON for later use.
Disable On-Screen Keyboard in Windows 11/10
The easiest way to switch OFF the On-screen Keyboard on a Windows computer is by using the Windows + CTRL + O keyboard shortcut, which works both for switching OFF and switching ON the keyboard.
While the Windows + CTRL + O shortcut can be used to dismiss the keyboard, it cannot be used to prevent the On-Screen keyboard from starting up with the computer.
However, you can easily Disable the On-screen keyboard and prevent it from starting up with the computer by using any of the following methods.
1. Disable On-Screen Keyboard Using Options Key
If the On-Screen Keyboard is already open, you can prevent it from starting up automatically by going to On-Screen Keyboard Options screen.
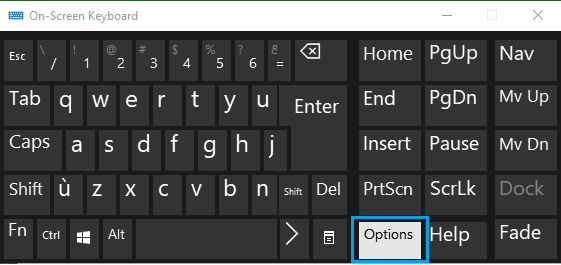
1. Using your Mouse or Trackpad, click on Options key on the On-Screen Keyboard.
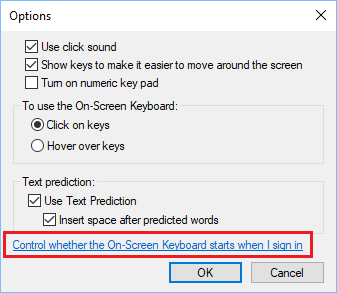
2. On Options screen, click on Control Whether the On-Screen Keyboard Starts when I Sign in link.
3. On the next screen, Uncheck Use On-Screen Keyboard Option.
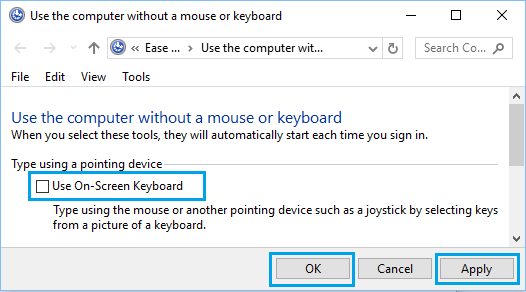
4. Click on Apply and OK to save this setting for On-Screen Keyboard on your computer.
After this, you will no longer find the On-Screen Keyboard starting automatically with your computer.
2. Disable On-Screen Keyboard Using Settings
The easiest way to disable the On-Screen keyboard in Windows is by going to the Accessibility Settings on your computer.
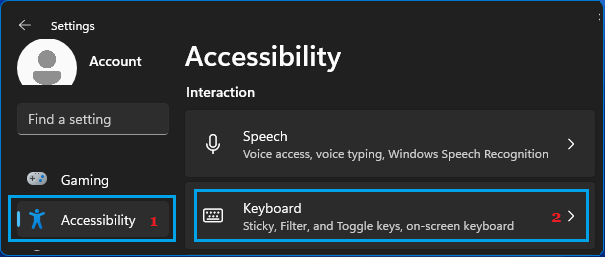
1. Go to Settings > Accessibility > scroll down in the right-pane and click on Keyboard tab, located under “Interaction” section
2. On the next screen, move the Slider next to On-Screen Keyboard to OFF position.
Windows 10: Go to Settings > Ease of Access > select Keyboard in the left-pane > Disable On-screen keyboard in the right-pane.

3. Disable On-Screen Keyboard Using Control Panel
You can also prevent the On-Screen Keyboard from popping up on the screen of your computer by using Control Panel.
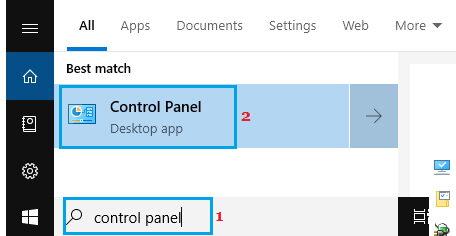
1. Type Control Panel in the search bar > Click on Control Panel Desktop App in the search results.
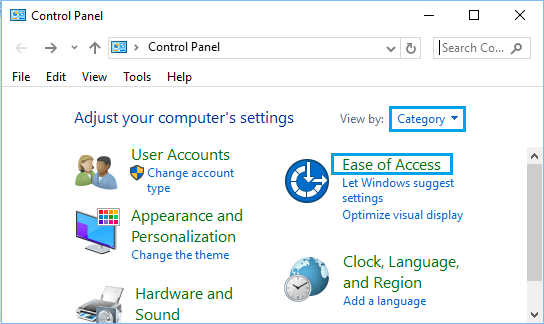
2. On the Control Panel screen, switch to Category view and click on Ease of Access.
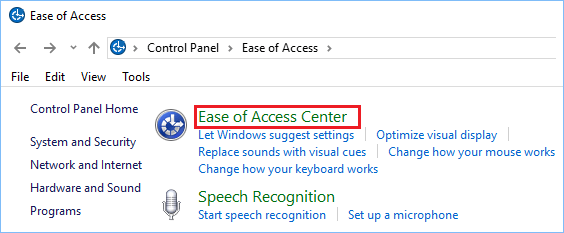
3. On the next screen, click on Ease of Access Center.
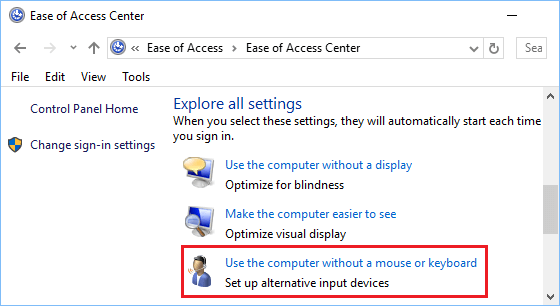
4. On Ease of Access Center screen, scroll down and click on Use the Computer Without a Mouse or Keyboard link under “Explore all Settings” section.
5. On the next screen, Uncheck Use On-Screen Keyboard option.
6. Click on Apply and OK to save this setting on your computer.
4. Disable On-Screen Keyboard By Using Registry
Advanced users can completely disable the On-Screen Keyboard by using the Registry Editor Screen.
1. Open Run Command > type regedit and click on OK.

2. From the Registry Editor screen, navigate to HKEY_LOCAL-MACHINE > Software > Microsoft > Windows > CurrentVersion > Authentication > LogonUI.
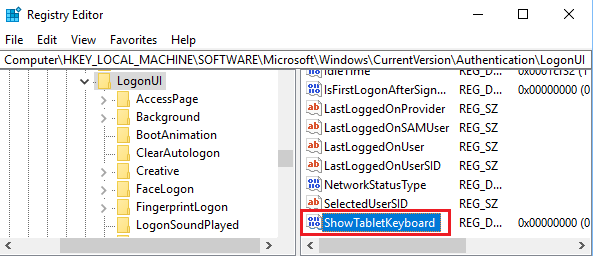
3. In LogonUI Folder, open ShowTabletKeyboard Key by double-clicking on it and set its Value to 0 and this will disable the On-Screen Keyboard on your computer.
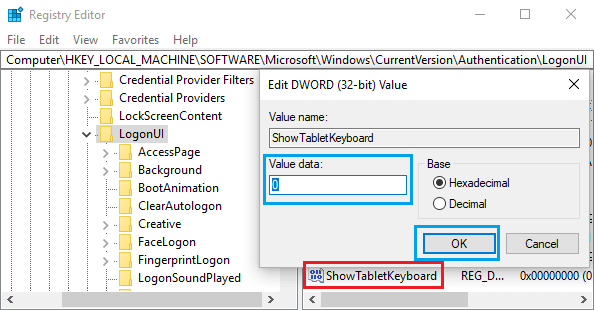
Note: If ShowTabletKeyboard Key does not exist on your computer, you can create the key by right-clicking and selecting Create New Key option.