If you are looking for a way to disable two-sided printing on Mac, it is likely that your printing requirements are mostly confined to printing homework assignments, essays, research papers and resumes, which need to be printed on a single side.
In such cases, you are better off disabling two-sided printing on Mac, in order to prevent the possibility of paper, toner and time being wasted, if your documents end up being printed on both sides of the paper.
This can happen, if two-sided printing is accidentally selected and you forget to disable it or the two-sided printing option gets linked to your user profile.
Disable Two-Sided Printing on Mac
The Print setup on a MacBook is based on CUPS (Common Unix Printing System), which is an open source modular printing system developed by Apple for Unix based systems.
Hence, the first step is to enable the “CUPS Interface” on your Mac, which contains or provides the option to disable two-sided printing on its Settings page.
Step 1. Enable CUPS Interface on Mac
Follow the steps below to enable the CUPS browser Interface on your MacBook.
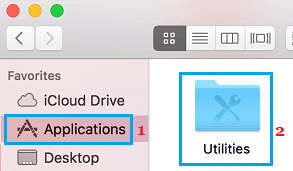
1. Open the Finder on your Mac > click on Applications in the left-pane and open Utilities Folder in the right-pane.
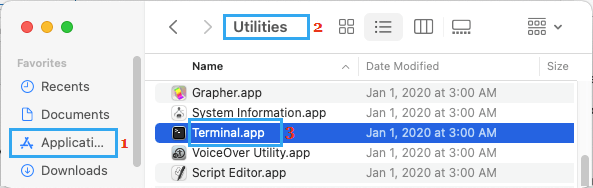
2. In the Utilities Folder, click on the Terminal.app.
3. On the Terminal Window, type sudo cupsctl WebInterface=yes and press the Enter key on the keyboard of your Mac

Once this command is successfully executed, you will be able to access the CUPS Interface using Safari or any other web browser on your Mac.
Step 2. Disable Two-sided Printing on Mac
After enabling CUPS interface, you can follow the steps below to access CUPS Settings page and disable two-sided printing on Mac.
1. Open the Safari browser on your Mac.
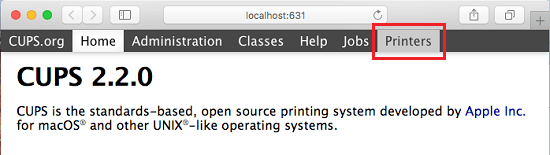
2. Type “http://localhost:631/printers” in the browser press the enter key – This should take you to CUPS Settings Page.
Note: Although you are accessing the CUPS Settings page via Safari browser, the page itself is not online and what you are seeing is located right on your computer.
3. When prompted, enter the Username and Password that you normally use to login to Mac.
4. On the CUPS settings page, click on the Printers tab in the top menu bar.
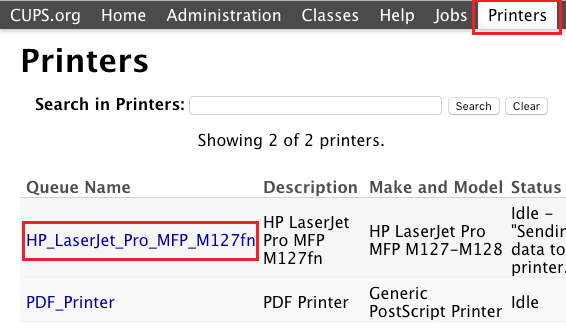
5. On the Printers page, you will see a list of printers > Select the Printer for which you want to change the print settings.
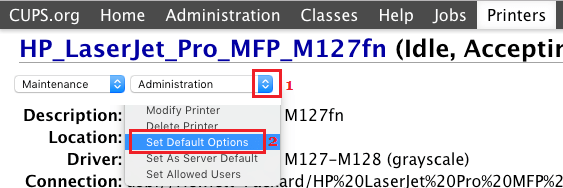
6. On the printer’s configuration page, click on down-arrow next to “Administration” and select Set Default Options in the drop-down menu.
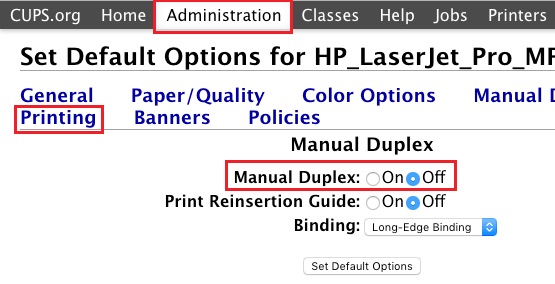
7. On the next screen, go to Administration > Printing and set Duplex Printing Mode to OFF position.
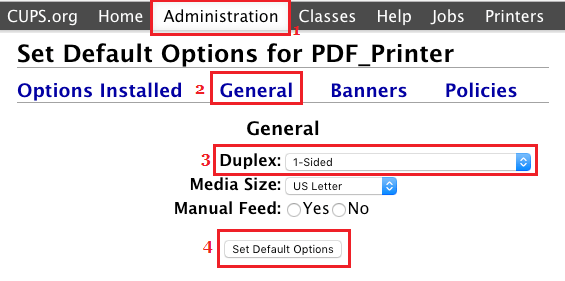
Note: For some printers the Duplex Printing Mode option is located under General Settings, as you can see in the below screenshot.
8. Make sure you click on Set Default Options button to save the changes.
Now, close the browser and try to print any document. You will see that the Two-sided printing option is no longer enabled by default on your Mac.
From now, you will no longer go through those frustrating episodes of having to discard two-sided print jobs and printing them again.