The built-in camera on a Laptop makes it easy to video chat with family, friends, relatives and conduct business related online meetings. However, there are cases, where you may find the need to disable the webcam on your Windows computer.
In general, most users think in terms of disabling the camera or the webcam on a computer that is being used by children and also if the computer is being used by an older non-tech savy person.
How to Disable Webcam In Windows 11/10
You can find below the steps to Disable Webcam on a Windows 11/10 computer and also the steps to Enable the Webcam back, in case you find the need to use the Webcam.
1. Disable Webcam Using Device Manager
Follow the steps below to switch OFF the built-in Camera on your computer using device manager.
1. Right-click on the Start button and click on Device Manager in the menu that appears.
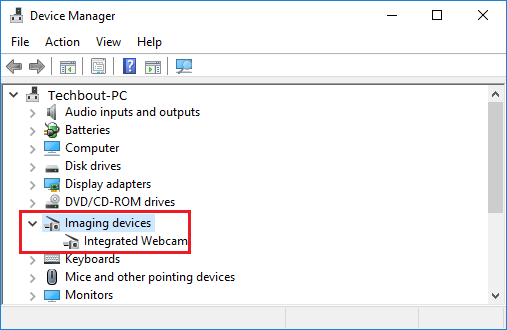
2. On the Device Manager screen, expand the entry for Cameras or Imaging Devices.

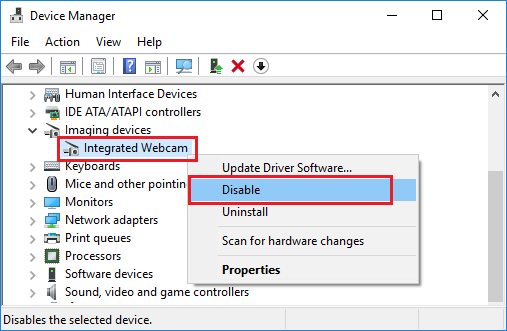
3. Next, right-click on Integrated Webcam and click on Disable in contextual menu that appears.

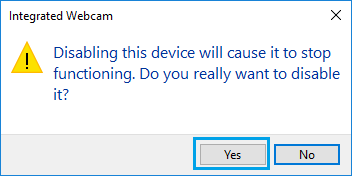
4. On the Confirmation pop-up, click on Yes to confirm your action.

5. Restart the computer.
The above steps will switch off the built-in camera on your computer.
Note: You may also want to cover the webcam with a tape or use webcam covers as available on Amazon.
2. Enable Webcam Using Device Manager
At any time you can enable back the Webcam on your computer by following the steps below.
1. Right-click on the Start button and click on Device Manager.
2. On the Device Manager screen, expand Cameras or Imaging devices entry.

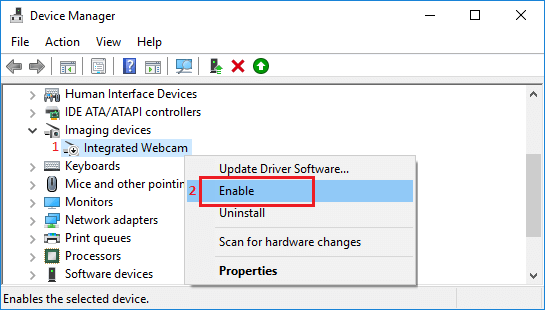
3. Next, right-click on Integrated Webcam and click on Enable in the contextual menu that appears.

After this restart your computer and you will be able to use the Camera once again on your computer.