The term Keylogger is mostly associated with spyware or malware programs designed to record the key strokes of unknowing computer users in a covert manner, with a harmful intent.
In the case of Windows 10, the term Keylogger began to be associated with the program when the trial version of Windows 10 was released with a built-in Key logging functionality.
If permitted by the Privacy settings on your computer, the official or the public release version of Windows 10 has the capability to collect information from your computer.
In this regard, you can refer to Microsoft’s Support Page to learn more about the type of information collected by Windows 10 and the steps to control and personalize data collection on your computer.
How to Disable Keylogger in Windows 10?
If you are concerned about the presence of Keylogger on your computer, you can follow the steps below to disable Keylogger on your Windows computer.
1. Go to Settings > Privacy > select Feedback & Diagnostics in the left-pane. In the right-pane, select the Basic option.
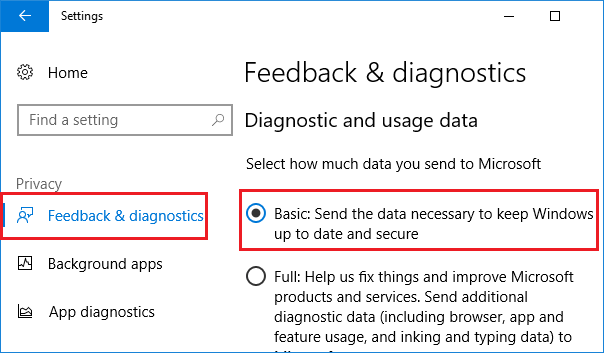
Selecting the “Basic” option prevents information about Apps and Programs that you open on your computer from being sent to Microsoft.
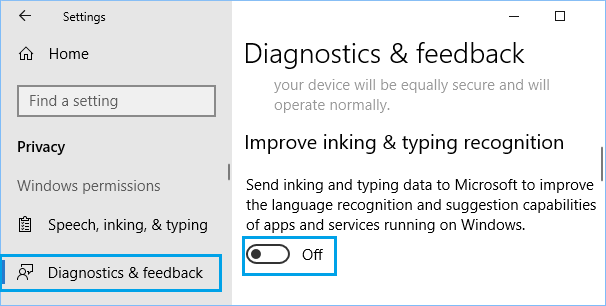
2. Next, go to Settings > Privacy > Diagnostics & feedback and turn OFF Send inking and typing data to Microsoft Option.
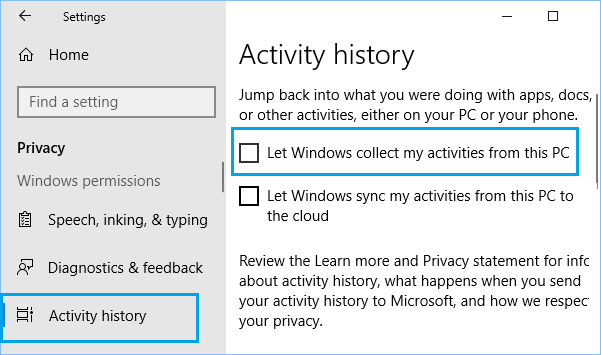
Also make sure that you disable “Let Windows collect my activities from this PC” in Activity History Section on the Privacy screen.
3. Go to Settings > Privacy > Activity History and uncheck “Let Windows collect my activities from this PC” option.
In case you are still concerned, you can change registry settings to totally disable Telemetry and data collection on your computer.