While the “Do Not Disturb” mode on iPhone is designed to work at a global level (block all call & message alerts from everyone), it can be configured to Allow Calls from Specific Contacts and block call & message alerts from specific Contacts or a particular individual that you do not want to call or message you; during a selected period of time.
For example, you may want to prevent a particular person or certain Contacts from influencing you in any way, while you are in the process of awarding a Contract or making an important personal or business related decision.
Apply “Do Not Disturb” for Specific Contacts on iPhone
You can enable “Do Not Disturb” or DND mode for specific Contacts on iPhone by adding these Contacts to the People tab in DND Mode and configuring DND mode to block call/message alerts only from these selected Contacts. This will result in all calls and messages from these selected Contacts being silenced, as long as your iPhone remains in “Do Not Disturb” mode.
The good thing about this setup is that call and message notifications from these Contacts (if any) will still be available on your device; which allows you to check them and get in touch with these Contacts (If required).
1. Open the Settings App on your iPhone.
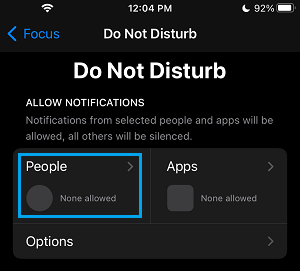
2. From the Settings screen, go to Focus > Do Not Disturb and tap on the People tab.
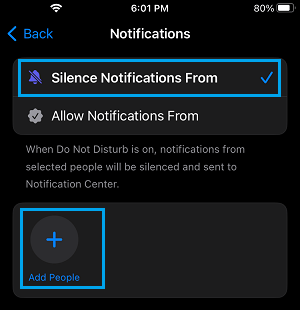
3. On the next screen, select Silence Notifications from option and tap on +Add People icon.
4. On the next screen, select the Contacts that you want to Silence Notifications from.
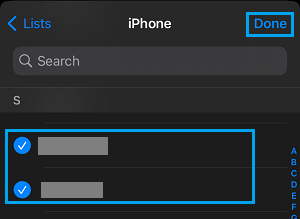
5. Once you are done adding the selected Contacts, tap on Done to save this setting on your iPhone.
After this, your iPhone will not bother you with Notifications; when these selected Contacts try to contact you by calling or messaging your device during your set “Do Not Disturb” period.
2. Remove Contacts from “Do Not Disturb” Mode on iPhone
Whenever the purpose of adding these selected Contacts to “Do Not Disturb” is completed, you can remove them from “Do Not Disturb” mode.
1. Go to Settings > Focus > Do Not Disturb > tap on the People tab.
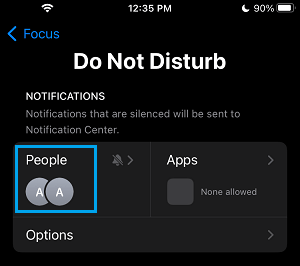
2. On the next screen, tap on the minus icon located above the Contact that you want to remove from “Do Not Disturb” block on your iPhone.
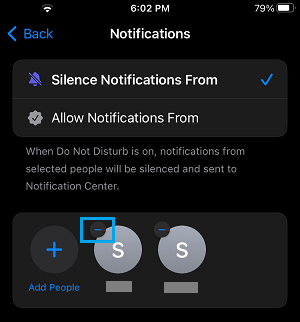
Once you tap on the minus icon, the Contact will be removed from “Do Not Disturb” mode block on your iPhone.