The “Driver Power State Failure” is also known as Blue Screen of Death (BSOD) and it usually occurs when a device driver fails to respond properly to power management request from the system.
The reason for BSOD error on a Windows computer could be due to a device driver becoming outdated or corrupted and also due to power supply to the driver being switched OFF by the computer, in order to save power.
Fix Driver Power State Failure in Windows 11/10
In many cases, the problem can be fixed by restarting the computer, which has the potential to auto-correct drive related issues by installing the right required drivers.
Hence, completely power off the computer by pressing the Power button > Wait for 60 seconds and Restart your device.
1. Remove Connected Devices and Restart
The reason for BSOD error on your computer could due to an external device attached to the computer going through driver related issues. Hence, remove all the USB connected devices from the computer and restart.
If the computer restarts normally, it confirms that the problem is being caused by the driver of an external device attached to the computer becoming incompatible or not being properly loaded.
2. Boot the Computer is Safe Mode
If your computer is repeatedly booting into BSOD screen, you can follow the steps as provided in this guide to start your computer in Safe Mode: How to Boot Windows 10/11 Computer in Safe Mode.
After the computer starts in Safe Mode, you can follow the next steps to Update Drivers, Reinstall Drivers and change the power settings on your computer.
Note: Follow the next steps, even if the computer has started normally.
3. Scan For Hardware Changes
The Device Manager Utility as available on a Windows computer provides the option to scan the computer for hardware changes and install the required drivers.
1. Right-click on the Start button and click on Device Manager.
2. On the device Manager screen, click on Action > Scan for Hardware Changes.
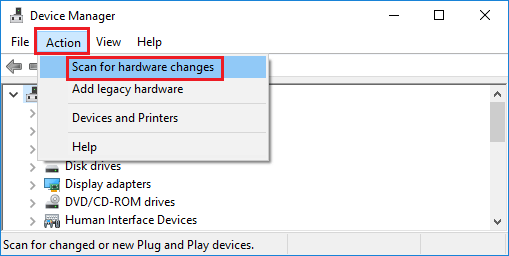
Windows will scan the computer for Hardware changes and install/update device drivers (if required)
4. Uninstall Faulty Device Drivers
You can manually check and uninstall Faulty device drivers (if any) by going to the Device Manager screen on your computer.
1. Right-click on Start button and click on Device Manager.
2. On the Device Manager screen, right-click on the Device with exclamation mark and select the Uninstall option in the right-click menu.
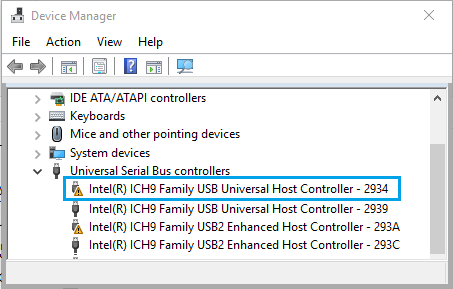
Note: The yellow exclamation mark indicates an outdated, faulty, corrupted or missing device driver.
3. Repeat the above steps for other devices with yellow exclamation marks (if any) and Restart the computer.
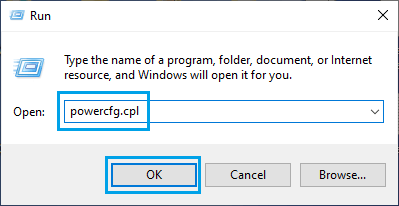
5. Set the Computer to Balanced Power Plan
As mentioned above, the reason for “Driver Power State Failure” could be due to the power supply to the drivers being switched off by the computer to save power.
In such cases, it is recommended that you to set your computer to either “Balanced” or “High Performance” Power Plan Setting.
1. Press Win + R Keys to open the Run Command on your computer.
2. Type powercfg.cpl and click on OK.
3. On the Power Options screen, select the Balanced Plan.
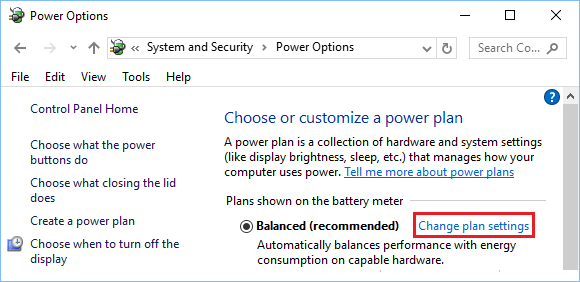
4. Click on Apply and OK to save this Power Plan Setting on your computer.
6. Use System Restore
If the problem has started after installation of an update, app or desktop program, you should be able to undo the changes made on your computer by using System Restore.
You can find the steps to System Restore the computer in this guide: How to System Restore Windows 11/10 Computer.