You may find the need to System Restore your computer, if it has become unstable after installation of an update, app, desktop program or due to change in System Settings and other reasons.
This can be done, if the “System Protection” feature was enabled on your device and a System Restore Point was automatically created by the System and also if you had manually saved a System Restore point on your computer.
System Restore Windows Computer
Before going ahead with the steps to Restore the computer using System Restore, you need to be aware that System Restore will take back the computer to the same status or condition at which point the System Restore Point was created.
Hence, it is important to make sure that the System Restore point; which is being used to Restore the computer is suitable for the purpose that you are trying to perform a System Restore on your computer.
If your computer has become very unstable, you can restart or boot the computer in Safe Mode and then perform a System Restore, using the second method as provided below in this guide.
1. Steps to System Restore Windows 11/10 Computer
If a valid System Restore Point is available on the computer, you can follow the steps below to recover the computer using System Restore.
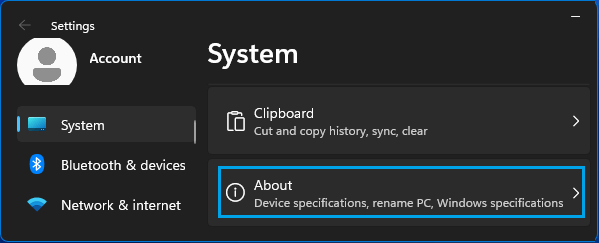
1. Open Settings > select System in the left-pane. In the right-pane, scroll down and click on About.
2. On About screen, click on System Protection link, located in “Related Links” section.

Windows 10: Go to Settings > System > About (left-pane) > click on System Protection link in the right-pane.
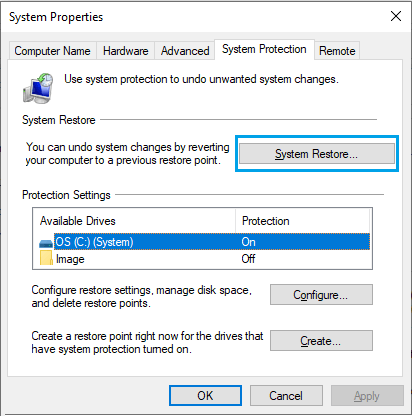
3. On System Properties screen, select the Drive that you want to Restore and click on System Restore.
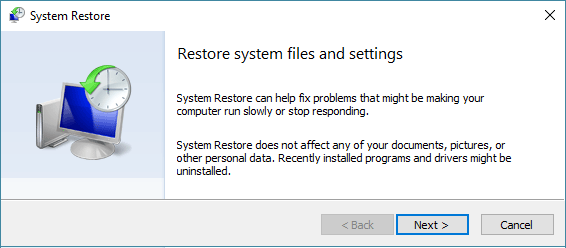
4. On System Restore screen, click on the Next button.
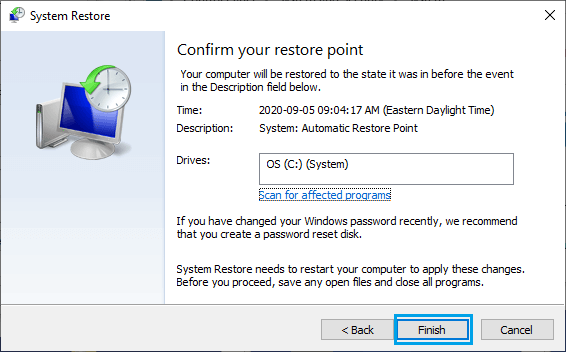
5. On the next screen, check Show more restore points option > select the Restore Point that you want to use and click on Next.
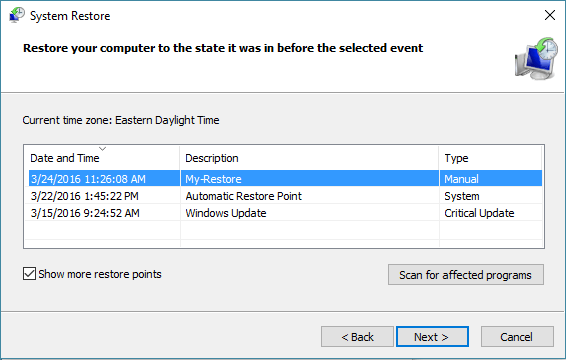
Note: After selecting Restore Point, it is better to click on Scan for affected programs option to take a look at Apps and programs that might be removed by the Restore process.
6. Click on Finish to start the System Restore process.
You will now see a pop-up indicating that progress of System Restore process. Once the Restore Process is completed, you will see a pop-up informing that your System has been restored.
After the Restore Process is completed, you should find your computer in the same working condition as it was when the System Restore Point was created.
2. System Restore Windows Computer in Safe Mode
If your computer has become unstable, you can follow the steps below to perform a System Restore in Safe Mode.
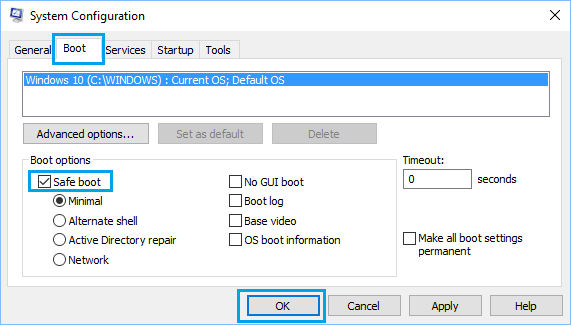
1. Press Win + R keys to open Run Command > type msconfig and click on OK.

2. On the System Configuration screen, go to Boot tab, select Safe Boot with Minimal option and click on OK.
3. On the pop-up, click on Restart to start the process of starting your computer in Safe Mode.
4. After the computer starts in Safe Mode, go to Settings > System > About > scroll down in the right-pane to “Related Links” and click on System Protection link.
5. Follow the steps as provided above (3,4,5 & 6) to complete the System Restore process.
Once the Restore process is completed, you should find your computer coming back to its normal working condition.