Windows operating system provides the option to create both manual & automated System Restore points on the computer, which can be used to Restore the computer back to its previous working status.
For example, if your computer is not performing well after installation of an app, program or due to change in System Settings, you can undo the change by Restoring the computer back to its previous status using a System Restore Point.
As indicated by its name, a “System Restore Point” contains a backup of system files, program files and Registry Settings as available on the computer at a specific point of time.
This also means that a “System Restore Point” is not a complete backup of the computer. It does not include your documents, spreadsheets, Power Point files, photos and other types of user created files.
Note: To backup personal files, you can make use of Backup & Restore.
Create System Restore Point in Windows 11/10
Depending on the requirements, you can setup your device to automatically create System Restore Points and also create manual System Restore Points, prior to making changes or installing third-part apps on the computer.
When the computer is setup to create System Restore Points, it will automatically create System Restore Points, whenever it detects an update, installation of app/program and changes being made on the computer.
However, it is always a good practice to manually create a System Restore point on the computer, when you are installing third-party apps and making system wide changes on the computer.
1. Automatically Create System Restore Points in Windows 11/10
All that is required to create Automated System Restore points on your computer is to Enable System Protection feature on your device.
1. Open Settings > select System in the left-pane > scroll down in the right-pane and click on About.
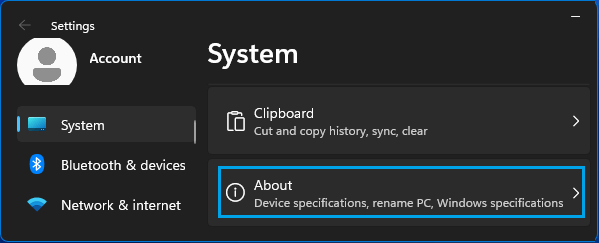
2. On About screen, click on System protection link, located in “Related Links” section.
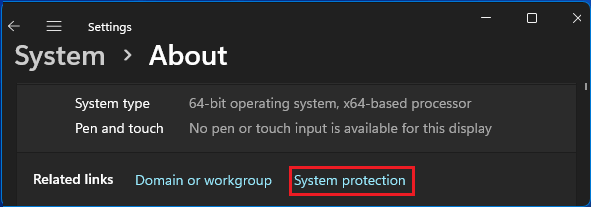
Windows 10: Go to Settings > System > About (left-pane) > click on System Protection in the right-pane.
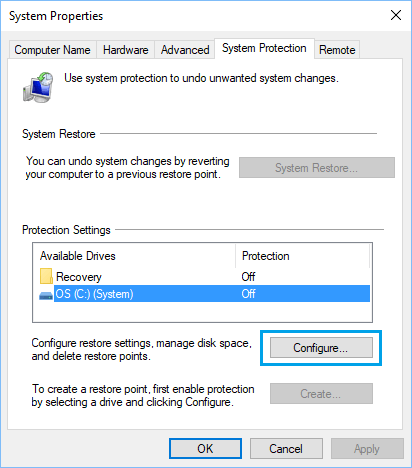
3. On System Properties screen, go to System Protection Tab, select the Drive that you want to System Protect and click on Configure.
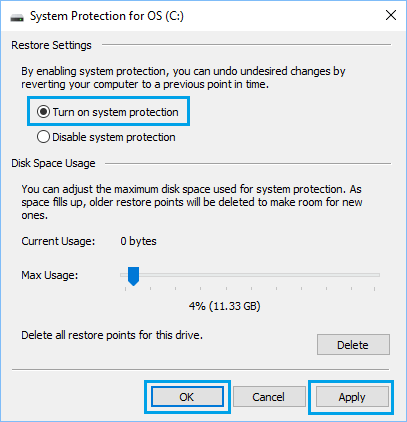
4. On the next screen, select Turn On System Protection option and click on Apply and OK.
Once System Protection is enabled, you can expect your computer to automatically create a System Restore Point, before installing any major update and also when new programs are being installed on the computer.
2. Manually Create System Restore Point in Windows 11/10
Even if automated system protection is enabled, it is a good practice to manually create a System Restore Point, before making any major changes on the computer.
1. Open Settings > select System (left-pane) > scroll down in the right-pane and click on About.
2. On About screen, click on System protection link, located in “Related Links” section.
Windows 10: Go to Settings > System > About (left-pane) > click on System Protection in the right-pane.
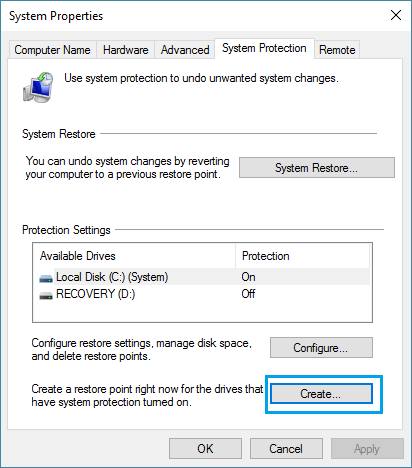
3. On System Properties screen, switch to System Protection tab and click on the Create button.
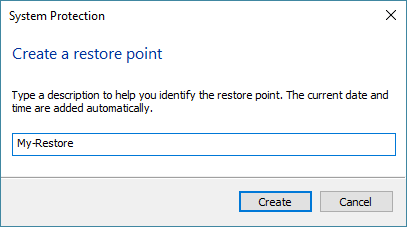
4. On the next screen, enter the Name and Date for the Restore Point and click on Create.
5. You will see a pop-up indicating the progress of System Restore point being created. Once the process is completed, you will see a confirmation message.
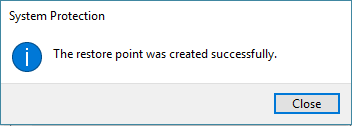
This confirms that you have successfully created a Manual System Restore point on your computer.