The default setting in previous versions of Windows was to automatically backup “Registry Files” and save the Registry Backup in “RegBackup” System Folder. However, this automatic Registry Backup feature has been removed by Microsoft in order to save storage space and is not available in the current versions of Windows 11/10.
This effectively means that you won’t be able to Restore Windows Registry from a backup, in case you end up with damaged or corrupted Registry Files on your computer. Hence, it has become more important that you remember to backup Registry Files; before making any changes to Registry Files on your computer.
Backup Windows Registry Files
Depending on your preference, you can make a manual backup of Registry; just before making changes to Registry Files, Re-enable the Automatic Registry Backup feature on your computer or go for both options; which ensures that a Backup of Registry is always available on your computer.
In both cases, the backup of Registry Files will be saved in a dedicated folder names as “RegBackup” and it will be located at path: C:\Windows\System32\config\RegBack.
1. Enable Automatic Registry Backup in Windows
You can make your computer to automatically backup all its Registry Files by enabling periodic Registry backups using Registry Editor.
Note: This step is meant for advanced users. Modifying Registry Files in an incorrect way can cause serious problems on the computer.
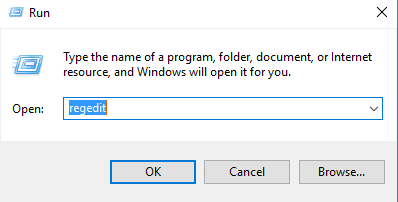
1. Open the Run Command on your computer.
2. In the Run Command Window, type regedit and click on OK.
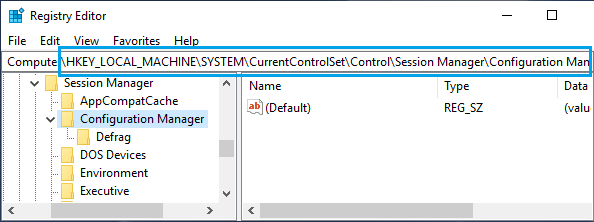
3. On the Registry Editor screen, navigate to HKEY_LOCAL_MACHINE\SYSTEM\CurrentControlSet\Control\Session Manager\Configuration Manager.
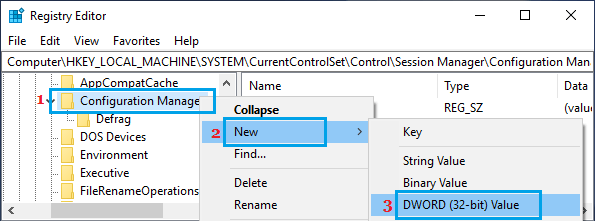
4. Right-click on Configuration Manager Folder > select New > click on DWORD (32-bit) Value.
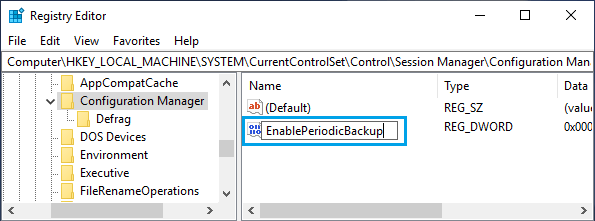
5. Name the newly created key EnablePeriodicBackup and press the Enter key on the keyboard of your computer.
6. Next, double-click on the newly created EnablePeriodicBackup DWORD and set its value to 1.
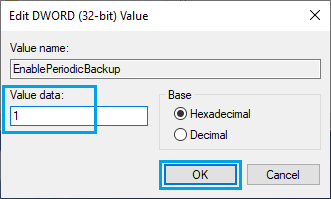
7. Click on the OK button to save the change to DWORD and Restart your computer.
After this change, your computer will automatically create a backup of the entire Registry on your computer and the backup file will be placed in “RegBackup” Folder located at C:\Windows\System32\config\RegBack.
Windows will also create “RegIdleBackup” task in the Task Scheduler to manage future Auto-registry backups on your computer.
2. Manually Backup Registry Files in Windows 11/10
You can make a manual backup of Registry Files on your computer at any time by using the following steps.
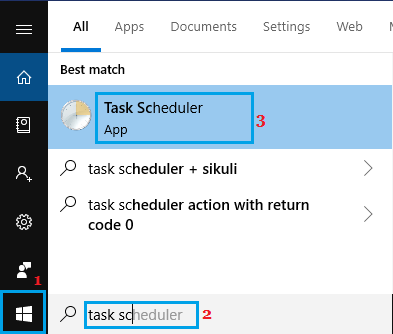
1. Type Task Scheduler in the search box and click on Task Scheduler App in search results.
2. From the Task Scheduler screen, navigate to Task Scheduler Library > Microsoft > Windows > Registry.
3. Right-click on RegIdleBackup task and click on Run in the menu that appears.
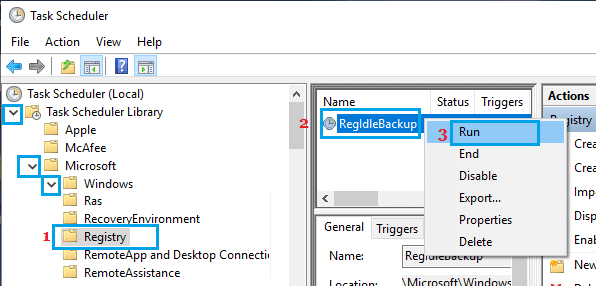
Once you click on Run, Task Scheduler will create a backup of the entire Registry on your computer, overwriting the previous Registry backup in the RegBackup folder.
Note: The “RegBackup” folder is located at C:\Windows\System32\config\RegBack. If Registry was not backed up, you will find all entries in this folder having 0 Kb size.