The File History tool in Windows 10 can be used to automatically Backup All or selected Files on your computer to an External Storage Drive.
The default option in “File History” is to back up all the main Folders located on a User Account (C:/Users/[Your Account Name]). This includes Desktop, Documents, Downloads, Music, Pictures, Videos, OneDrive Folder and also the App Data Folders.
In addition to backing up main the User Folders, File History also monitors these Folders for changes and automatically backs up any New File that you create or modify on the computer.
How to Backup Files Using File History in Windows 10
Follow the steps below to make a backup of all your files and data using File History on a Window 10 computer.
1. Open Settings > Click on Update & Security Icon.
2. On the next screen, select Backup or Backup Files in the left-pane. In the right-pane, scroll down and click on Add a drive option.
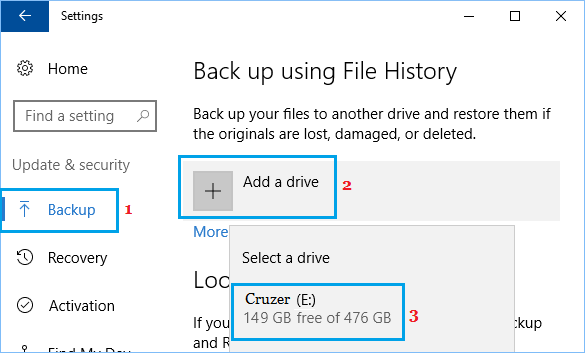
3. On the pop-up, select the External Drive that you want to use for File History’s backups.
4. Once the Backup Drive is selected, you will see Automatically Back up my Files option appearing and this will be turned ON by default.
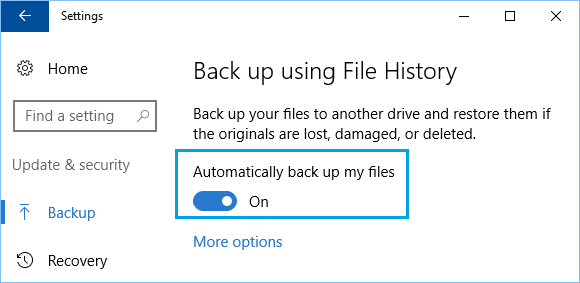
After this, Windows will automatically start backing up your files to the external backup drive on an hourly basis (default setting).
You can initiate a Manual File History Backup at any time on your computer by clicking on More options > Backup Now button.
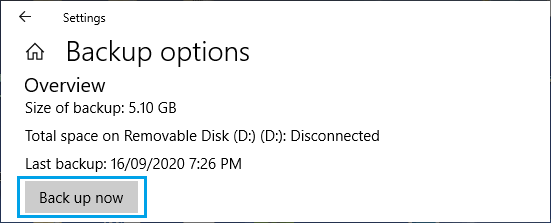
This will start the process of Backing up all the Main Folders in your User Account to the selected Backup Drive.
How to Change File History Backup Time
The default File History Setting is to backup Files on an hourly basis and keep the Backups stored Forever on your selected Backup Drive.
However, you can always change File History Backup time and select a different Backup save option by following the steps below.
1. Go to Settings > Update & Security > Backup or Backup Files and click on More Options in the right-pane.
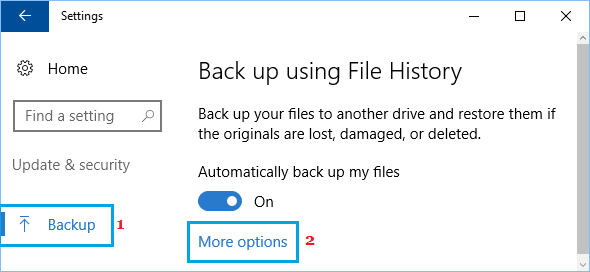
2. On the next screen, you can select a different Back Up My Files time and a different Keep My Backups option by clicking on the Down Arrows.
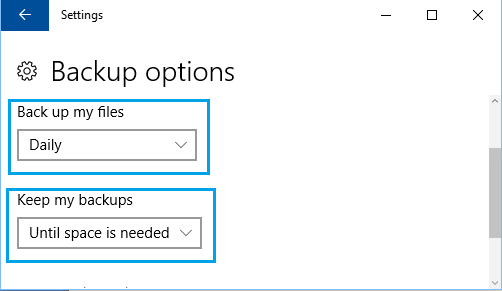
Backup My Files: You can select from 10, 15, 20, 30 minutes, 1, 3, 6, 12 hours or Once per day.
Keep My Backups: You can Set File History to keep Backups for 1, 3, 6, 9 months, 1, 2 years or Until Space is Needed or Keep them Forever (default setting).
If you select Until Space is Needed, the File History tool will be automatically deleting older Backups to create space for new Backups.
What Folders are Included in File History Backup?
The default setting in Windows 10 is to back up all the main folders located in the User Account. This includes, Desktop, Documents, Downloads, Music, Pictures and Video folders.
In addition to above, OneDrive Folder and Roaming Folders on your computer that store application data will also be included in a typical File History Backup.
You can take a look at the List folders being included in File History Backups on your computer under “Backup these Folders” section.
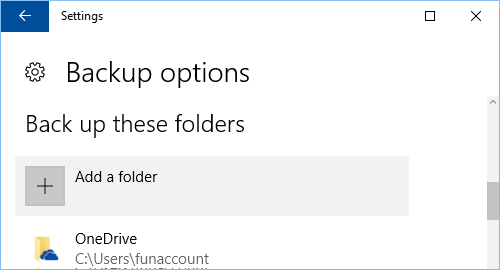
You can Add more Folders by clicking on Add a folder option.
How to Remove Folders from File History Backup?
As mentioned above, the default setting in Windows 10 is to automatically select Desktop, Documents, Downloads, Music, Pictures, Video, OneDrive and Roaming App Data Folders for backup.
However, you can remove any folder or folders from File History Backup by clicking on the Folder that you want to remove and selecting the Remove option.
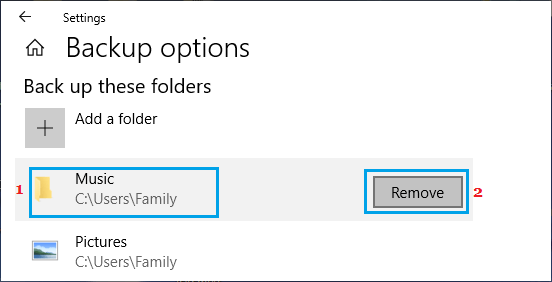
Similarly, you can select other Folders and remove them from File History Backups.
How to Stop File History Backups and Change Backup Drive
At any time, you can stop File History Backups on your computer or switch to a different File History Backup Drive by clicking on Stop Using Drive option.
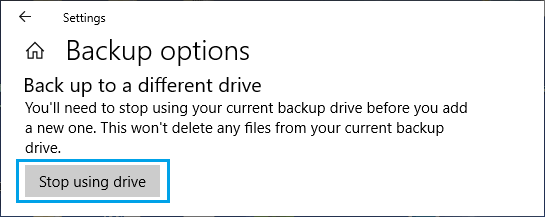
This stops your computer from backing up files to the selected backup drive and also disables File History Backups on your computer.
After this, you can switch to a New Backup Drive by clicking on Add a Drive option on the Backup screen and selecting the New Backup Drive.

Once it is setup and configured properly, File History Backups will be active in the background making copies of your Files.
Restore Files from Backup Using File History
Follow the steps below to Restore Files from a backup using the File History tool in Windows 10.
1. Open Settings > Click on Update & Security Icon.
2. On the next screen, select Backup or Backup Files in the left-pane. In the right-pane, scroll down and click on More Options.

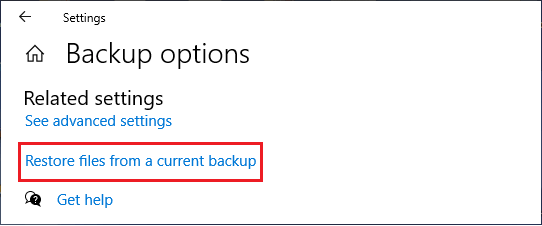
3. On Backup options screen, scroll down to bottom and click on Restore Files from a current backup link.
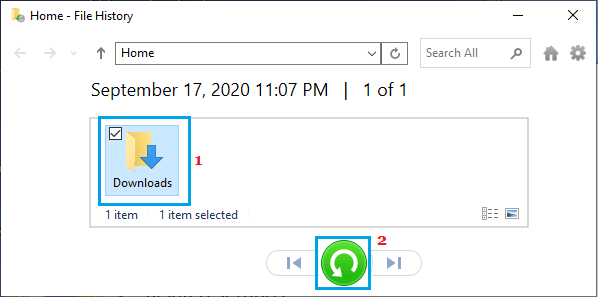
4. On the next screen, select the Folders that you want to Restore and click on the Restore button.
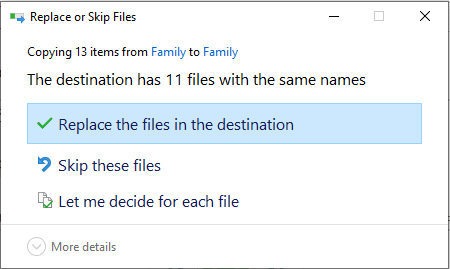
5. On the next screen, you will find the options to Replace all Files, Skip All Files or individually Select Files to Restore.
Tip: You can restore previous versions of a file without opening File History by right-clicking on the File and going to Properties > Previous Versions tab.