All digital photos, whether they were taken by using a Smartphone or Digital Camera have an Information File attached to them, which may include GPS Coordinates of the Location where the photo was taken.
For example, when you take a photo on iPhone or Android phone, the camera automatically records the GPS Coordinates of the Location at which the photo was taken and tags this information to the photo.
However, this happens only when Location Services is enabled on the mobile device and the Camera App is provided with access to your Location Data.
Find Location Where Photo Was Taken
The steps to find the Location at which the photo was taken vary, depending on whether the photo is available on your mobile device or located on a social media site or any other place on the internet.
If the photo is located on your mobile device, you should be able to make use of the Photos App to find the Location where the photo was taken.
If the photo is located on the internet, you can download the photo to your computer and access its location information by going to its Properties screen (File Properties).
1. Find Location Where Photo Was Taken By Using iPhone
If you are using an iPhone, you can make use of the Photos App to access the Location Data and other information attached to the photo.
1. Open the Photos App on your iPhone.
2. Select the Photo for which Location Information is required.
3. Tap on the “i” Icon and scroll down – You will see a map showing where the photo was taken and the Location Name displayed below the Map in the form of a Blue Link.
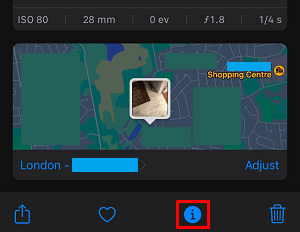
If you tap on the Blue Link, you should find it opening the Maps App, where you can get more information about this location.
Along with with Location data, you will also be able to see information about the camera that was used to take the photo – ISO speed, Camera aperture size, Camera mode, Focal Length and Shutter speed.
Note: If your mobile device shows location in the form GPS Cordinates and not on a Map, you can make use of Google Maps to find the exact Location where the photo was taken.
2. Use Computer to Access Location Information Attached to Photo
If the photo is located on the internet, you can access the Location Data attached to the photo by going to its Properties screen.
1. Download the Photo to your Windows Computer or Mac
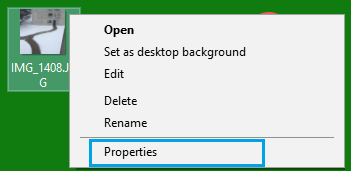
2. Once the photo is downloaded, right-click on the Photo and click on Properties in the drop-down menu.
3. On the next screen, switch to Details tab and scroll down to GPS section.
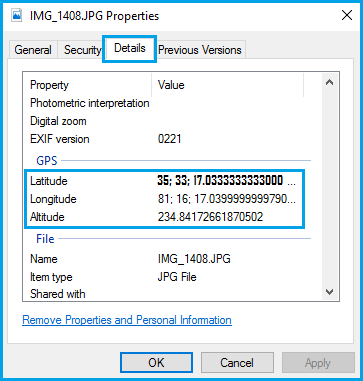
Under GPS section, you will find the GPS coordinates (Latitude, Longitude) attached to the photo.
Since, the Location information is available in the form of Latitude and Longitude coordinates, you need to make use of Google Maps or any other utility that can point these coordinates on a Map.
3. Use Google Maps to Find Where the Photo Was Taken
If the Latitude and Longitude information attached to the photo is available, you can make use of Google Maps to find the exact location where the photo was taken.
1. Go to Google Maps on your Windows Computer or MacBook.
2. On Google Maps, enter the GPS Coordinates into the Search bar and press the enter key on the keyboard of your computer.
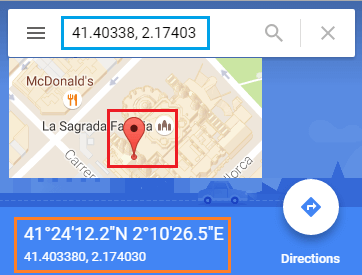
3. Within seconds, you should find Google Maps pointing to the exact location where the photo was taken
Google Maps accepts coordinates in any of the following formats.
- Degrees, minutes, and seconds (DMS): 41°24’12.2″N 2°10’26.5″E
- Degrees and decimal minutes (DMM): 41 24.2028, 2 10.4418
- Decimal degrees (DD): 41.40338, 2.17403
Make sure that you enter the coordinates correctly, using the correct symbols for degrees, minutes and seconds.
You can enter the coordinates in decimal degrees, in case you are finding it difficult to enter the degree “°” symbol.
You can take a look at how to search for a place using Latitude and Longitude Coordinates if you are still not clear about this part.