If Deleted Files are showing on the computer, even after being deleted, you can find below the steps to fix the problem of Deleted Files Showing in Windows 11/10.
Deleted Files Showing Up in Windows 11/10
When you delete Files or Folders on the computer, they are first moved to the Recycle bin, where they remain waiting to be manually cleared by the User or automatically cleared by the System.
If Deleted Files are still showing up on the computer, even after they have been cleared from the Recycle Bin, it could be due to any of the following reasons.
- Files Syncing from OneDrive or any other Cloud Storage Service
- File/Folder is being re-created by the system
- Faulty or Corrupted Recycle bin
- Corrupted System Files
- User Account lacking the permission to delete files
- Presence of virus or malware on the computer
Unless deleted Files/Folders are being re-created by the System. you should be able to fix the problem using the following methods.
1. Restart the Computer
The problem could be due to a stuck program or process preventing the files from being cleared. In most cases, this can be fixed by restarting the computer.
Move to the next steps, if you are unable to permanently delete the files and they are still showing up after being deleted.
2. Switch OFF Syncing Services
If you are using OneDrive or any other Cloud Syncing Service, the problem could be due to the deleted files being saved back to the computer from Cloud Storage service.
In most cases, temporarily switching OFF the Cloud Storage service should fix the problem. If this does not help, you need to Unsync Files from the Cloud Storage service.
3. Reset Recycle Bin
The problem could be due to the Recycle Bin on your computer becoming faulty or corrupted. This can be fixed by resetting the Recycle bin.
1. Type Command Prompt in the Search bar > right-click on Command Prompt in the search results and select Run as Administrator option.
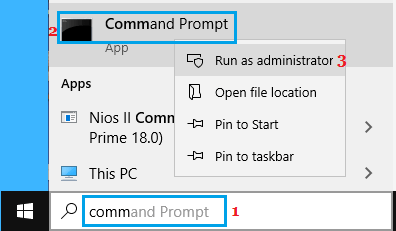
2. In the Command Prompt window, type rd /s /q C:$Recycle.bin and press the Enter key on the Keyboard of your computer.

3. Restart the computer and you should now find Recycle Bin working properly.
4. Change File Permissions
The Files won’t be deleted and cleared, if the User Account to which you are logged-in does not have the permission to delete files and folders.
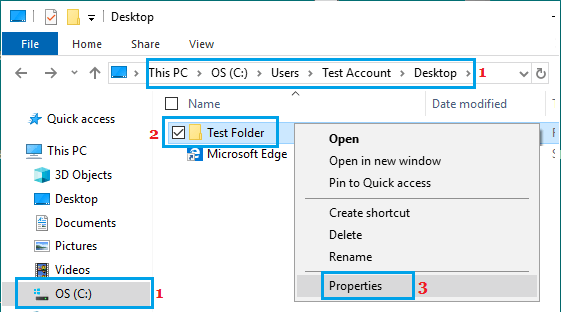
1. Right-click on the File/Folder that is still showing up after deletion and click on Properties.
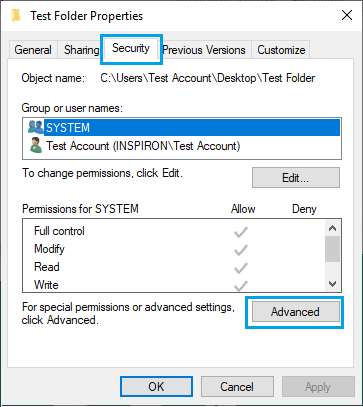
2. On the File/Folder Properties screen, switch to Security Tab and click on the Advanced button.
3. On Advanced Security Settings screen, click on the Change option located next to the Owner entry.
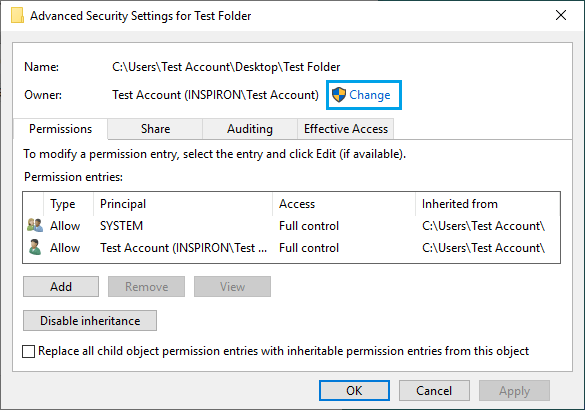
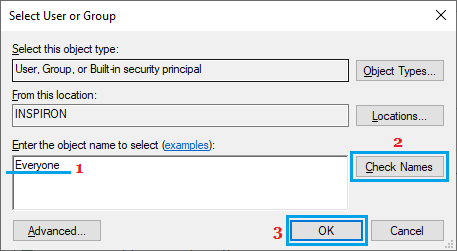
4. On the Select User or Group window, type Everyone in the text field, click on Check Names and then click on OK.
5. Back on Advanced Security Settings screen, click on Apply and OK to save this change on your computer.
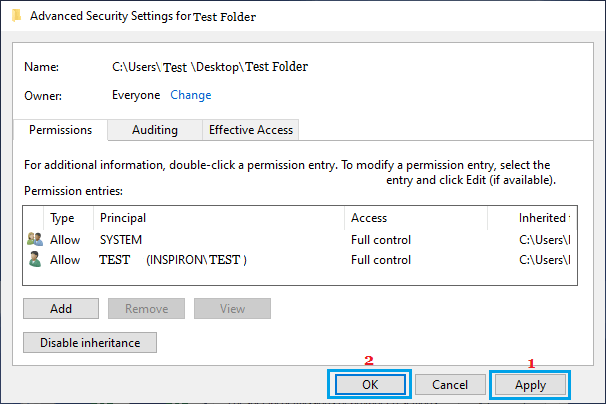
After this, deleted files should be moved to the Recycle Bin and won’t be coming back on your computer.
5. Scan PC Using Microsoft Safety Scanner
Rule out the possibility of your computer being infected with malware by downloading Microsoft Safety Scanner from Microsoft’s official website.
After the File is downloaded, open the File > select Type of Scan and click on the Scan button. Once, the scan is completed, you will be able to see the Scan results.
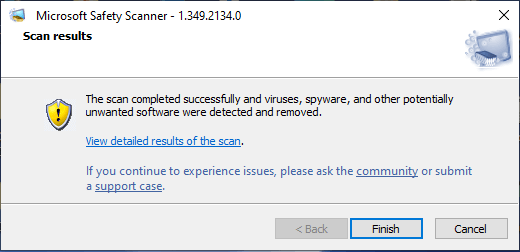
Note: After the virus scan is completed, click on View Detailed Results option to see detailed scan results at %SYSTEMROOT%\debug\msert.log.
6. Run SFC Scan & DISM Tool
Run SFC Scan to rule out the possibility of System Files being damaged or corrupted on your computer.
1. Type Command Prompt in the Search bar > right-click on Command Prompt and select Run as Administrator option.

2. In the Command Prompt window, type sfc /scannow and press the Enter Key.
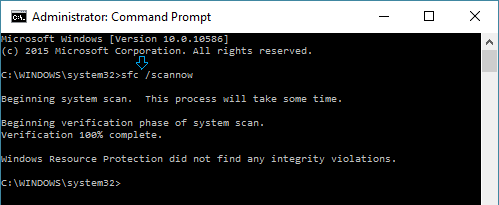
Patiently wait (it can take a long time) for Windows to scan your computer for System File Errors and fix them.
3. After the SFC Scan is completed, type DISM /Online /Cleanup-Image /RestoreHealth and press the Enter Key.
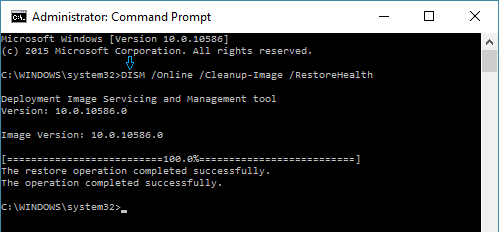
4. Wait for the DISM tool to check your computer for errors and fix them.
After the DISM command has finished running, restart your computer and see if you are now able to Enable Microsoft Defender Antivirus Protection on your computer.