In addition to Microsoft Account, Windows operating system provides the option to create as many Local User Accounts as required and login to the computer using a Local User Account.
This allows you to get most of your work done on a Local Account and use Microsoft Account, only while making purchases on Windows Store and accessing OneDrive and other Microsoft related services.
In-fact, you can even grant admin rights to any Local User Account on the computer and use this Local Admin Account to carry out Admin related tasks on the computer.
Create Local User Account in Windows 11/10
Except for a slight variation in the Location of “Add Account” option, the steps to create Local Users Accounts are practically the same on both Windows 10 and Windows 11 computers.
Also, the requirement for adding New Users Accounts to the computer in both versions of Windows is to be logged-in to an Admin account.
1. Add Local User Account to Windows 11 Computer
Login to the computer using your Admin Account and follow the steps below to add a Local User Account to the computer.
1. Go to Settings > Accounts (left-pane) > scroll down in the right-pane and click on Other Users.
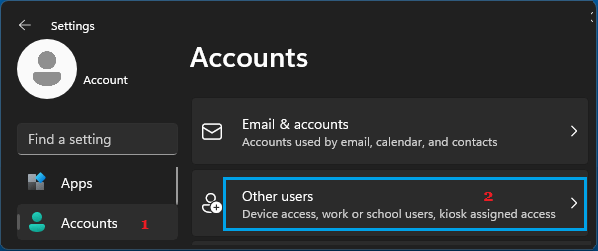
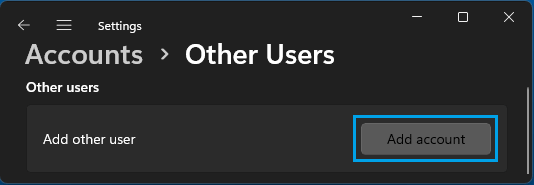
2. On Other Users screen, click on Add Account button.
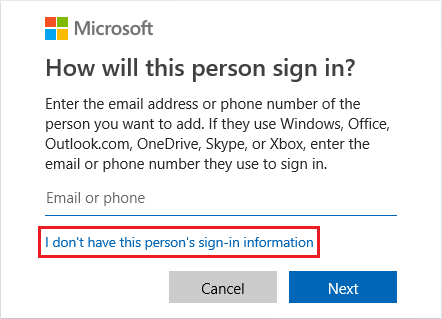
Note: Steps 3 and 4 are required, only if the computer is connected to internet.
3. On the next screen, click on I don’t have this person’s sign-in information link.
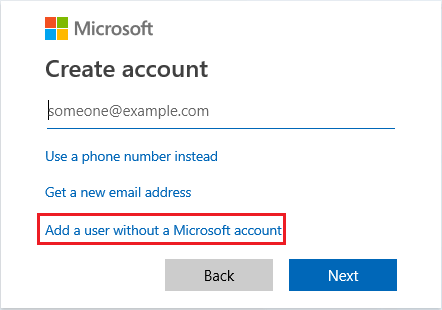
4. On Create Account screen, click on Add a user without a Microsoft account link.
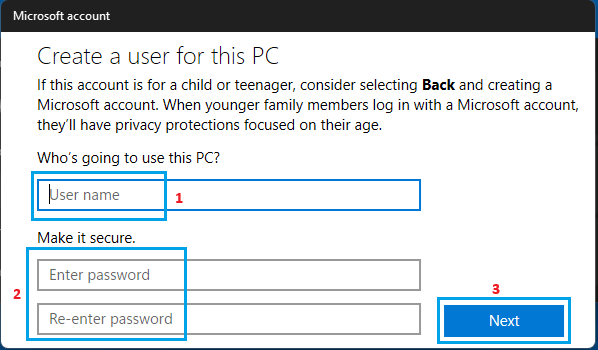
5. On the next screen, enter User Name, Password, re-enter password, setup Security Questions and click on Next.
Within a few seconds, you will be taken back to Accounts screen where you will be able to see the Local Account that you just created on your computer.
2. Add Local User Account to Windows 10 Computer
Login to your Admin Account and follow the steps below to create or add a New User Account to your computer.
1. Open Settings > click on Accounts Icon.
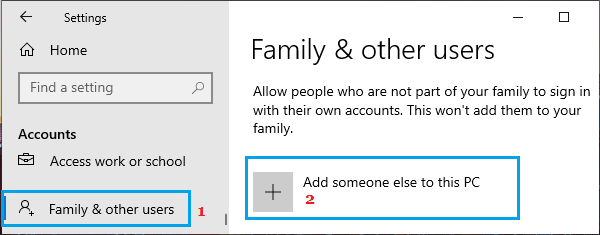
2. On Accounts screen, select Family & other users in the left-pane. In the right-pane, click on Add someone else to this PC.
Note: Steps 3 and 4 are required, only if your computer is connected to internet.
3. On the pop-up, click on I don’t have this person’s sign-in information option.
4. On Create Account screen, select Add a user without a Microsoft account option.
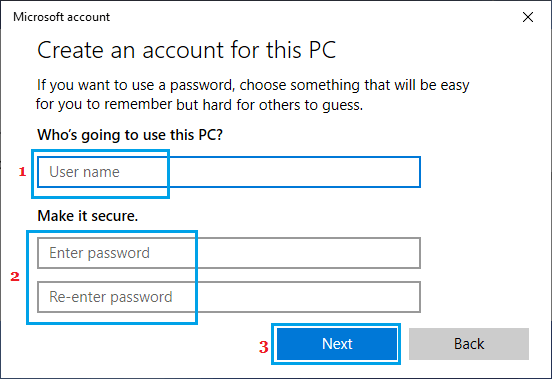
5. On the next screen, enter User Name, Password, re-enter Password and click on Next.
Once you click on Next, Windows will take you back to Accounts screen, where you will be able to see the New Local User Account that you just created.