In general, most users end up creating a Microsoft Account during the setup process of a new computer, when they are prompted to use an existing Microsoft Account or create a New Microsoft Account.
When they follow these instructions, they end up being logged-in to a Microsoft User Account, which Windows automatically creates during the setup process.
Depending on your choice, you can continue using the Microsoft Account or convert the Microsoft Account to a Local User Account, which removes the Microsoft Account from the computer.
Switch Microsoft Account to Local User Account
When you switch Microsoft Account to a Local User Account, all your Files, Photos and Data that were available in the Microsoft Account will be switched over to the New Local Account and you will be able to access them.
However, if you had downloaded any Apps or Programs on the computer using Microsoft Account, they will still remain linked to your Microsoft Account.
Your Microsoft Account will remain active for all practical purposes and you will still be able sign-in to Microsoft Store, Skype, OneDrive, Microsoft Teams and other Microsoft services.
Steps to Convert Microsoft Account to Local User Account
In order to Switch Microsoft Account to Local Account, you need to be logged-in to the computer using your Microsoft Account.
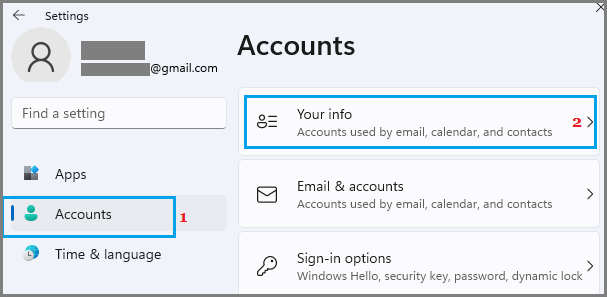
1. Open Settings > select Accounts in the left-pane and click on Your Info in the right-pane.
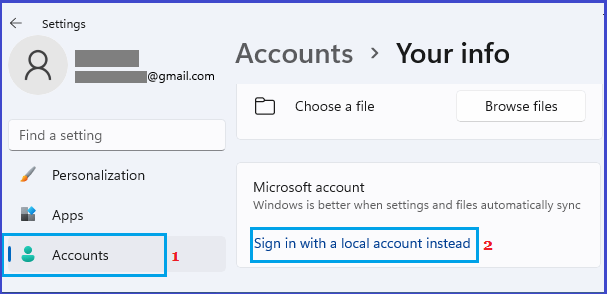
2. On the next screen, click on Sign-in with a local account instead link in the right-pane.
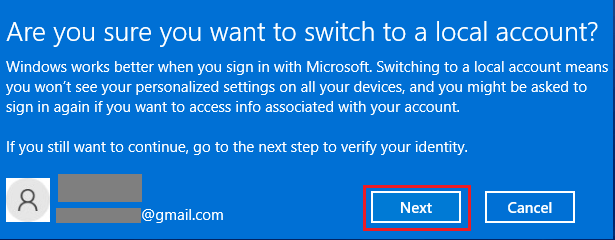
Note: If you had signed-in using PIN, you will be prompted to verify your identity by entering the PIN Passcode.
3. On the confirmation pop-up, click on the Next button to confirm.
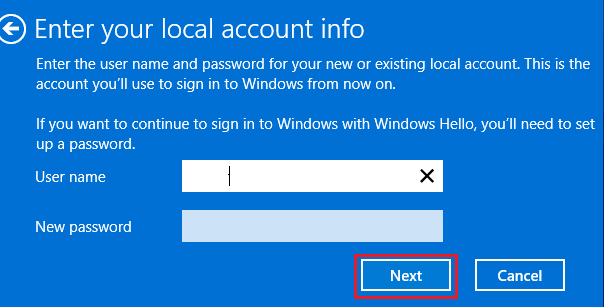
4. On the next screen, type User Name, Password that you want to use for the Local User Account and click on Next.
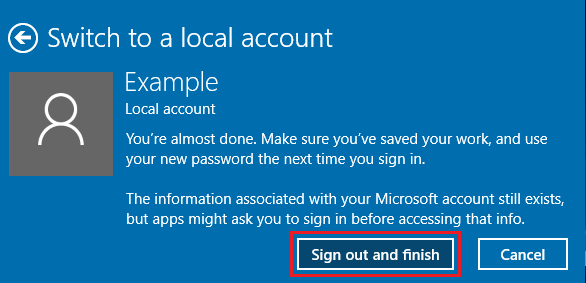
5. On the next screen, click on Sign Out and finish button.
Once the computer is switched to Local Account, the Microsoft Account will be removed and it will no longer remain linked to your computer.