The issue of Sound not working on a Windows computer is usually caused due to wrong or incorrect speaker being selected as the output device, outdated drivers, the speaker being accidentally muted or due to the audio device becoming disabled.
In certain cases, the problem is due to built-in audio enhancements like spatial sound or bass boost causing software conflicts and distorted or muffled sound.
No Sound or Audio Not Working in Windows 11/10
If you are using an external speaker, start by making sure that the problem is not being caused due to a loose connection or due to the headphone jack being inserted into the wrong port of a desktop computer.
After ruling out these issues, you can move to other troubleshooting steps as provided below in this guide.
1. Check Taskbar Sound Icon
When a Windows computer is going through sound problems, it usually comes up with red cross next to the Speaker Icon in the Taskbar.
1. Right-click on the Speaker Icon located in the Taskbar and select Troubleshoot Sound Problems option.
![]()
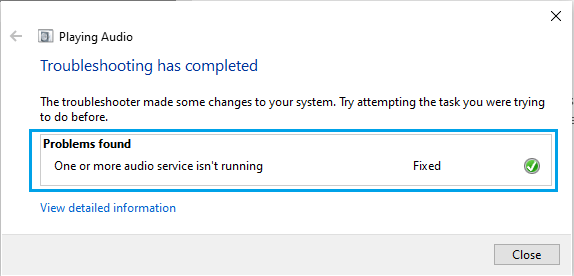
2. When prompted, enter your Admin Password and wait for the Troubleshooter to run and fix the sound problem on your computer.
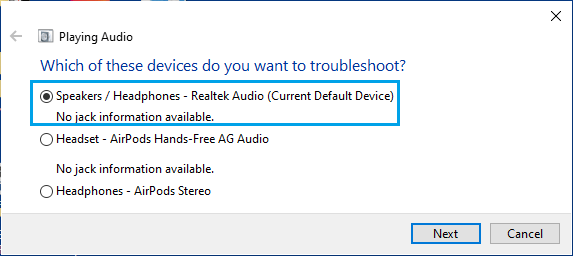
If this is not the case, it may prompt you to select the Speaker/Headphone that you want the troubleshooter to fix. Select the Applicable Speaker and click on Next.
3. Wait for the Troubleshooter to fix the Sound problem on your computer.
Note: If the Sound Troubleshooter comes up with “Audio services not responding” message, you can find the troubleshooting steps in this guide: Fix: Audio Services Not Responding in Windows 11/10.
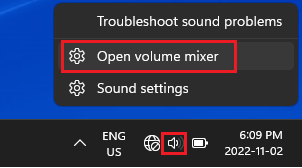
2. Select Right Output Device
Open the Volume mixer on the computer and make sure that the right output device (speaker) is selected and the volume of speaker is not muted or set to a very low level.
1. Right-click on the Sound Icon in the taskbar and click on Open Volume Mixer.
2. On the next screen, use the Down-Arrow next to Output Device to select the right Speaker.
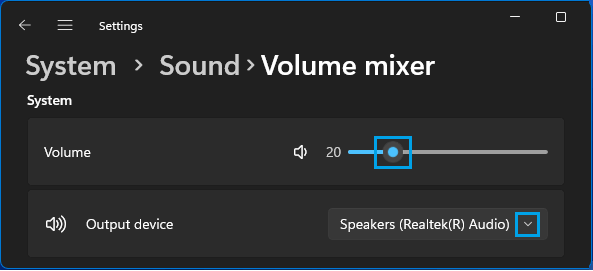
Also use the Blue Circle and move it to the right to Unmute the Speaker and increase its volume on your computer.
3. Update Audio/Sound Drivers
As mentioned above, sound problems on a Windows computer can also be caused due to the Audio drivers becoming outdated.
1. Right-click on Start button and click on Device Manager.
2. On Device Manager screen, expand Sound, Video and Game Controllers > right-click on the Audio Device and select Update driver option.
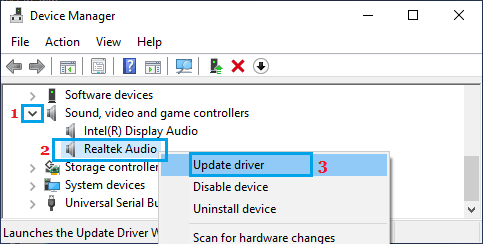
3. On the next screen, select Search Automatically For Driver Software option and follow the instructions to install the updated driver (If available).
4. Restart Windows Audio Service
The problem could be due to “Windows Audio Service” being stuck and this can be easily fixed by restarting Windows Audio Service.
1. Right-click on the Start button and click on Run.
2. Type services.msc in the Run Command window and click on OK.

3. On the Services screen, right-click on Windows Audio entry and select the Restart option.
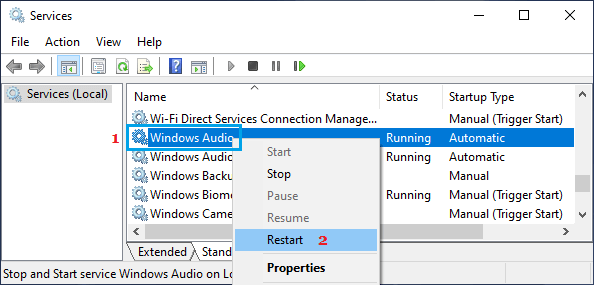
4. Restart the Computer and see the Sound is now working properly on your computer.
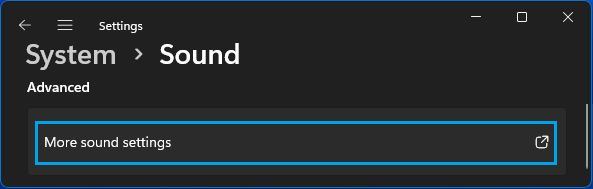
5. Disable Audio Enhancements
Disabling the use of “Audio Enhancements” might help in fixing the problem.
1. Go to Settings > System > Sound > scroll down and click on More Sound Settings.
2. On the pop-up, select your Sound Device and click on Properties.
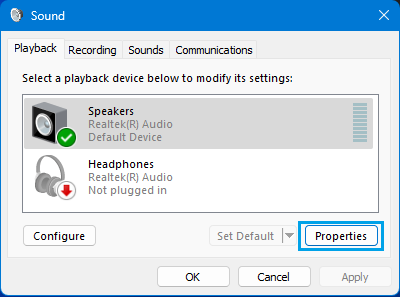
3. On the next pop-up, switch to Advanced tab and uncheck Enable Audio Enhancements option.
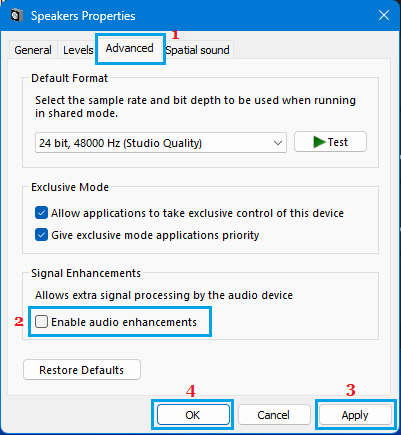
4. Click on Apply and OK to save this change on your computer.
After disabling Audio Enhancements, restart the computer and this should hopefully fix the sound problem on your computer.
6. Disable Exclusive Mode
The problem might be due to the speaker on your computer being occupied by another App.
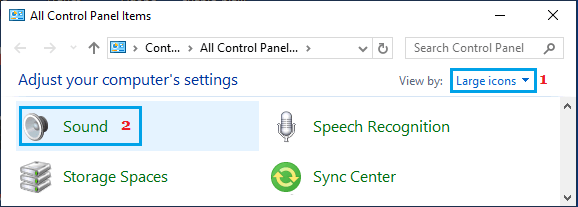
1. Open the Control Panel on your computer.
2. On the Control Panel screen, make sure you are in Large icons view and click on the Sound Icon.
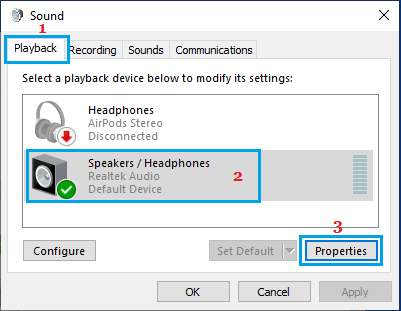
3. On the next screen, select the active Speaker/Headphones and click on Properties.
4. On “Speaker Properties” screen, switch to Advanced tab and uncheck Allow Applications to take exclusive control of this device option.
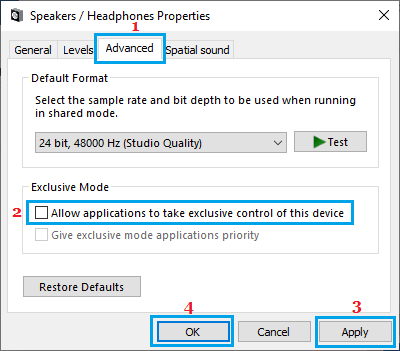
5. Click on Apply and OK to save this setting on your computer.
7. Reinstall Audio Drivers
If the problem is not yet fixed, try removing and reinstalling the Audio Drivers on your computer.
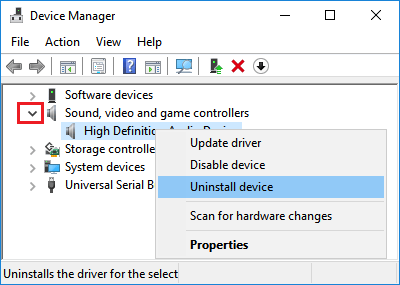
1. Right-click on the Start button and select Device Manager.
2. On the next screen, open Sound, Video and Game Controllers entry > right-click on the Audio device and click on Uninstall device option.
3. Next, click on Action tab in top-menu bar and select Scan for hardware changes option in the drop-down menu.
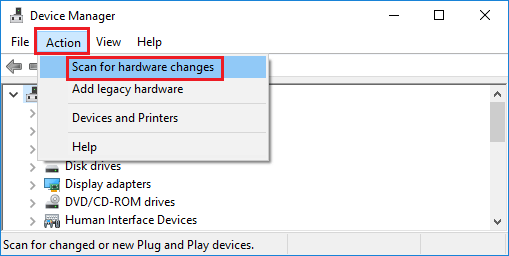
4. Restart the computer and check if Sound is now working properly on your computer.