When you connect a Windows computer to a Wi-Fi or LAN Network for the first time, it prompts you to confirm whether you want to make the computer discoverable by other devices on the network.
Your response to this pop-up determines whether the network that you are trying to connect to will be setup as Public or Private network on your computer.
If you select the option to make the computer discoverable, the network will be set up as a Private Network. If you select not to make your computer discoverable, the network will be setup as a Public Network.
Difference Between Public and Private Network in Windows
When you designate any Network as Private on your computer, Windows assumes that you trust this Network and makes your computer visible or discoverable by other devices on the Network.
Since a Private Network supports Network discovery, this type of Network is required for Sharing Files, Folders and Printers.
In the case of a Public Network, Windows makes your computer hidden from other devices and disables all network discovery features on the computer.
As a rule of thumb, you should always use a Public Network connection, when you are outside and using public Wi-Fi Networks (Coffee shop, library and others).
A Private Network should only be used to connect to connect Printers and enable File Sharing in a Home or Office environment.
1. Switch from Public to Private Network on Windows 11 Computer
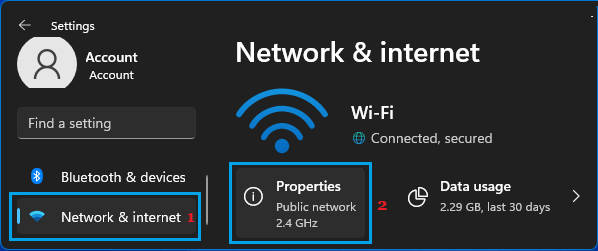
If you are using Windows 11, you can switch from Public to Private Network by going to Network & Internet Settings screen on your computer.
1. Go to Settings > Network & Internet > Click on Properties tab for the active network on your computer.

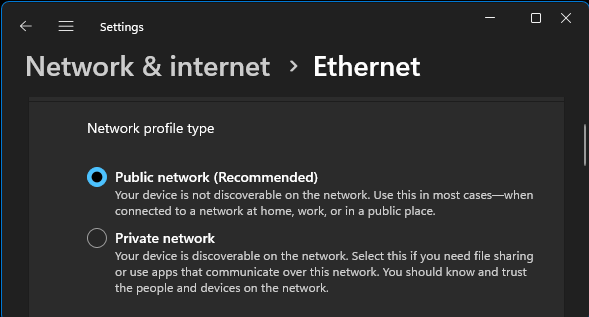
2. On the next screen, you can switch from Public to Private or Private to Public, depending on your requirements.

Once you select the required option, Windows will setup the Network as Private to Public, depending on your selection.
2. Switch from Public to Private Network on Windows 10 Computer
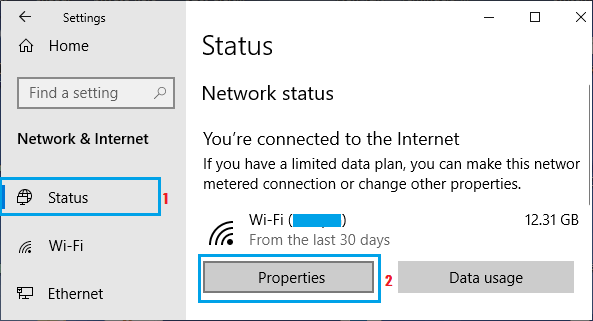
If you are using Windows 10, you can follow the steps below to switch any network on your computer from public to private network.
1. Go to Settings > Network & Internet and click on Properties button for the active network on your computer.

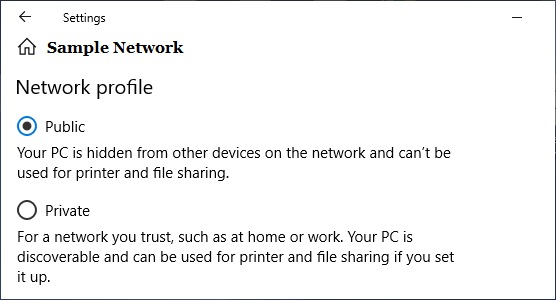
2. On the next screen, you can set the Network Type to either Public or Private under “Network Profile” section.

Once the Network type is selected, Windows will setup the Network on your computer.