If you are thinking in terms of installing Windows 11, you need to make sure that Trusted Platform Module is available on the computer and manually Enable TPM 2.0 (if required).
Trusted Platform Module or TPM is basically a security chip, capable of implementing Hardware based security features on computers using cryptographic keys.
In addition to minimum hardware requirements, Microsoft requires computers running Windows 11 to be equipped with TPM 2.0, in order to support enhanced security features like Face ID, Finger Print & Iris login, integrated BitLocker for Data Protection and others.
Enable TPM 2.0 on Windows computer
If your computer was purchased during the last 5 years, it should be equipped with Trusted Platform Module (TPM) and capable of being upgraded to Windows 11.
If required, you can always check and Enable TPM on a Windows computer by using any of the following methods.
1. Enable TPM 2.0 Using Settings
You and check and enable TPM (Trusted Platform Module) on a Windows computer by using the following steps.
1. Go to Settings > Update & Security > Windows Security.
2. Select Device Security in the left-pane and click on Security Processor Details link in the right-pane.
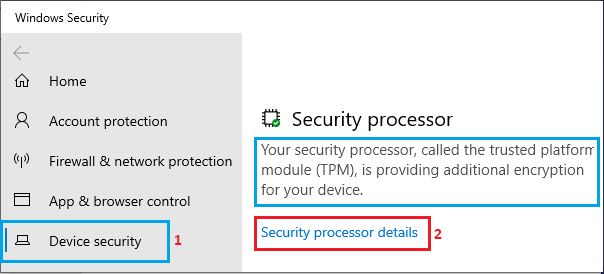
Note: If Security Processor is not listed, you need to manually Enable TPM on the computer using the next steps as provided below in this guide.
3. On the next screen, make sure that Specification Version is 2.0.
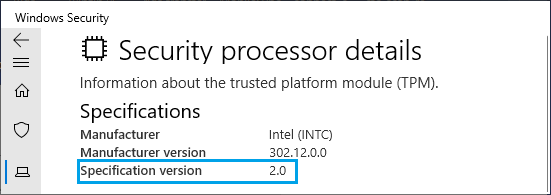
If TPM Specification version is 2.0, your computer is ready for Windows 11. If it is below 2.0, your computer does not qualify for Windows 11.
2. Enable TPM Using UEFI Settings
In certain cases, the computer is equipped with TPM security chip, but it does not show up on Device Security screen. This can be fixed by enabling TPM in BIOS/UEFI Settings.
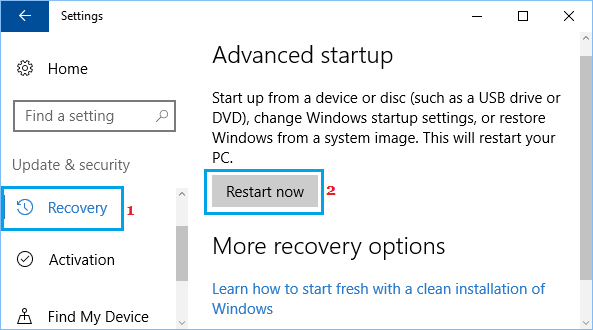
1. Go to Settings > Update & Security.
2. Select Recovery in the left-pane. In the right-pane, scroll down and click on Restart now button, located under “Advanced Startup” section.
3. From the next screen, navigate to Troubleshoot > Advanced options > UEFI Firmware Settings.
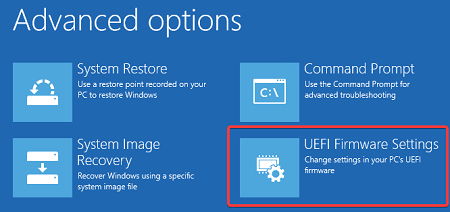
4. On the next screen, click on Restart to proceed to UEFI Settings screen.
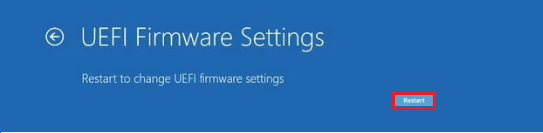
5. On the next screen, locate TPM Settings option and toggle the TPM Device Status to ON position. Make sure you save the revised TPM Settings and logout from UEFI.
Note: On UEFI Settings screen, TPM Settings may be available under Advanced Security, Trusted Computing, Intel Software Guard or other headings.
Also, the option to Enable TPM may be named as Intel Platform Trust Technology, Intel PTT, Intel SGX Enable, Security Device or Security Device Support, AMD fTPM or AMD PSP fTPM.
3. Check TPM Using Device Manager
After enabling TPM in UEFI, you need to make sure that TPM 2.0 has been detected by the system.
1. Right-click on the Start button and select Device Manager.
2. On Device Manager screen, expand Security Devices entry > right-click on Trusted Platform Module 2.0 and click on Update Driver option.
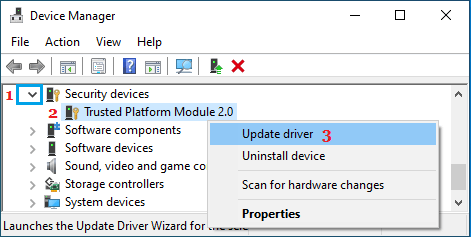
Note: If Trusted Platform Module 2.0 is not listed or if you see yellow triangle next to it,
3. On the next screen, select “Search Automatically for updated Driver version” option.
4. Follow the onscreen instructions to install updated driver software on your computer.
Can’t Install Windows 11 After Enabling TPM
If you are unable to Install Windows 11, even after enabling TPM 2.0, the problem might be due to the Processor or certain Hardware components on your computer being incompatible with Windows 11.
The easiest way to confirm this is by downloading PC Health Check App from Microsoft.
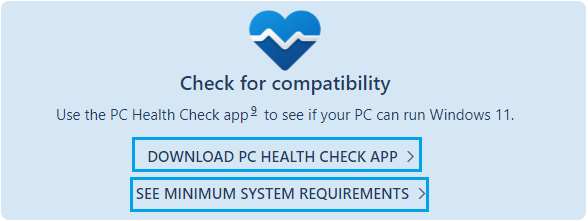
1. Open the downloaded App on your computer and click on Check Now.
2. On the next screen, you will see whether or not your PC meets Windows 11 requirements.
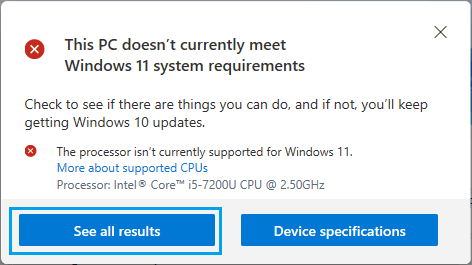
You won’t be install Windows 11, if the Processor or any other Hardware component on your computer does not meet Windows 11 requirements.
The option in this case is either to buy a New Windows 11 compatible computer or continue using Windows 10. As you can see in above image, you will keep getting Windows 10 updates.