The Focus Assist feature in Windows can be used to block all distractions during a set period of time. You can find below the steps to Enable and use Focus Assist in Windows 10.
Enable and Use Focus Assist in Windows 10
Most of us tend to get distracted by notifications popping up on the computer and end up losing a good amount of productive time due to these distractions during work hours.
An easy solution for this problem is to simply prevent such distractions from reaching you during work hours by using Focus Assist feature as available in Windows OS.
The Focus Assist feature is customizable and allows you to block all distractions during a set period of time, while allowing call or message notifications from selected Contacts or Apps.
As soon as the Focus Assist period is completed, you will be able to see a summary of Notifications that you missed during the Focus period.
1. Enable Focus Assist in Windows 10
You can enable Focus Assist from the action center on your Windows computer or use Settings to enable, disable and configure Focus Assist period on your computer.
1. Open Settings > click on the System Icon.
2. On the next screen, select Focus Assist in the left-pane. In the right-pane, select Priority Only option to enable Focus Assist on your computer.
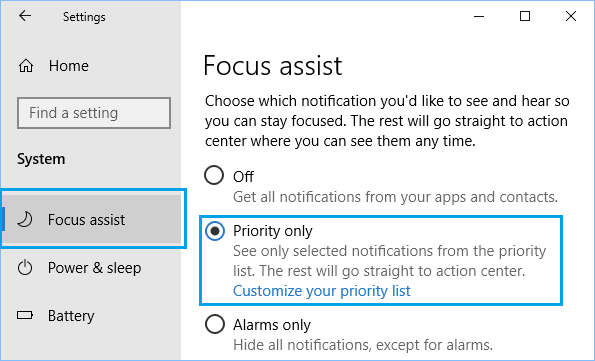
The other Focus Assist option that you can choose on this screen is Alarms Only, which disables All Notifications during Focus Assist period and allows only Alarms to reach you.
Choosing OFF option, disables Focus Assist and you will see All Message and App Notifications on your computer.
2. Set Up Focus Assist Period in Windows 10
After enabling Focus Assist, the next step is to set up the time period during which you want the Focus Assist feature to kick in on your computer.
1. Open Settings > click on the System Icon.
2. On the next screen, select Focus Assist in the left-pane. In the right-pane, scroll down to “Automatic Rules” section and move the toggle next to During These Times to ON position.

3. On the next screen, you can set the Start Time and the End Time for the Focus Assist period on your computer.

On the same screen, you can configure Repeats, Focus Level and choose whether or not you would like to see a Notification in the action center, whenever Focus Assist is automatically turned ON.
3. How to Create Focus Assist Priority List
The Focus Assist feature provides the option to setup a priority list that can be used during the Focus Assist period to allow calls, notifications and alerts from your family memebers and other Contacts.
Depending on your requirements, you can customize the Focus Assist priority list to:
- Show notifications for missed calls, texts and messages
- Show Notifications From Selected Apps
- Show Message Notifications from Family or selected people
You can find below the steps to setup and configure each of the above options during Focus Assist period.
1. Show Notifications for Missed Calls, Texts and Messages During Focus Assist
The Focus Assist feature provides the option to see whether someone tried to call or sent a text message to your mobile phone, while you are busy working on the computer.
1. Open Settings > click on the System Icon.
2. On the next screen, select Focus Assist in the left-pane. In the right-pane, click on Customize your Priority List link.
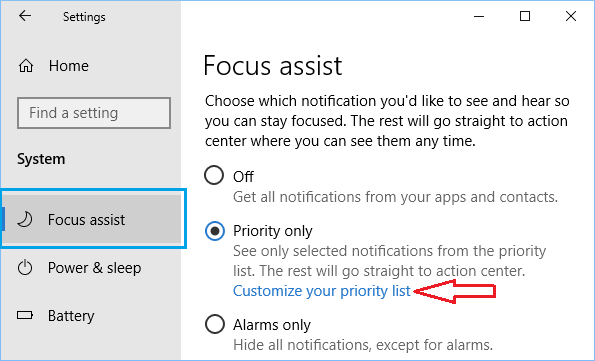
3. On the next screen, you will see the options to configure Cortana to show notifications for missed calls, texts and messages.

This option requires you to install the Cortana App on your mobile device and is not available for iOS devices.
2. Show Notifications from Selected Apps During Focus Assist Period
Another option available in Focus Assist is to allow notifications from your favourite Apps while you are busy working on the computer.
For example, if you are expecting an important email, you can add the Mail App to the priority list and keep an eye on the emails being sent to your email account.
1. Open Settings > click on the System Icon.
2. On the next screen, select Focus Assist in the left-pane. In the right-pane, click on Customize your Priority List link.
3. On the next screen, scroll down to the Apps section and click on Add an App button.
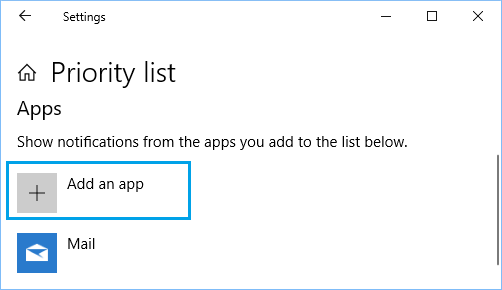
4. On the next screen, click on the App that you want to add to the Focus Assist Priority List.
Note: You can only Add Microsoft Store Apps to the allowed list
3. Show Message Notifications from Selected People During Focus Assist Period
You can avoid most distractions during Focus Assist period and still stay connected with your family and important people by adding people to the priority list.
1. Open Settings > click on the System Icon.
2. On the next screen, select Focus Assist in the left-pane. In the right-pane, click on Customize your Priority List link.
3. On the next screen, scroll down to People section and click on Add Contacts button.
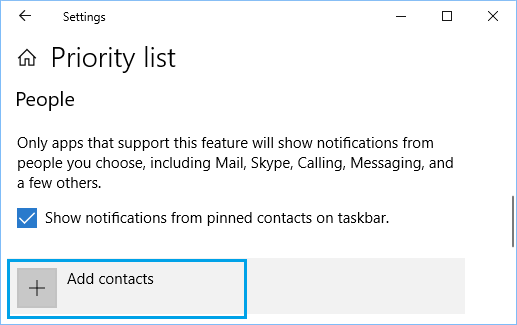
4. On the next screen, click on the Contacts or the People that you want to add to Focus Assist Priority List.
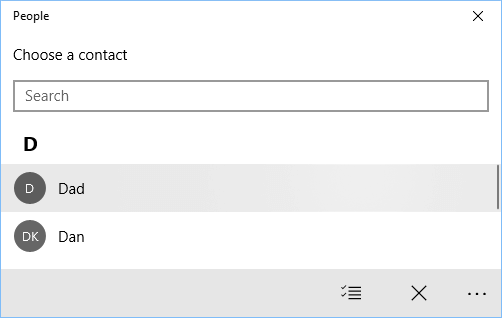
Once you add People to Priority List, only the Contacts having priority will be allowed to get through during the Focus Assist Period on your computer.
4. Other Focus Assist Automatic Rules
Apart from allowing you to setup Focus Assist period, the Automatic Rules section of Focus Assist screen provides other options that you can see in the image below.
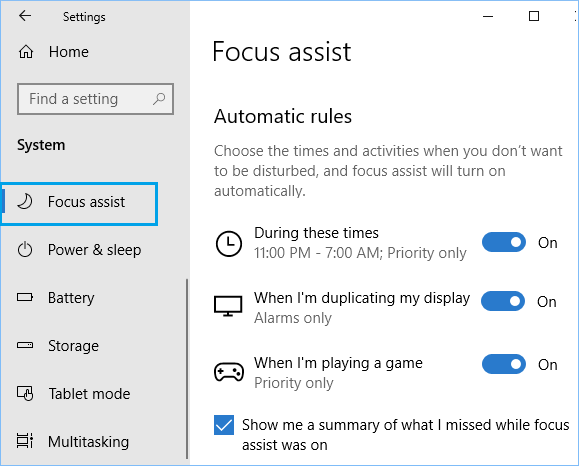
When I’m duplicating my display: This option automatically enables Focus Assist on the computer, whenever you are mirroring the screen of the computer.
This prevents notifications from popping up on the screen of your computer, while you are giving a presentation by mirroring the screen of your computer using a projector.
When I’m playing a game: Automatically switches ON Focus Assist, whenever you are playing games in full-screen mode.
At the end, you will see the option to get a summary of what you missed during Focus Assist period. You can get this summary by clicking on the Focus Assist Notification icon available in Notifications area of the computer.