It can be quite annoying to see “ERR CONNECTION TIMED OUT Error on your computer, just when you are trying to access an interesting website. You will find below the steps to fix this error.
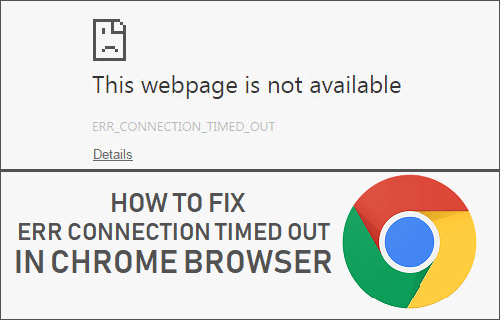
Err Connection Timed Out Error in Chrome
There could be various reasons for Err_Connection_Timed_Out Error on your computer, ranging from problems with the DNS Server or the Network to the website being busy or unavailable.
So, let us go ahead and take a look at some of the methods that are known to Fix Err Connection Timed Out Error in Chrome Browser on a Windows 10 computer.
1. Clear Chrome Browser Cache
Clear the Chrome browser Cache on your computer to rule rule out the possibility of the problem being due to cached error pages or corrupted cookie files.
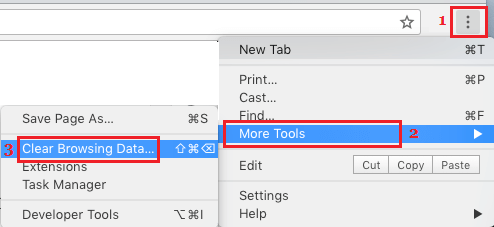
1. Open the Chrome browser on your computer > click on 3-dots menu icon > More Tools > and select Clear Browsing Data… option in the drop-down menu.
2. On the next screen, check Clear Browsing History, Cookies/Site Data, Cached Images/Files and click on Clear Data button.
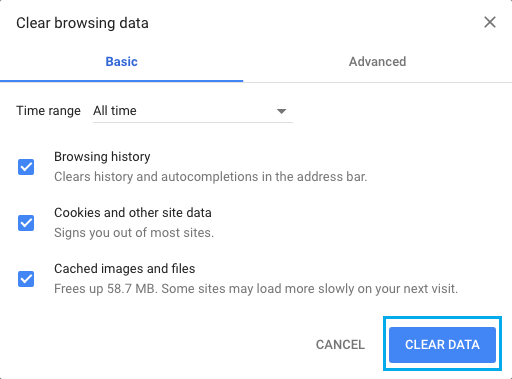
Now, try to access the same webpage and see if you are still getting Err_Connection_Timed_Out Error on your computer.
2. Run Network Troubleshooting Commands
The next step is to run Network Troubleshooting Commands to Flush the DNS Cache, Reset TCP/IP Stack and Renew the IP Address.
1. Right-click on the Start button and click on Command Prompt (Admin).
2. In the Command Prompt window, type the following commands (in the same order) and press the enter key after each of these commands.
- netsh winsock reset
- netsh int ip reset
- ipconfig /release
- ipconfig /renew
- ipconfig /flushdns
Once the above commands have been executed, type Exit and press the enter key to close the Command Prompt window.
Restart your computer for the changes to take affect and see if you are still getting Err Connection Timed Out Error in Chrome browser.
3. Disable Proxy Servers
Using Proxy Server settings is known to cause network connectivity problems, while accessing certain websites.
1. Open Settings > click on Network and Internet tab.
2. On the next screen, click on Proxy in the left-pane. In the right-pane, disable Automatically detect settings option, located under ‘Automatic Proxy Setup’ section.
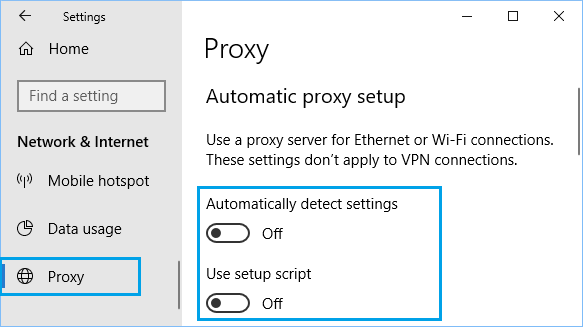
On the same screen, scroll down and disable Use a Proxy server option under manual proxy section.
4. Reset Chrome Browser
Follow the steps below to Reset Chrome browser to its default settings.
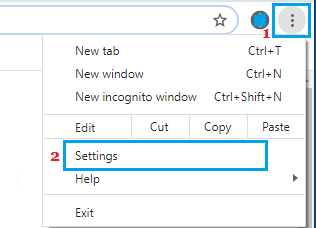
1. Open Chrome browser > click on 3-dots Menu icon > select Settings option in the drop-down menu.
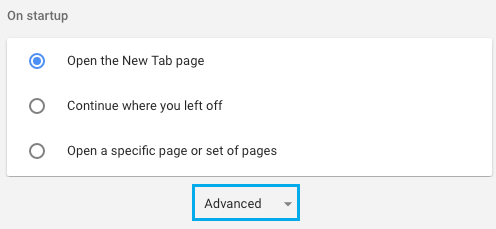
2. On the Settings screen, scroll down to the bottom of the page and click on Advanced.
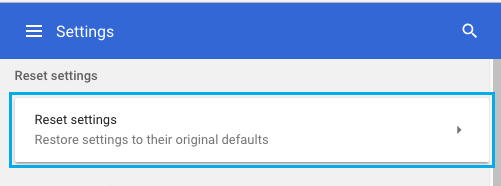
3. Scroll down more and click on Reset Settings option.
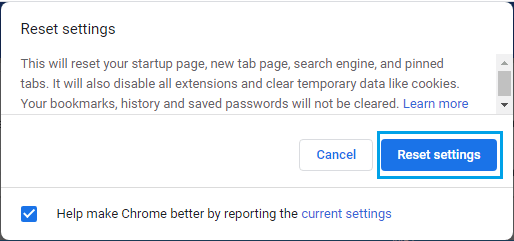
4. On the confirmation pop-up, click on the Reset button.
5. Disable IPv6
Some users have reported fixing Err Connection Timed Out Error in Chrome browser by disabling IPv6 protocol.
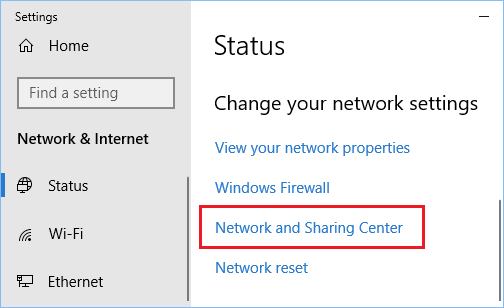
1. Go to Settings > Network and Internet > scroll down and click on Network and Sharing Center.
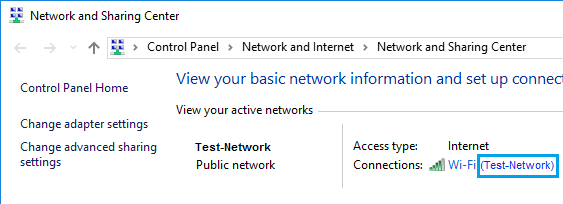
2. On Network and Sharing Center screen, click on your Current Network.
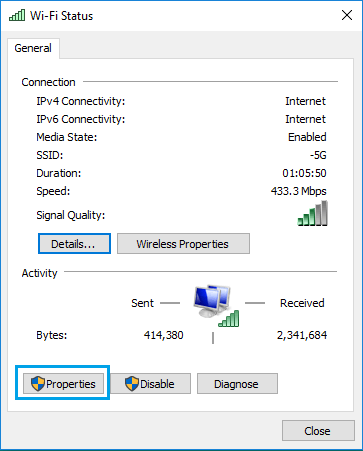
3. On the next screen, click on the Properties button.
4. On Network properties screen, uncheck Internet Protocol Version 6 (TCP/IPv6) option.
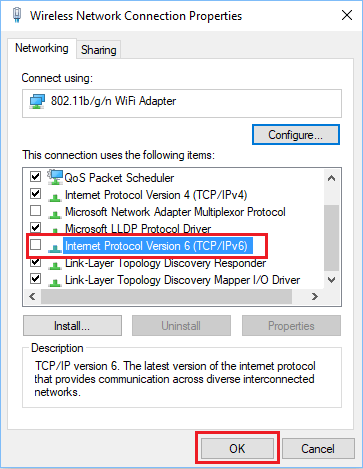
4. Click on OK to save the changes and Restart your computer for the changes to apply.
6. Check If Hosts File Has Been Modified
Sometimes, the Hosts File located at C:\windows\system32\drivers\etc can gets modified and blocks access to certain websites.
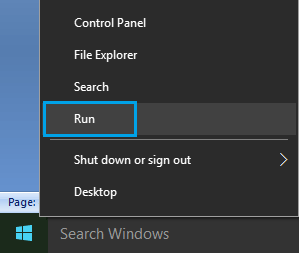
1. Right-click on the Start button and click on Run.
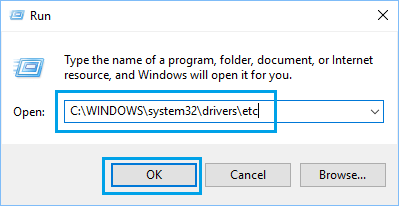
2. In Run Command window, type C:\windows\system32\drivers\etc and click on OK.
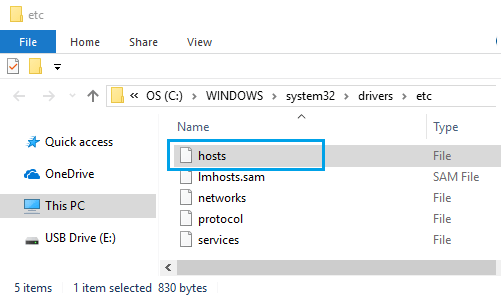
3. On the next screen, double-click on the Hosts File and select to open the File using Notepad.
4. In the Hosts File, delete all entries containing names of websites that you are trying to access and Save the file.

Basically delete all the entries without the # sign and you will be fine.
7. Switch DNS Servers
If you are frequently encountering ERR Network Timed Out Error in Chrome, you can consider switching to Google’s fast and free DNS service using steps as mentioned in this article: How to Change DNS Servers in Windows 10