It is time to Free up iCloud Storage Space, if your iPhone is coming up with “Not Enough iCloud Storage” pop and unable to backup its data to your iCloud Account.
Clear iCloud Storage Space
Apple provides its device users with 5 GB Free Storage Space on iCloud, which allows iPhone users to get started with Automated iCloud backups, iCloud Photos and other iCloud related services.
However, the limited iCloud storage space as available in a Free iCloud Account can get quickly filled up with iPhone Backups, Photos and App related data.
When this happens, iPhone won’t be able to backup its data to iCloud and the solution in this case would be to buy more storage space on iCloud or free up storage space in your iCloud Account.
1. Delete iCloud Backups
If you have been switching to newer models of iPhone, it is likely that there are unwanted backups of your older devices taking up storage space in your iCloud Account.
Open Settings > tap on your Apple ID Name > iCloud > Manage Storage > Backup > On the next screen, select the iPhone Backup that you want to delete.
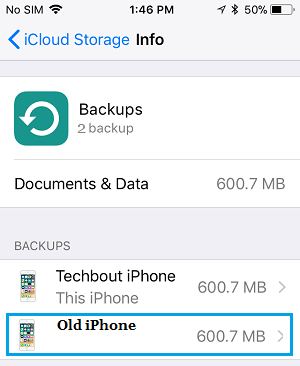
On the next screen, scroll down and tap on Delete Backup option. On the Confirmation pop-up, tap on Turn off & Delete to confirm.
This will remove the Backup of your old iPhone from iCloud and also Turn OFF future iCloud Backups for that device.
2. Delete Unwanted App Data
You can expect to Free Up some iCloud Storage Space by removing Data stored by unwanted Apps in your iCloud Account.
Open Settings > tap on your Apple ID Name > iCloud > Manage Storage > Backups > tap on your iPhone located under ‘Backups’ section.
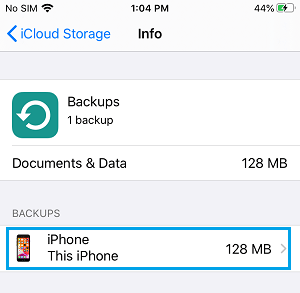
On the next screen, disable Apps that you do not want backing up data to iCloud by moving the toggle next to the Apps to OFF position.
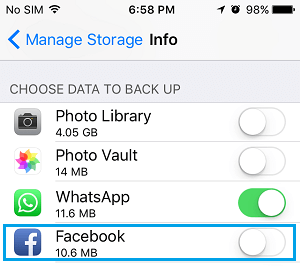
On the Confirmation pop-up, tap on Turn Off & Delete.
This will delete all the App Data stored by the App on iCloud Stored and also prevent these Apps from storing data on iCloud.
3. Turn OFF iCloud Photos
Enabling iCloud Photos ensures that a copy of all your Photos is saved to iCloud. However, this can quickly fill up the storage space available in your iCloud Account.
Open Settings > tap on your Apple ID > iCloud > Photos > disable iCloud Photos by moving the toggle to OFF position.
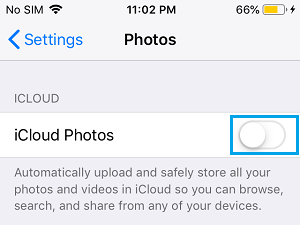
On the conformation pop-up, select Remove from iPhone.
As mentioned above, these steps will only prevent your device from uploading New Photos to iCloud. It does not Delete Photos that have been already uploaded to iCloud.
4. Delete iCloud Photos
If you are still suffering from lack of iCloud Storage, you can download All Photos from iCloud to Mac or Windows computer and delete All Photos from your iCloud Account.
1. Visit icloud.com on your computer and login to your iCloud Account > Once you are in iCloud, click on the Photos tab.
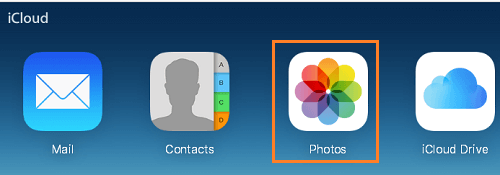
2. In Photos App, click on the Photos tab to switch to Photos View.

3. Next, press Command + A keys to select All Photos and click on the Download icon to start downloading All Photos from iCloud to your Mac.
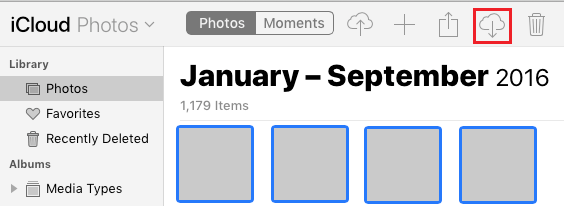
Note: If you are on Windows PC, press CTRL + A to select All Photos and click on the Download Icon to download Photos to your Windows PC.
4. After Photos are downloaded, click on the Trash Can icon to Delete the selected iCloud Photos.
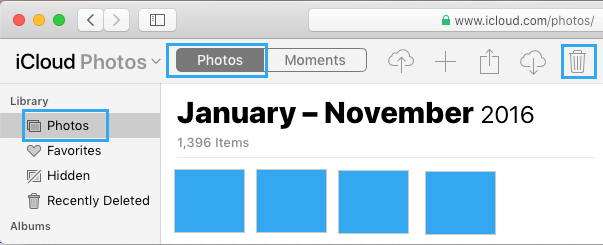
The deleted Photos will still be available in your iCloud Account for a period of 30 days, after which they will be automatically deleted.
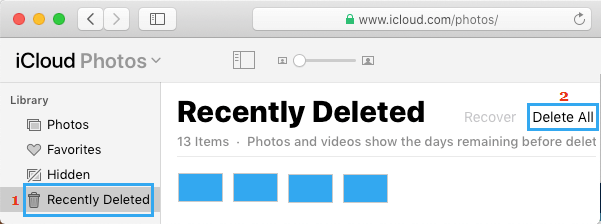
If you want to immediately Free Up iCloud Storage, you will have to remove Deleted Photos from Recently Deleted Folder.
5. Click on Recently Deleted tab in the Left pane. In the right-pane, click on Delete All option to permanently Delete All Photos from your iCloud Account.
5. Get More iCloud Storage
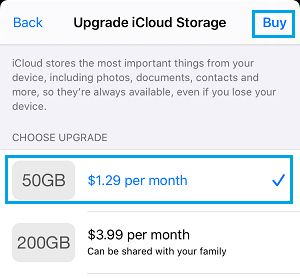
If you like using iCloud Photos, you can consider the option of buying more storage space to meet your iCloud Storage requirements.
Go to Settings > Apple ID > iCloud > Manage Storage > Change Storage Plan > On the next screen, select the Storage Plan that you want to go for and tap on the Buy option.
As you may agree, iCloud Storage is not that expensive and can be used to backup your Photos on Apple’s Cloud Storage services.